Wireless_DWIT_MAC_Filter_List
Wireless networking provides native MAC filtering capabilities which prevents wireless clients from authenticating and associating with the wireless security appliance. If you enforce MAC filtering on the WLAN, wireless clients must provide you with the MAC address of their wireless networking card. The SonicOS wireless MAC Filter List allows you to configure a list of clients that are allowed or denied access to your wireless network. Without MAC filtering, any wireless client can join your wireless network if they know the SSID and perhaps other security parameters to “break into” your wireless network.
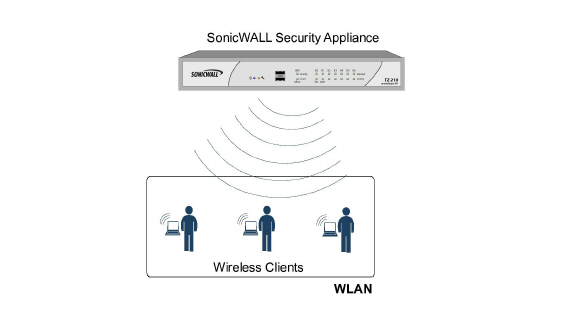
Figure 41:1 displays typical SonicWALL MAC Filter List deployment scenarios.
Figure 41:1 Typical MAC Filter List Topologies
Consider the following when deploying the MAC Filter List:
• For the SonicPoint-N appliance, this feature requires the gateway to store the MAC Filer List settings.
• For the SonicWALL TZ series appliance’s internal wireless, some members need to be added to the VAP structure to store the MAC Filter List settings and the complete function should be modified to set the configurations to the driver.
• MAC Filter List configurations are added to the Wireless Virtual Access Point (VAP) profile settings. They can be view by navigating to the Wireless > Virtual Access Point page.
Using the Wireless > MAC Filter List Page
In your management interface, navigating to the Wireless > MAC Filter List page. Tables 1 and 2 describe how to use the SonicWALL MAC Filter List feature.
Figure 41:2 Wireless > MAC Filter List
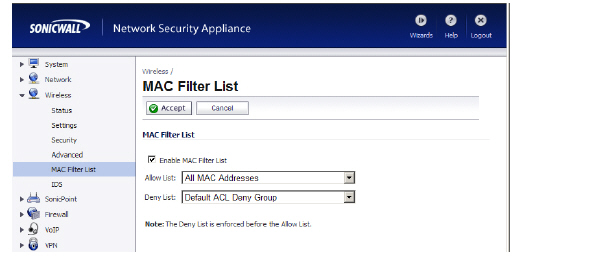
Table 4 Wireless > MAC Filter List Descriptions
|
Figure 41:3 Add Address Object Group Window
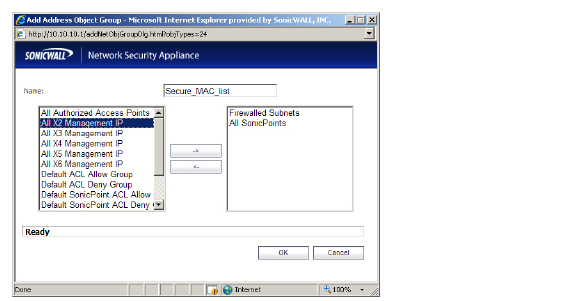
Table 5 Add Address Object Group Descriptions
|
Configuring the MAC Filter List
To configure the MAC filter list to allow or deny address object groups, perform the following steps:
Step 1 Log into your SonicWALL management interface.
Step 2 Navigate to the Wireless > MAC Filter List page.
Enter and do the Following:
a.
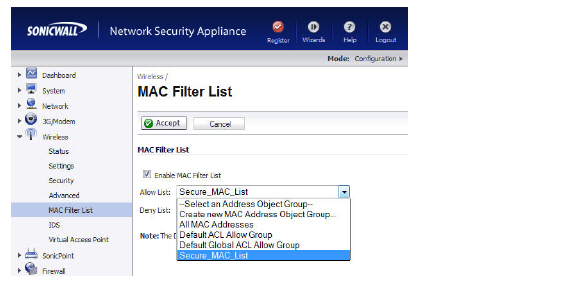
b. Click the Allow List drop-down, select the address group you want to allow.
c. Click the Deny List drop-down, select the address group you want to deny.
To add new address objects to the allow and deny lists, click the drop-down and select Create New MAC Address Object Group... .
The Add Address Object window displays.
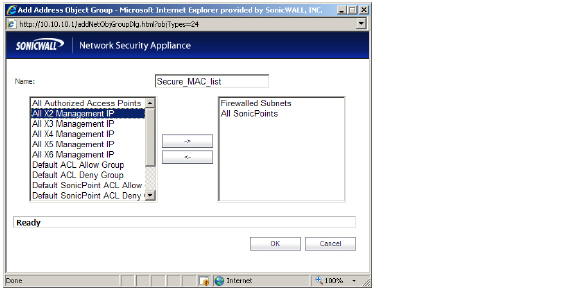
Step 3 In the Name: text field, enter a name for the new group.
Step 4 In the left column, select the groups or individual address objects you want to allow or deny. You can use Ctrl-click to select more than one item at a time.
Step 5 Click the -> button to add the items to the group.
Step 6 Click OK.
Step 7 Click the Accept button. Verify that your list was created.