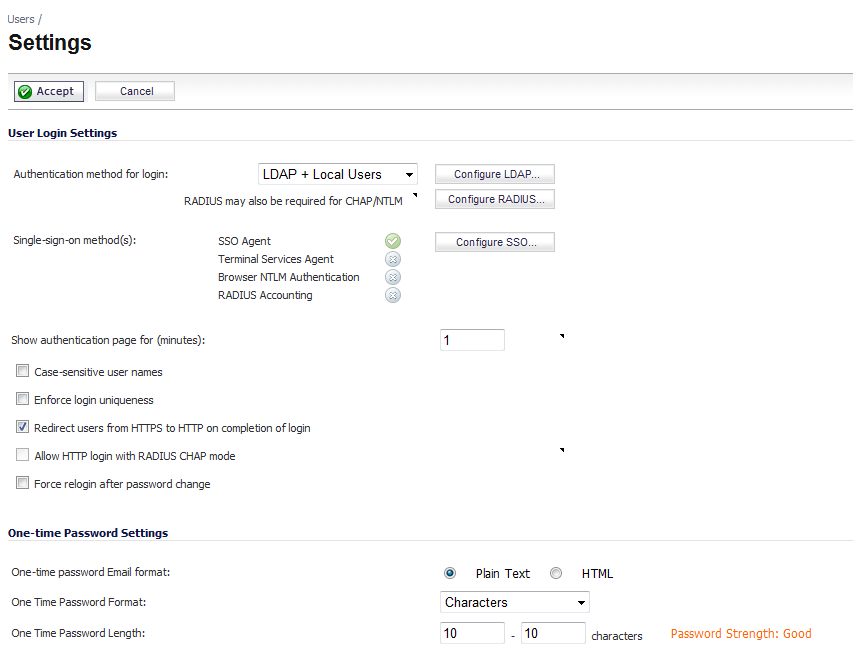
RADIUS accounting for SSO is configured on the Users > Settings page, which has buttons for configuring RADIUS, SSO, and LDAP.
|
1
|
Go to the Users > Settings page.
|
|
2
|
|
3
|
|
4
|
Select the Enable SSO agent authentication option.
|
|
5
|
Click the RADIUS Accounting tab.
|
|
6
|
To enable RADIUS accounting for SSO, select the Enable SSO by RADIUS accounting option.
|
|
7
|
In the Port number box, enter the UDP port number on which to listen for RADIUS accounting messages.
|
|
8
|
To add a new RADIUS client, click the Add button. The Settings, RADIUS, and Forwarding tabs appear in the lower half of the screen.
|
|
9
|
Under the Settings tab, in the Client host name or IP address box, enter the name or the IP address for the RADIUS client host.
|
|
10
|
|
11
|
Under the RADIUS tab, from the User-Name attribute format drop-down menu, select the format for the user name login.
|
|
12
|
If you want it, select the Log user out if no accounting interim updates are received option.
|
If you select Other as the User-Name attribute format, this panel shows two additional fields:
|
•
|
|
a
|
In the Format field, you enter a limited scanf-style string.
|
To specify a non-standard format, enter the format in the Format box as a scanf-style string, with either a "%s" or "%[...]" directive for each component.
In the Format field, you must tell the appliance what the network access device (NAS) will be sending in the User-Name attribute. This format is not specified by the RADIUS Accounting RFC. Devices are not constrained as to what they can send in this attribute. So, its content can be very variable. What you set here specifies how the appliance must decode the User-Name attribute to extract the user name, domain, and/or DN. There are some pre-defined formats for the common cases, but if those do not match what your network access server sends, then you must select Other as the User-Name attribute format and enter a customized format.
When you select Other, these fields are set to the format string and components of the previously selected format. So, first select the pre-defined format that most closely matches what your network access server sends. Then, change to Other, and that will give you a good starting point for entering your customized format.
|
b
|
From the Component drop-down menu, you select one of the following items:
|
|
•
|
|
•
|
|
•
|
The components that you enter as a limited scanf-style string in the Format field consist of one or more of the following items:
|
•
|
|
NOTE: You can double click in the Components box to display the Tooltip box with instructions on how to enter the scanf-style format.
|
|
13
|
Click the Forwarding tab to enter up to four RADIUS accounting servers.
|
|
15
|
In the Timeout field and Retries field, enter the timeout period in seconds and the number of retries.
|
|
16
|
Click the SSO Agents tab.
|
|
17
|
|
18
|
Click the Advanced tab.
|
|
19
|
In the Maximum requests to send at a time field, enter the maximum number of user requests the firewall can send to the SSO agent in a single request message.
|
|
20
|
Click OK.
|