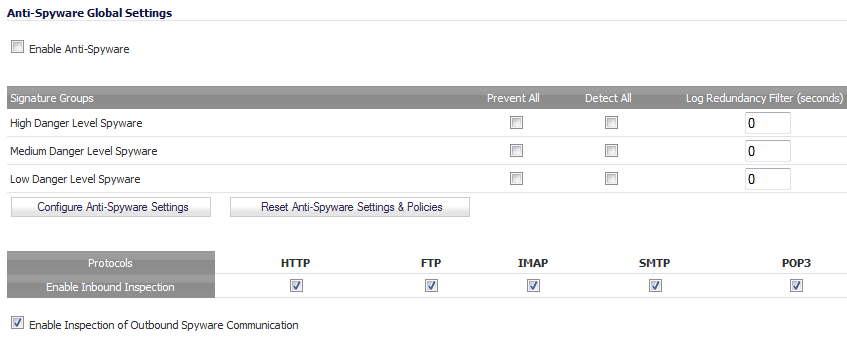
SonicWall Anti-Spyware allows you to globally manage your network protection against attacks.
|
1
|
|
2
|
For each class of spyware in the Signature Groups table, High Priority Spyware, Medium Priority Spyware, and Low Priority Spyware, select the Prevent All check boxes. Spyware belonging to the enabled group will be blocked.
|
|
CAUTION: Leaving the High Priority Spyware, Medium Priority Spyware, and Low Priority Spyware signature groups with no Prevent All action checked means no Anti-Spyware blocking will occur on the SonicWall security appliance.
|
|
3
|
For each class of attack in the Signature Groups table, select the Detect All check boxes. Spyware belonging to the enabled group will be logged.
|
|
4
|
Optionally, specify the number of seconds to delay between log entries for the same detected spyware in its Log Redundancy Filter (seconds) field. The default for all classes of spyware is 0 seconds (every detected spyware is logged).
|
|
5
|
In the Protocols table, Inbound Inspection is enabled for all protocols by default. To disable Anti-Spyware inspection of any protocol, deselect its check box.
|
|
CAUTION: Disabling the Inbound Inspection of any protocol means no Anti-Spyware inspection of inbound traffic will occur for that protocol on theSonicWall security appliance.
|
|
6
|
If spyware has been installed on a LAN workstation prior to the SonicWall Anti-Spyware installation, the service will examine outbound traffic for streams originating at spyware-infected clients and reset those connections. The Enable Inspection of Outbound Spyware Communication is enabled by default. To disable the option, clear its check box.
|
|
7
|
Click Apply at the top of the page to protect your network against the most dangerous and disruptive spyware.
|
Through Anti-Spyware Settings, you can:
|
1
|
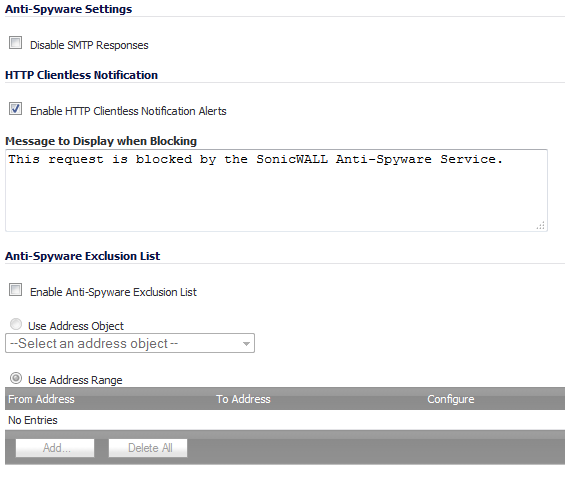
In the Anti-Spyware Global Settings section, click the Configure Anti-Spyware Settings button. The Anti-Spyware Config View dialog displays.
|
|
2
|
SMTP allows for Address Objects to be used to construct a white-list (explicit allow) or black-list (explicit deny) of SMTP servers. Entries in this list will bypass the RBL querying procedure. When enabled, the Disable SMTP Responses setting suppresses the SMTP spam-filtering technique. By default, this setting is disabled. To suppress SMTP spam filtering, select the check box. For more information about the SMTP response, see Anti-Spam > RBL Filter.
|
|
3
|
The Enable HTTP Clientless Notification Alerts setting is enabled by default. When this option is enabled, requests that are blocked by the Anti-Spyware Service will be redirected to a HTTP alert for notification. To disable this setting, deselect the check box; alerts will not be generated.
|
|
4
|
Optionally, enter a message in the Message to Display when Blocking field. The default message is This request is blocked by the SonicWall Anti-Spyware Service.
|
|
•
|
Not going to add an Anti-Spyware Exclusion list, click the OK button. The modifications are made to the Anti-Spyware Exclusion List table and the window closes. The message, The configuration has been updated., displays in the status line.
|
|
CAUTION: Any IP addresses listed in the exclusion list bypass Anti-Spyware scanning on their traffic.The Anti-Spyware Exclusion List provides the ability to define a range of IP addresses whose traffic will be excluded from SonicWall Anti-Spyware scanning. Use caution when specifying exclusions to SonicWall Anti-Spyware protection.
|
|
6
|
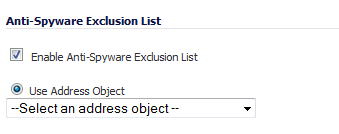
Click the Enable Anti-Spyware Exclusion List check box to enable the exclusion list feature. The radio button and Add… button for Use Address Range become active. You can do any or all of the following:
|
|
•
|
Add multiple ranges to the Anti-Spyware Exclusion List table as described in Adding a range to be excluded.
|
|
•
|
Configure or delete excluded ranges in the Anti-Spyware Exclusion List table, as described in Modifying an Anti-Spyware Exclusion List table entry
|
|
•
|
Delete excluded ranges in the Anti-Spyware Exclusion List table, as described in Deleting entries in the Anti-Spyware Exclusion List table
|
|
•
|
|
1
|
|
2
|
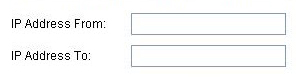
Enter the IP address range in the IP Address From and IP Address To fields, then click OK. You IP address range is added to the Anti-Spyware Exclusion List table and the window closes. The message, The configuration has been updated., displays in the status line.
|
|
3
|
To add other ranges to the Anti-Spyware Exclusion List table, for each range to be excluded, click the Configure Anti-Spyware Settings button and then repeat Step 1 through Step 2.
|
|
1
|
To change an entry, in the Configure column, click the Edit icon for that entry. The Edit Anti-Spyware Range Entry dialog displays.
|
|
3
|
Click OK. The modifications are made to the Anti-Spyware Exclusion List table and the dialog closes. The message, The configuration has been updated., displays in the status line.
|
|
4
|
|
1
|
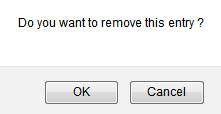
To delete an entry from the Anti-Spyware Exclusion List table, click the Delete icon. To delete all the excluded ranges, click the Delete All button. A warning message displays, asking for confirmation of the deletion.
|
|
2
|
|
1
|
In the Anti-Spyware Exclusion List section, click the Use Address Object radio button. The drop-down menu becomes available.
|
|
3
|
Click OK to select the address object and exit the Anti-Spyware Config View dialog. The message, The configuration has been updated., displays in the status line.
|
You can reset all your Gateway Anti-Virus Settings to factory default values by clicking the Reset Anti-Spyware Settings & Policies button. A warning message displays.
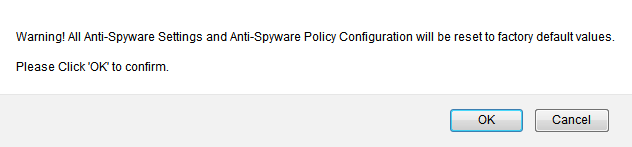
To completely remove your Gateway Anti-Virus Settings and restore the factory default values, click OK. Otherwise, click Cancel.