After you have successfully added a Tunnel Interface, you can then create a Static Route.
|
1
|
Navigate to Network > Routing.
|
|
2
|
|
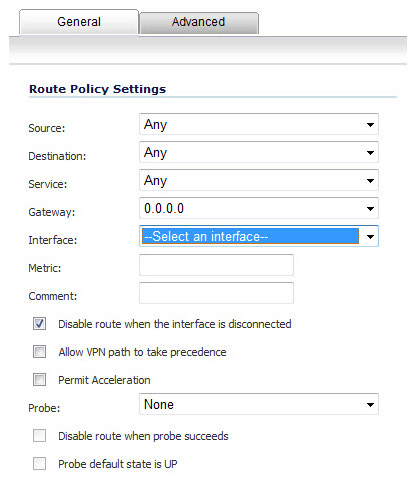
3
|
Select an interface from the Interface drop-down menu, which lists all available tunnel interfaces.
|
The image below shows an example of same tunnel interface for different networks (Routes 1 & 2):
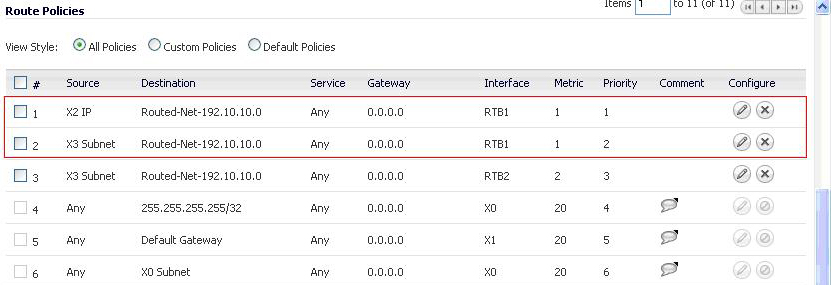
The image below illustrates redundant static routes for a network (Routes 2 & 3):

|
1
|
|
2
|
Click the Add button.
|

Once added, the route is enabled and displayed in the Route Polices.
