|
1
|
|
2
|
|
3
|
|
4
|
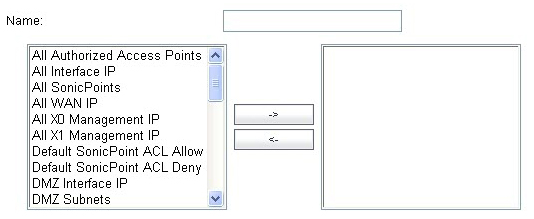
Select an Address Objects from the list and then click the right arrow. The selected item is added to the group. Clicking while pressing the Ctrl key allows you to select multiple objects.
|
|
5
|
Click OK.
|
To edit a group, click the Edit icon in the Configure column of the Address Groups table. The Edit Address Object Group window is displayed. This window is the same as the Add Address Object Group window; see Creating Group Address Objects .
To delete a custom Address Group, click on the Delete icon in the Configure column to delete an individual Address Group. A dialog box is displayed asking you to confirm the deletion. Click OK to delete the Address Group.
To delete all custom Address Groups, click the Delete All button.