|
1
|
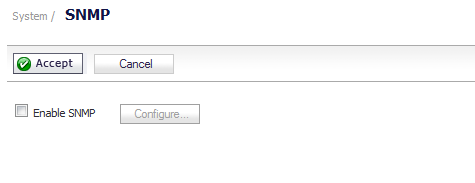
To enable SNMP on the Dell SonicWALL security appliance, navigate to the System > SNMP page.
|
|
2
|
Select the Enable SNMP checkbox. By default, SNMP is disabled.
|
|
3
|
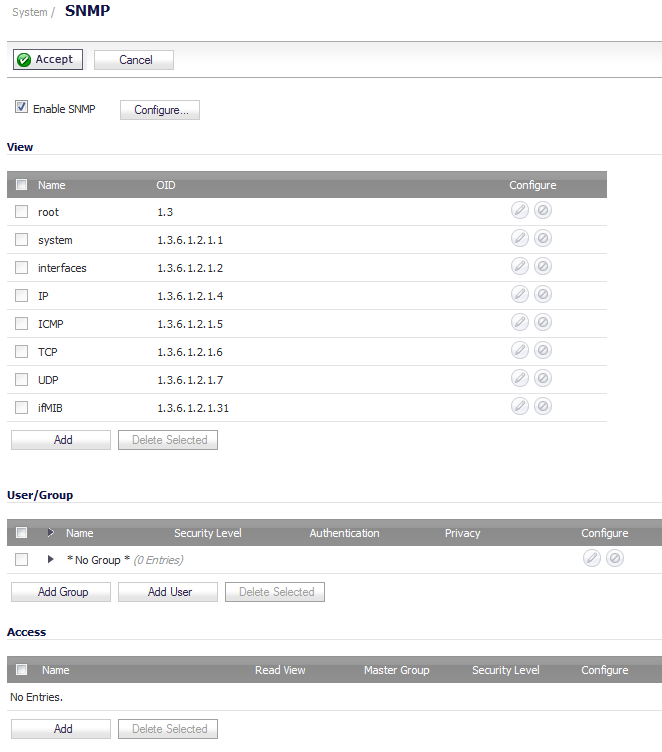
Click Accept. The SNMP information is populated on the SNMP page.
|
|
4
|
To configure the SNMP interface, click on the Configure button. The Configure SNMP dialog is displayed.
|
|
5
|
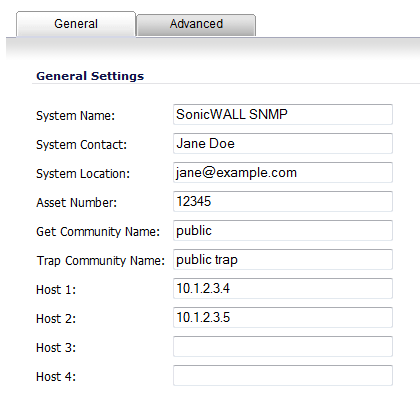
In the General tab, enter the host name of the Dell SonicWALL security appliance in the System Name field.
|
|
6
|
Enter the network administrator’s name in the System Contact field.
|
|
7
|
Enter an email address, telephone number, or pager number in the System Location field.
|
|
8
|
If the SNMPv3 configuration option is used, enter an asset number in the Asset Number field.
|
|
9
|
Enter a name for a group or community of administrators who can view SNMP data in the Get Community Name field.
|
|
10
|
Enter a name for a group or community of administrators who can view SNMP traps in the Trap Community Name field.
|
|
11
|
Enter the IP address or host name of the SNMP management system receiving SNMP traps in the Host 1 through Host 4 fields. You must configure at least one IP address or host name, but up to four addresses or host names can be used.
|
|
12
|
Click OK.
|
|
1
|
|
2
|
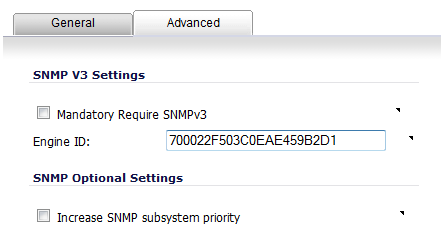
Click the Advanced tab.
|
|
3
|
Select the Mandatory Require SNMPv3 checkbox. This disables SNMPv1/v2 and allows only SNMPv3 access, which provides maximum security for SNMP management.
|
|
4
|
Enter the hexadecimal Engine ID number in the Engine ID field. This number will be matched against received SNMP packets to authorize their processing; only packets whose Engine ID matches this number will be processed.
|
|
5
|
Optionally, select the Increase SNMP subsystem priority checkbox.
|
|
6
|
Click OK. The SNMPv3 security options are now used in processing packets.
|
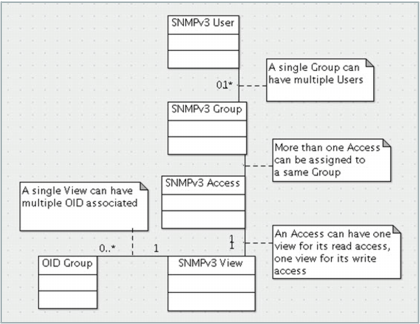
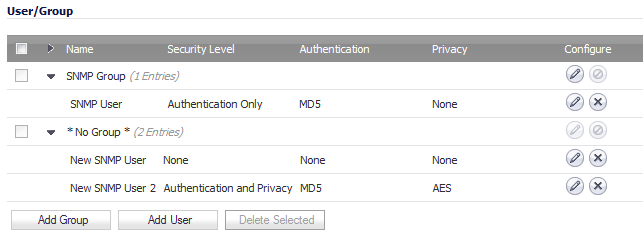
SNMPv3 allows you to set up and assign groups and access with differing levels of security. Object IDs are associated with various levels of permissions, and a single view can be assigned to multiple objects. Figure 3 shows how access for groups and users are associated with these different permission levels.
Figure 3. SNMPv3 group and user access
|
1
|
Navigate to System > SNMP.
|
|
2
|
|
3
|
|
4
|
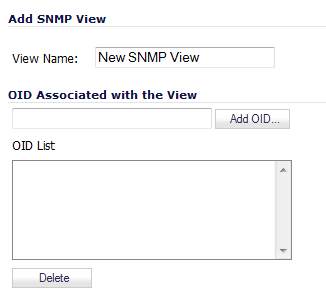
Enter an unassigned OID in the OID Associated with the View field.
|
|
5
|
Click Add OID.
|
The new view appears in the OID List. To delete an OID from the OID List, select the OID and click the Delete button.
|
7
|
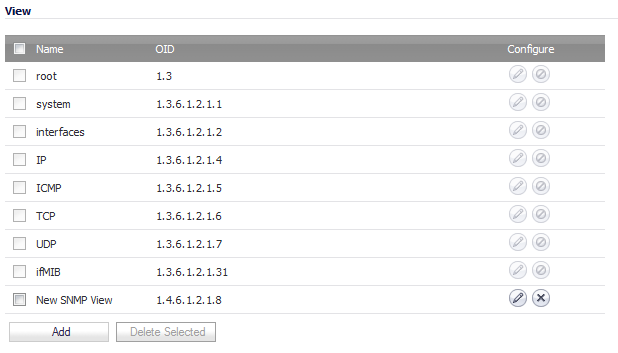
Click OK. The new views are added to the list on the SNMP page.
|
|
1
|
Navigate to System > SNMP.
|
|
2
|
To create a Group, click the Add Group button under the User/Group table. The Add SNMP Group window displays.
|

|
3
|
Enter a friendly name in the Group Name field. The group name can contain up to 32 alphanumeric characters.
|
|
4
|
Click OK.
|
|
1
|
Navigate to System > SNMP.
|
|
2
|
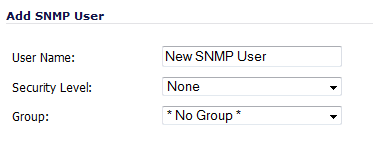
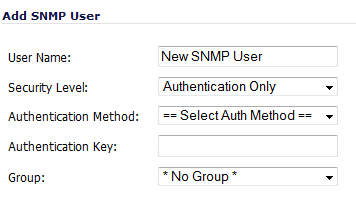
To add a user, click the Add User button under the User/Group table. The Add SNMP User dialog displays.
|
|
3
|
Enter the user name in the User Name field.
|
|
4
|
Select a security level from the Security Level drop-down menu:
|
|
•
|
None (default)
|
|
•
|
Authentication – Two new options appear:
|
|
•
|
|
•
|
Authentication Key – Enter an authentication key in the field. The key can be any string of 8 to 32 printable characters.
|
|
•
|
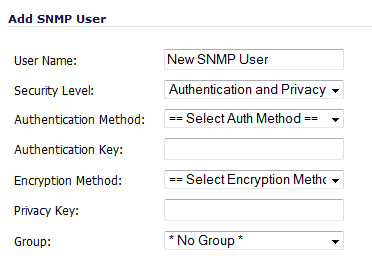
Authentication and Privacy – More options appear:
|
|
•
|
Authentication Method – See above.
|
|
•
|
Authentication Key – See above.
|
|
•
|
|
•
|
Enter the encryption key in the Privacy Key field. The key can be any string of 8 to 32 printable characters.
|
|
5
|
|
6
|
Click OK when finished. The user is added to the list and added to the appropriate group (including *No Group*).
|
|
1
|
Navigate to System > SNMP.
|
|
2
|
|
3
|
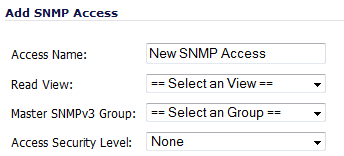
Enter a friendly name in the Access Name field.
|
|
4
|
From the Read view drop-down menu, select a view from the list of available views.
|
|
5
|
From the Master SNMPv3 Group drop-down menu, select a group from the list of available groups. Access cannot be given to *No Group*.
|
|
6
|
From the Access Security Level drop-down menu, select a security level:
|
|
•
|
|
7
|
