SNMP configuration consists of:
|
1
|
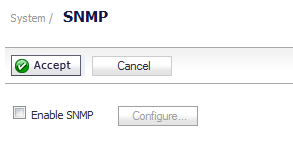
To enable SNMP on the SonicWall security appliance, navigate to the System > SNMP page.
|
|
2
|
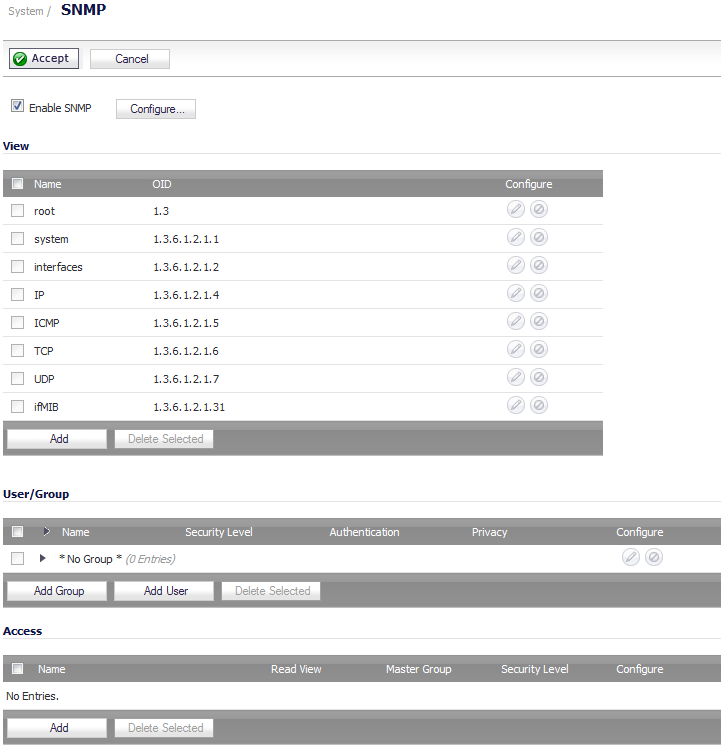
Select the Enable SNMP check box, and then click Accept. The Configure button becomes active and the display expands.
|
|
3
|
To configure the SNMP interface, click the Configure button. The Configure SNMP dialog displays with two tabs: General and Advanced.
|

|
4
|
Type the host name of the SonicWall security appliance in the System Name field.
|
|
5
|
Type the network administrator’s name in the System Contact field.
|
|
6
|
Type an e-mail address, telephone number, or pager number in the System Location field.
|
|
7
|
When SNMPv3 configuration is used, an Asset Number field displays on the menu. Enter the asset number of the appliance.
|
|
8
|
Type a name for a group or community of administrators who can view SNMP data in the Get Community Name field. A default name of public is provided.
|
|
9
|
Type a name for a group or community of administrators who can view SNMP traps in the Trap Community Name field.
|
|
10
|
Type the IP address or host name of the SNMP management system receiving SNMP traps in the Host 1 through Host 4 fields. You must configure at least one IP address or host name, but up to four addresses or host names can be used.
|
|
11
|
Click OK.
|
|
1
|
Navigate to System > SNMP.
|
|
2
|
|
3
|
|
4
|
If SNMP has not been configured, configure the General tab as described in Enabling and Configuring SNMP Access.
|
|
5
|
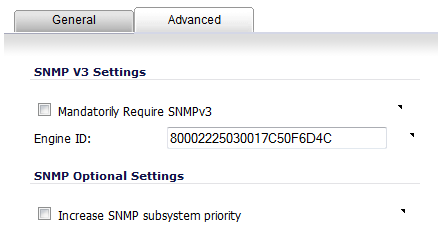
Click the Advanced tab.
|
|
6
|
Select the Mandatorily Require SNMPv3 check box. This option is not selected by default.
|
|
7
|
Enter the Engine ID number in the Engine ID field.This number is matched against received SNMP packets to authorize their processing. By default, the Engine ID of the appliance is provided. If you enter a different Engine ID, it must be in hexadecimal.
|
|
8
|
|
9
|
Click OK
|
|
10
|
Click Accept.
|
The SNMPv3 security options is now used in processing packets.