This scenario extends the previous example, Configuring Basic SonicPoint Layer 3 Management, by adding Virtual Access Points (VAPs) for the SonicPoints. See SonicPoint Layer 3 Management Using VAPs Configuration.
SonicPoint Layer 3 Management Using VAPs Configuration
To configure VAPs for SonicPoint Layer 3 Management, perform the following steps:
|
1
|
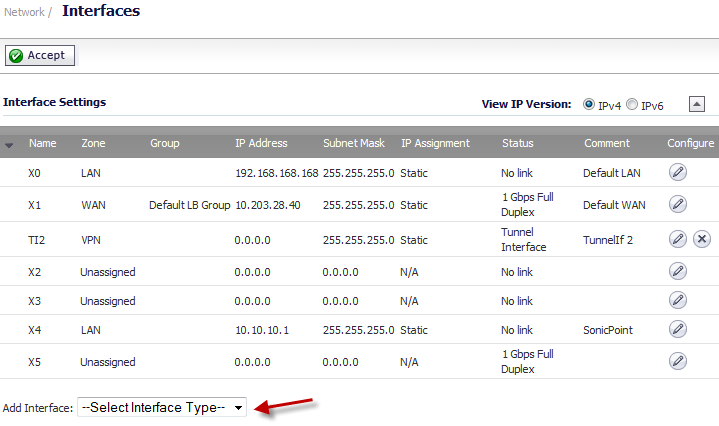
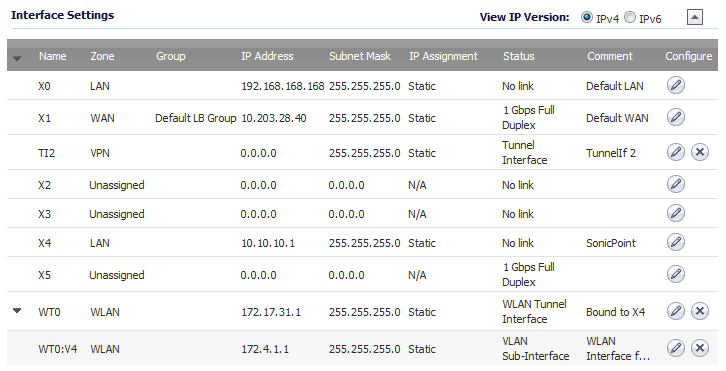
Navigate to the Network > Interfaces page.
|
|
2
|
|
3
|

|
4
|
|
5
|
|
6
|
|
7
|
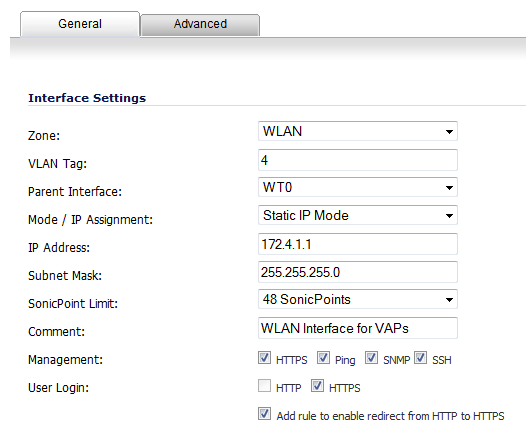
In the IP Address field, enter the IP address for the WLAN. For example, 172.4.1.1. The default is 0.0.0.0.
|
|
8
|
In the Subnet Mask field, enter the subnet mask. For example, 255.255.255.0. The default is 255.255.255.0.
|
|
9
|
From the SonicPoint Limit drop-down menu, select the maximum number of SonicPoints for this interface. For this scenario, select 48 SonicPoints. The default is 64 SonicPoints.
|
|
10
|
(Optional) In the Comment field, enter a descriptive comment. This comment is displayed in the Comment field.
|
|
11
|
If you did not specify a web management protocol in Configuring the Access Controller Interface, select one or more Management options: HTTPS, Ping, SNMP, SSH.
|
|
NOTE: If you select HTTPS, the Add rule to enable redirect from HTTP to HTTPS option is enabled automatically.
|
|
12
|
If you did not specify a login protocol in Configuring the Access Controller Interface, optionally select HTTPS for User Login to enable users with management rights to log in to the SonicWall.
|
|
13
|
If you did not select HTTPS for Management, but did select HTTPS for User Login, to enable users logging in from HTTP to be redirected to HTTPS, select Add rule to enable redirect from HTTP to HTTPS.
|
|
14
|
|
1
|
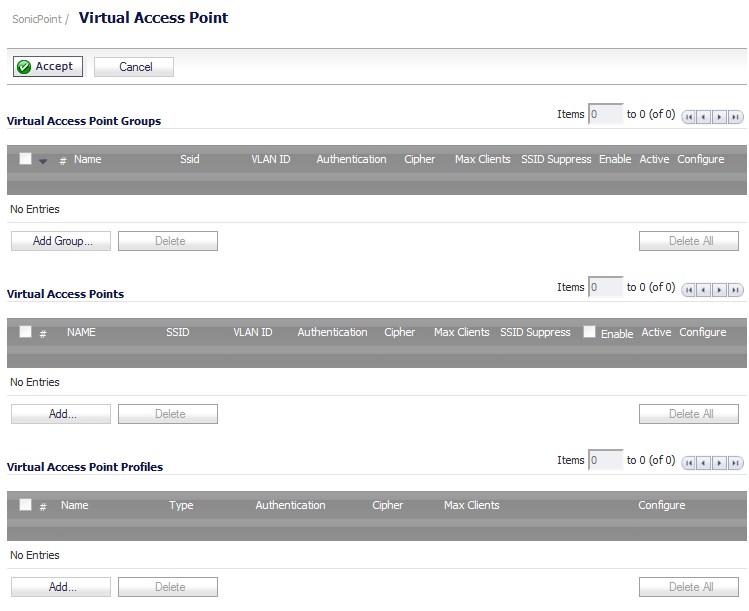
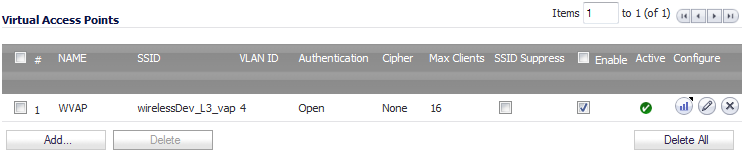
Navigate to the SonicPoint > Virtual Access Point page.
|
|
2
|
|
3
|
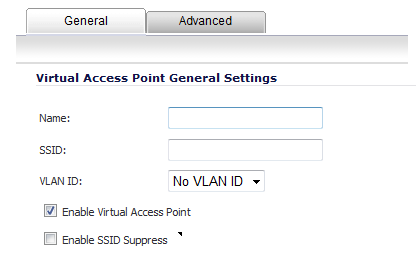
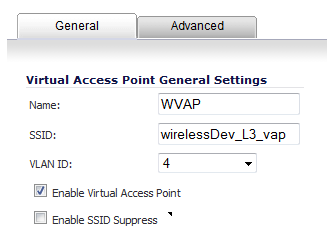
In the Name field, enter a descriptive name for the VAP.
|
|
4
|
in the SSID field, enter a SSID that represents the Layer 3 management network. For example, wirelessDev_L3_vap.
|
|
5
|
From the VLAN ID drop-down menu, select the VLAN Tag ID that you configured in Configuring a WLAN Interface for VAPs. For example, 4.
|
|
6
|
Select the Enable Virtual Access Point option. By default, this option is selected
|
|
7
|
|
8
|
|
1
|
Navigate to the SonicPoint > Virtual Access Point page.
|
|
2
|
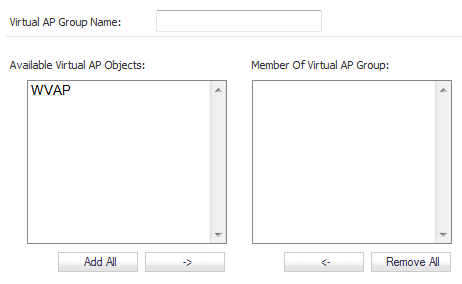
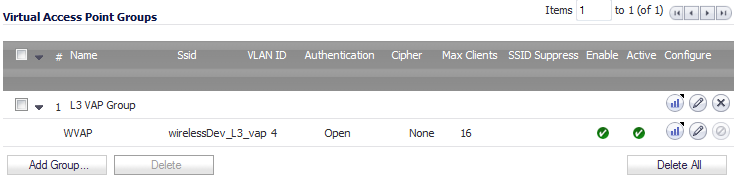
In the Virtual Access Points Groups table, click Add Group. The Add Virtual Access Point Group dialog displays.
|
|
3
|
The Available Virtual AP Objects box should be populated with the VAP objects you created in Configuring a VAP Object.
|
4
|
Move the VAP objects you want from the Available Virtual AP Objects list to the Member of Virtual AP Group list.
|
|
5
|
|
1
|
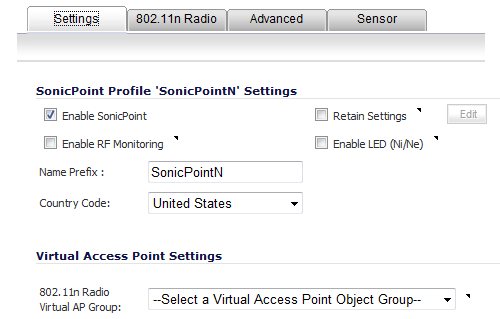
Navigate to the SonicPoint > SonicPoints page and scroll to the SonicPoint N Provisioning Profiles section.
|
|
2
|
Click the Configure icon for the SonicPoint you want to configure. The Edit SonicPoint Profile dialog displays.
|
|
3
|
Select the Enable SonicPoint option.
|
|
4
|
From the 802.11n Radio Virtual AP Group drop-down menu, select the Virtual AP Group you created in Configuring a VAP Group. For example, L3 VAP Group.
|
|
5
|
Click OK.
|