TIP: You can also configure all your WAN and network settings on the Network > Settings page of the SonicWALL Management Interface
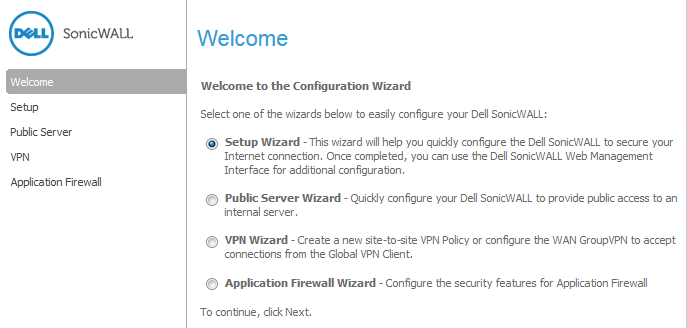
The first time you log into your SonicWALL appliance, an initial Setup Wizard is launched automatically. This wizard helps you quickly configure the Dell SonicWALL firewall to secure your internet connection. When configuration is completed, you can use the Dell SonicWALL Management Interface for additional configuration.
To launch the Setup Wizard at any time from the management interface:
|
1
|
Click Wizards in the top right corner of the management interface banner.
|
|
2
|
Select Setup Wizard.
|
|
TIP: You can also configure all your WAN and network settings on the Network > Settings page of the SonicWALL Management Interface
|
The Setup Wizard helps you configure the following settings:
|
1
|
Click the word Wizard in the top-right corner of the SonicOS management interface. The Welcome page displays.
|
|
2
|
Select the Setup Wizard.
|
|
3
|
|
1
|
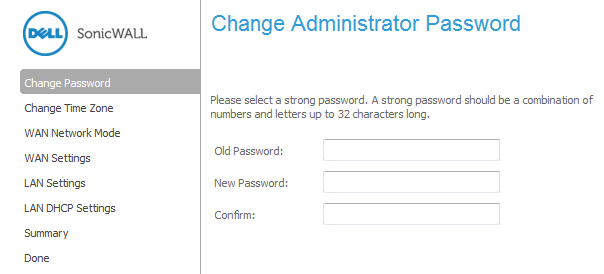
To set the password, first, enter the old password in the Old Password field.
|
|
2
|
|
3
|
|
1
|
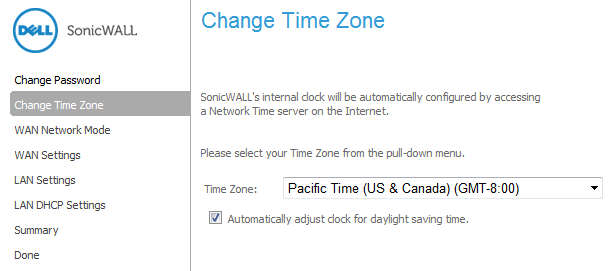
Select the appropriate Time Zone from the Time Zone menu. The firewall’s internal clock is set automatically by a Network Time Server on the Internet.
|
|
2
|
|
1
|
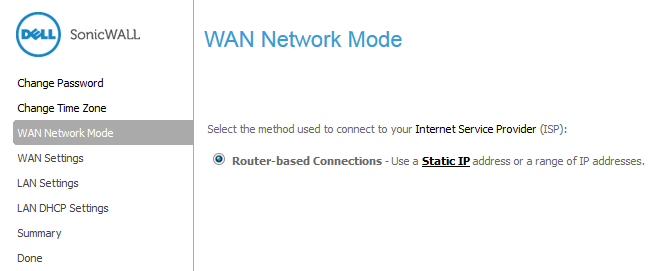
Confirm that you have the proper network information necessary to configure the SonicWALL to access the Internet. For Dell SonicWALL network security appliances, the Router-based Connections option is set to Static IP.
|
|
2
|
|
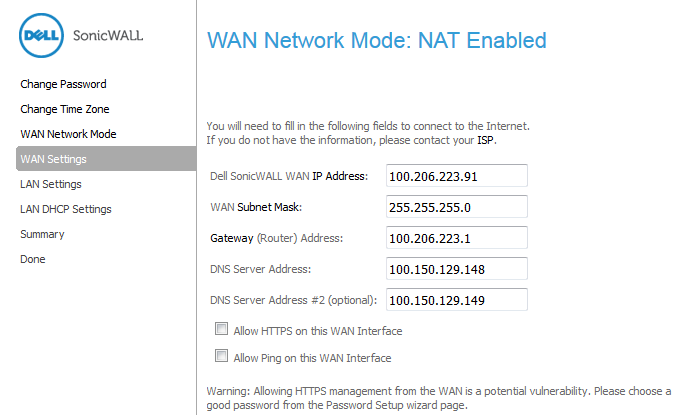
1
|
Enter the public IP address provided by your ISP in the SonicWALL WAN IP Address.
|
|
2
|
Fill in the rest of the fields with the appropriate IP addresses: WAN Subnet Mask, WAN Gateway (Router) Address, and DNS Server Addresses.
|
|
3
|
To allow HTTPS on the WAN interface, select the Allow HTTPS on this WAN Interface checkbox. By default, this checkbox is not selected.
|
|
4
|
To allow Ping on the WAN interface, select the Allow Ping on this WAN Interface checkbox. By default, this checkbox is not selected.
|
|
5
|
|
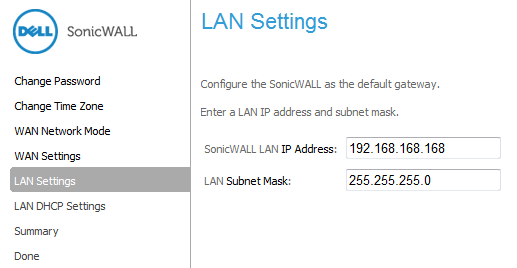
1
|
|
•
|
SonicWALL LAN IP Addresses – The private IP address assigned to the LAN port of the SonicWALL.
|
|
•
|
LAN Subnet Mask – The range of IP addresses on the LAN.
|
|
2
|
|
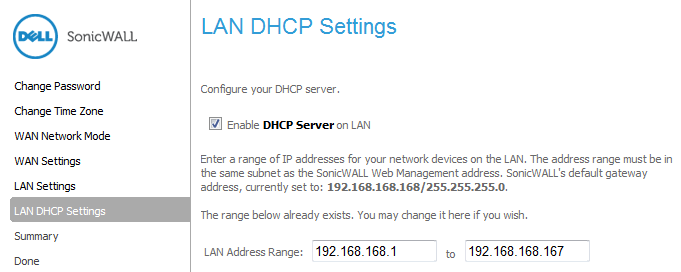
1
|
To enable the DHCP server, select Enable DHCP Server on LAN. This option is not selected by default.
|
|
•
|
Specify the range of IP addresses that are assigned to computers on the LAN in the LAN Address Range fields.
|
|
2
|
|
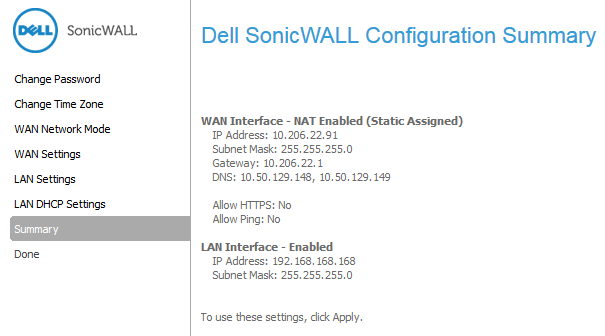
1
|
The Dell SonicWALL Configuration Summary page displays the configuration defined using the Setup Wizard. To modify any of the settings, click Back to return to the appropriate page.
|
|
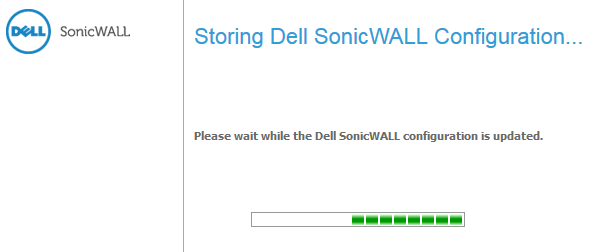
2
|
Click Apply. A Storing Dell SonicWALL Configuration… message displays before the Setup Wizard Complete page displays.
|
|
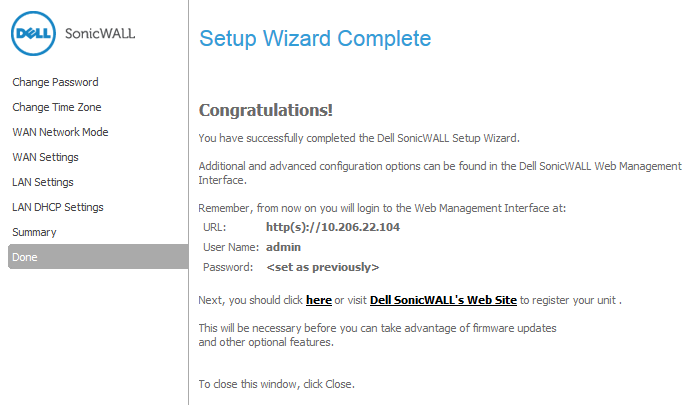
1
|
If you have not yet registered your firewall, click one of the links in Next, you should click here or visit Dell SonicWALL's Web Site to register your unit.
|
|
2
|
Click Close to return to the SonicWALL Management Interface.
|