Configuring External Guest Authentication

1
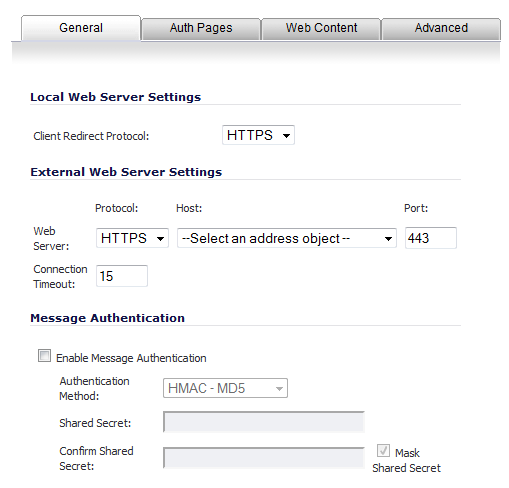
Click the Configure button after selecting the Enable External Guest Authentication check box. The External Guest Authentication dialog displays.

2
In the Local Web Server Settings section, select either HTTPS (default) or HTTP from the Client Redirect Protocol drop-down menu.
3
In the External Web Server Settings section:
Select the Web Server:
Protocol: Select either HTTPS (default) or HTTP from the drop-down menu.
Host: From the drop-down menu, select an address object or create a new one.
Port: Enter the port number for the Web Server; the default port is 443.
Connection Timeout: Enter the time to elapse before the connection times out; the minimum value is 1 second, the maximum value is 20 seconds, and the default value is 15 seconds.
4
In the Message Authentication section,
Optionally, select Enable Message Authentication, which activates the following options.
From the Authentication Method drop-down menu, select:
HMAC - MD5 (default)
In the Shared Secret and Confirm Shared Secret fields, enter the authentication shared secret.
To display the shared secret as bullets, select Mask Shared Secret. If this option is not selected, the shared secret will display in normal text. This option is selected by default.
5
6
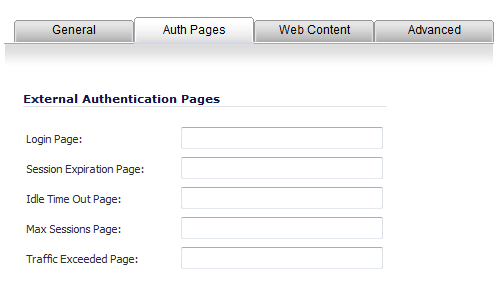
Click the Auth Pages tab.

7
8
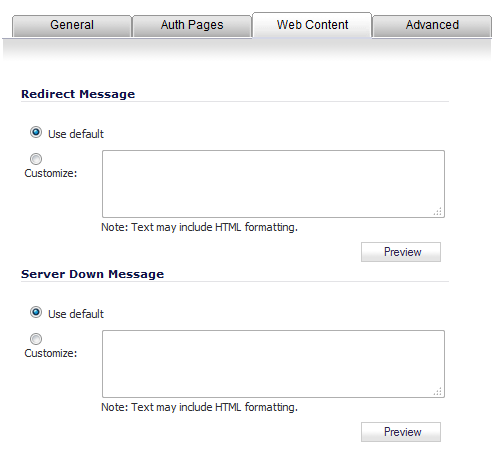
Click the Web Content tab.

9
In the Redirect Message section, select one of the radio buttons:
Use default (this is the default)
Customize: enter the text of your redirection message; text may include HTML formatting.
10
Optionally, click Preview to see how the message will be displayed in the External Guest Redirect window. To see the default message, click Preview as well.

11
In the Server Down Message section, select one of the radio buttons:
Use default (this is the default)
Customize: enter the text of your redirection message; text may include HTML formatting.
12
Optionally, click Preview to see how the message will be displayed in the Wireless Services Unavailable window. To see the default message, click Preview as well.

13
Click the Advanced tab.

14
In the Auto-Session Logout section, optionally select Enable Auto-Session Logout. The sub options become active.
a
Enter the time for logging out expired sessions in the Auto-logout Expired Sessions Every minutes. The default is 1 minute.
b
15
In the Server Status Check section, optionally select Enable Server Status Check. The sub options become active.
a
Enter the elapsed time between checking the server status in the Check Status Every minutes. The default is 5 minutes.
b
Enter the server status page in the Server Status CGI field.
16
In the Session Synchronization section, optionally select Enable Session Synchronization. The sub options become active.
a
Enter the elapsed time between synchronizing the session in the Synchronize Every minutes. The default is 10 minutes.
b
17