
|
1
|
|
2
|
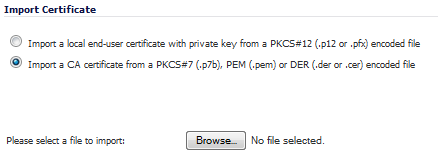
Select Import a CA certificate from a PKCS#7 (*.p7b) or DER (.der or .cer) encoded file. The Import Certificate dialog settings change.
|
|
3
|
|
4
|
Click Open to set the directory path to the certificate.
|
|
5
|
Click Import to import the certificate into the firewall. When it is imported, you can view the certificate entry in the Certificates and Certificate Requests table.
|
|
6
|
Moving your pointer to the Comment icon in the Details column displays the certificate details information.
|
|
1
|
|
2
|
Enter a certificate name in the Certificate Name field.
|
|
3
|
Enter the password used by your Certificate Authority to encrypt the PKCS#12 file in the Certificate Management Password field.
|
|
4
|
|
5
|
Click Open to set the directory path to the certificate.
|
|
6
|
Click Import to import the certificate into the firewall. When it is imported, you can view the certificate entry in the Certificates and Certificate Requests table.
|
|
7
|
Moving your pointer to the Comment icon in the Details column displays the certificate details information.
|
|
•
|
Private key (typically a file with .key extension or the word key in the filename)
|
|
•
|
Certificate with a public key (typically a file with .crt extension or the word cert as part of filename).
|
With these two files available, run the following command:
In this example out.p12 become the PKCS-12 formatted certificate file and server.key and server.crt are the PEM formatted private key and the certificate file respectively.