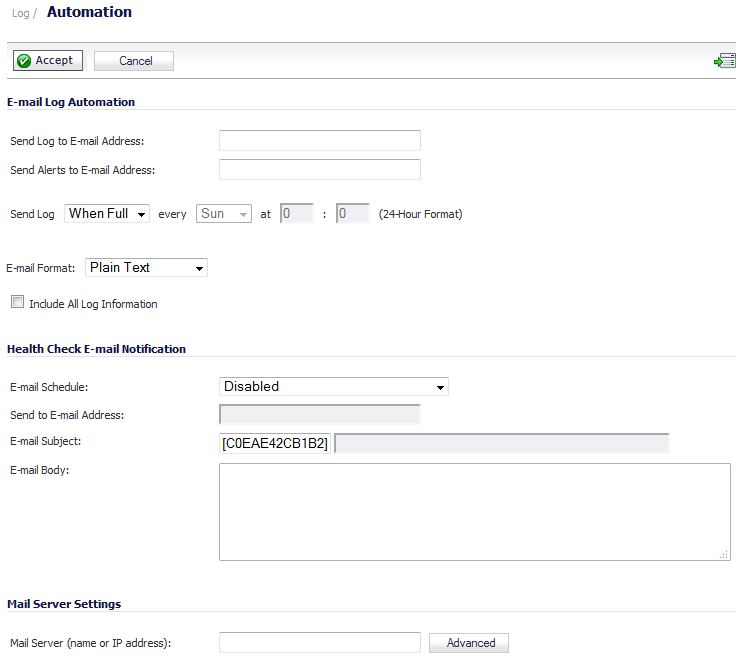
The Log > Automation page includes settings for configuring the SonicWALL to send log files using Email and configuring mail server settings.
|
•
|
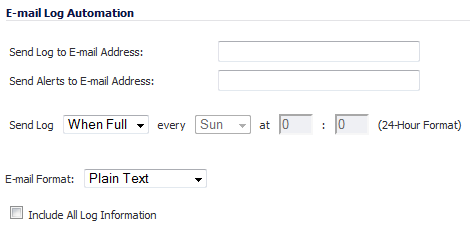
Send Log to Email address - Enter your Email address (username@mydomain.com) in this field to receive the event log via Email. Once sent, the log is cleared from the SonicWALL memory. If this field is left blank, the log is not Emailed.
|
|
•
|
Send Alerts to Email address - Enter your Email address (username@mydomain.com) in the Send alerts to field to be immediately Emailed when attacks or system errors occur. Type a standard Email address or an Email paging service. If this field is left blank, Email alert messages are not sent.
|
|
•
|
Send Log - Determines the frequency of sending log files. The options in the drop-down menu are
|
|
•
|
When Full (default)
|
|
•
|
Weekly—Select the day of the week the log is sent in the every drop-down menu and enter the time of day in 24-hour format in the At field
|
|
•
|
Daily.—Enter the time of day the log is to be sent in 24-hour format in the At field.
|
|
•
|
Email Format - Select whether log emails will be sent in Plain Text or HTML format from the drop-down menu.
|
|
•
|
Include All Log Information - Select to have all information included in the log report.
|
The Health Check E-mail Notification section enables you to create a predefined email notification with a set subject and body at the times specified by the selected schedule.
|
1
|
From the E-mail Schedule drop-down menu, select a pre-defined schedule, Create a new schedule, or Disabled.
|
|
2
|
In the Send to E-mail Address field, enter the email address of the recipient(s) to notify.
|
|
3
|
In the E-mail Subject field, enter the subject of the email.
|
|
4
|
In the E-mail Body field, enter the body of email.
|
|
•
|
Mail Server (name or IP address) - Enter the IP address or FQDN of the email server used to send your log emails in this field.
|
|
NOTE: If the Mail Server (name or IP address) is left blank, log and alert messages are not emailed.
|
|
•
|
|
•
|
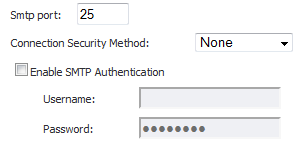
Smtp port - Enter the SMTP port used for email. The default port number is 25.
|
|
•
|
Connection Security Method - Select a security method for the email from the drop-down menu:
|
|
•
|
None (default)
|
|
•
|
SSL/TLS
|
|
•
|
|
•
|
Enable SMTP Authentication - Select to enable SMTP authentication for the emails, then enter the following. This option is disabled by default.
|
|
•
|
|
•
|
|
•
|
From Email Address - Enter the Email address you want to display in the From field of the message.
|
|
•
|
|
1
|
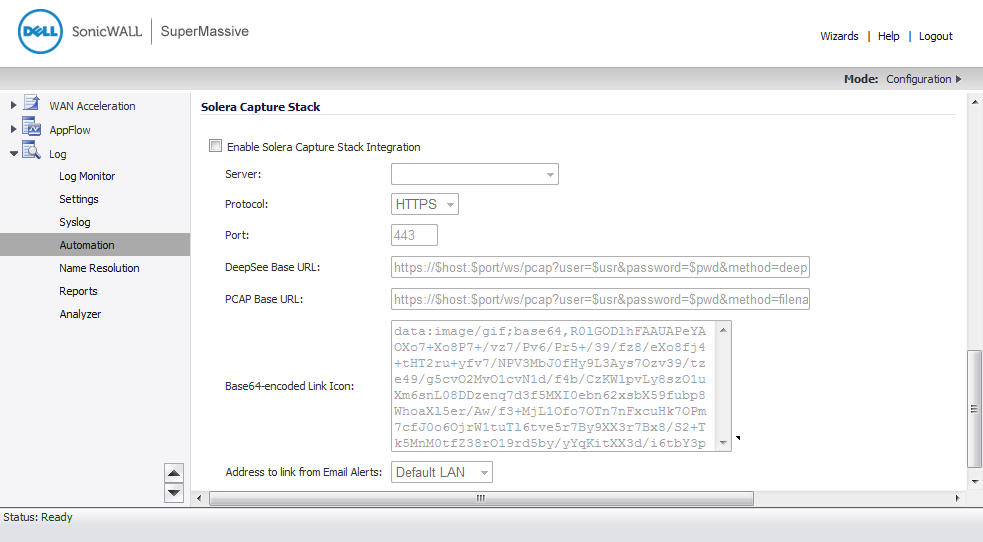
Select the Enable Solera Capture Stack Integration option.
|
|
•
|
Server - Select the host for the Solera server. You can dynamically create the host by selecting Create New Host...
|
|
•
|
|
•
|
Port - Specify the port number for connecting to the Solera server.
|
|
•
|
DeepSee Base URL - Defines the format for the base URL for the DeepSee path. In the actual URL, the special tokens are replaced with the actual values.
|
|
•
|
PCAP Base URL - Defines the format for the base URL for the PCAP path. In the actual URL, the special tokens are replaced with the actual values.
|
|
•
|
$host - server name or IP address that has the data
|
|
•
|
$port - HTTP/HTTPS port number where the server is listening
|
|
•
|
$usr - user name for authentication
|
|
•
|
$pwd - password for authentication
|
|
•
|
$start - start date and time
|
|
•
|
$stop - stop date and time
|
|
•
|
$ipproto - IP protocol
|
|
•
|
$scrip - source IP address
|
|
•
|
$dstip - destination IP address
|
|
•
|
$srcport - source port
|
|
•
|
$dstport - destination port
|


