Intrusion Prevention Service (IPS) is configured on the Security Services > Intrusion Prevention page, which is divided into three panels:
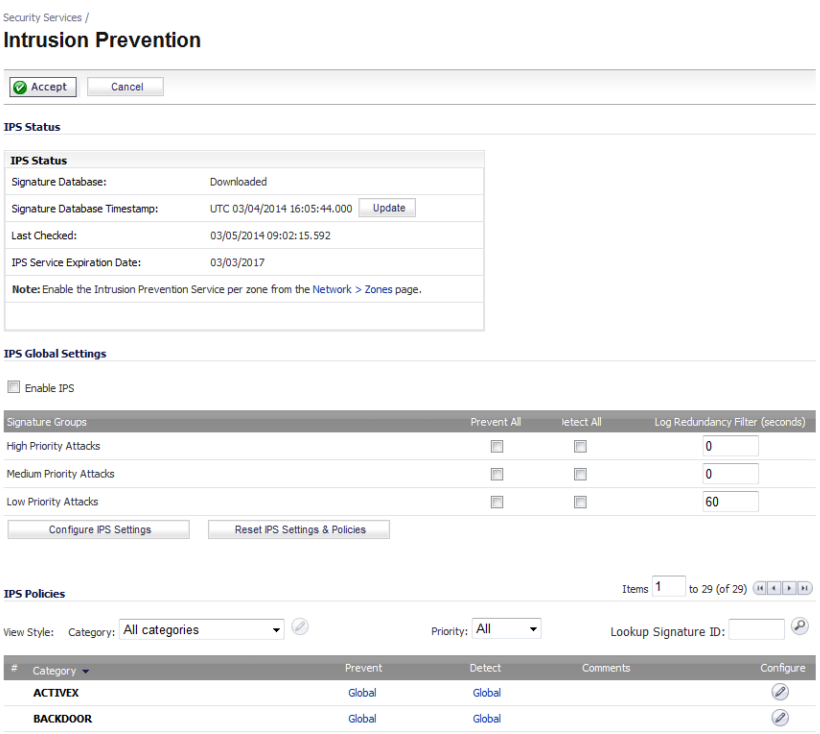
The IPS Status panel displays status information for the signature database and your Dell SonicWALL IPS license.
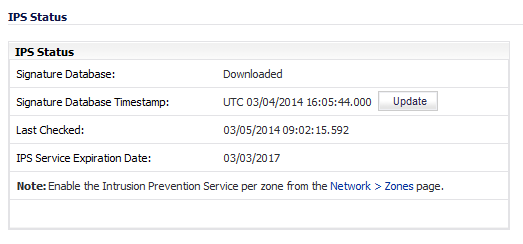
The IPS Status panel displays the following information:
|
•
|
Signature Database indicates whether the signature database is being downloaded, has been downloaded, or needs to be downloaded. The signature database is updated automatically about once an hour. You can also manually update your IPS database at any time by clicking the Update button located in the IPS Status section.
|
|
•
|
Signature Database Timestamp displays the last update to the IPS signature database, not the last update to your SonicWALL security appliance.
|
|
•
|
Last Checked indicates the last time the SonicWALL security appliance checked the signature database for updates. The SonicWALL security appliance automatically attempts to synchronize the database on startup, and once every hour.
|
|
•
|
IPS Service Expiration Date indicates the date when the IPS service expires. If your IPS subscription expires, the SonicWALL IPS inspection is stopped and the IPS configuration settings are removed from the SonicWALL security appliance. After renewing your IPS license, these settings are automatically restored to the previously configured state.
|
|
•
|
Note: Enable the Intrusion Prevention Service per zone from the Network > Zones page.
|
If you click on Network > Zones in this note, it displays the Network > Zones page where you can configure IPS on zones. See Configuring IPS Protection on Zones .
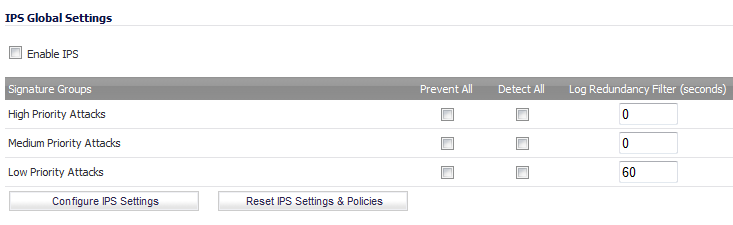
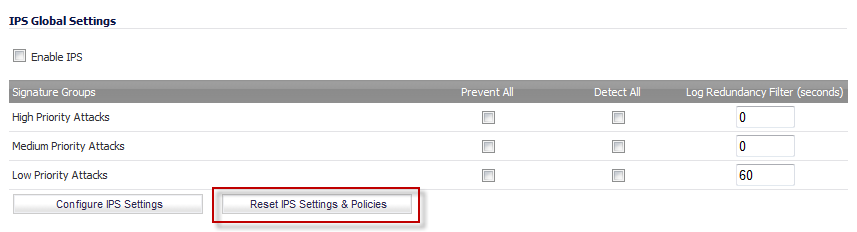
The IPS Global Settings panel provides the key settings for enabling Dell SonicWALL IPS on your firewall.
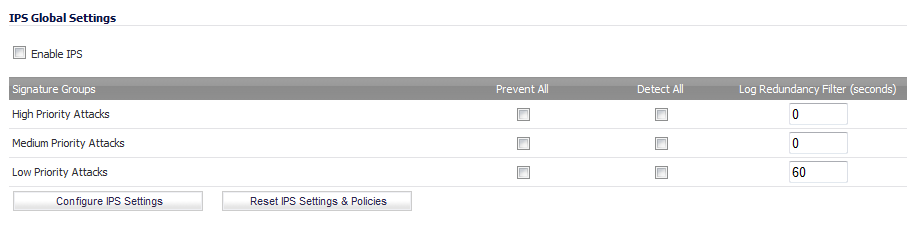
Dell SonicWALL IPS is activated by globally enabling IPS on your firewall and selecting the class of attacks. Optionally, you can configure an IPS Exclusion List as well.
|
1
|
Go to the Security Services > Intrusion Prevention page.
|
|
2
|
Go to the IPS Global Settings panel.
|
|
3
|
Select Enable IPS.
|
|
4
|
Select the action that you want (Prevent All, Detect All, or both) for each of the Signature Groups:
|
|
NOTE: To activate intrusion prevention on the firewall, you must specify a Prevent All action for at least one of the Signature Groups. If no Prevent All actions are checked, no intrusion prevention occurs on the firewall.
|
|
NOTE: Selecting both Prevent All and Detect All for all of the Signature Groups protects your network against the most dangerous and disruptive attacks.
|
|
1
|
Go to the Security Services > Intrusion Prevention page.
|
|
2
|
Go to the IPS Global Settings panel.
|
|
3
|
Select Enable IPS.
|
|
4
|
Click the Configure IPS Settings button.
|
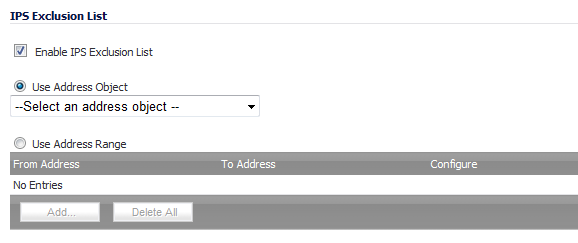
The IPS Exclusion List dialog appears.
|
5
|
Select Enable IPS Exclusion List.
|
|
6
|
|
7
|
If you selected the Use Address Object option, select the address object you want to exclude from the menu.
|
|
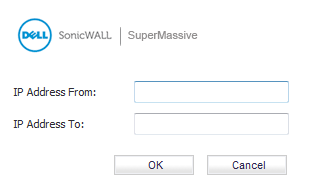
8
|
The Add IPS Range Entry dialog appears.
|
9
|
|
10
|
Click OK.
|
|
1
|
Go to the Security Services > Intrusion Prevention page.
|
|
2
|
|
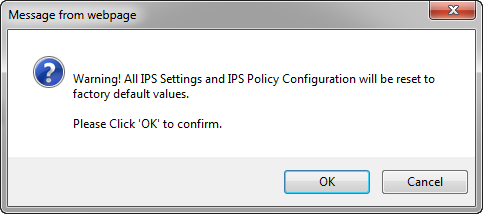
3
|
Click OK.
|
The following message appears at the bottom of the screen: Status: The configuration has been updated.
You apply SonicWALL IPS to zones on the Network > Zones page to enforce SonicWALL IPS not only between each network zone and the WAN, but also between internal zones. For example, enabling SonicWALL IPS on the LAN zone enforces SonicWALL IPS on all incoming and outgoing LAN traffic.
In the IPS Status section of the Security Services > Intrusion Prevention Service page, click the Network > Zones link to access the Network > Zones page. You apply SonicWALL IPS to a zone listed on the Network > Zones page.
|
1
|
Go to Network > Zones or from the IPS Status section on the Security Services > Intrusion Prevention page, click the Network > Zones link. The Network > Zones page is displayed.
|
|
2
|
In the Configure column in the Zone Settings table, click the Edit icon for the zone you want to apply SonicWALL IPS. The Edit Zone window is displayed.
|
|
3
|
Click the Enable IPS checkbox. A checkmark appears. To disable SonicWALL IPS, clear the box.
|
|
4
|
Click OK.
|
You also enable SonicWALL IPS protection for new zones you create on the Network > Zones page. Clicking the Add button displays the Add Zone window, which includes the same settings as the Edit Zone window.
The IPS Policies panel allows you to view SonicWALL IPS signatures and configure the handling of signatures by category groups or on a signature by signature basis. Categories are signatures grouped together based on the type of attack.
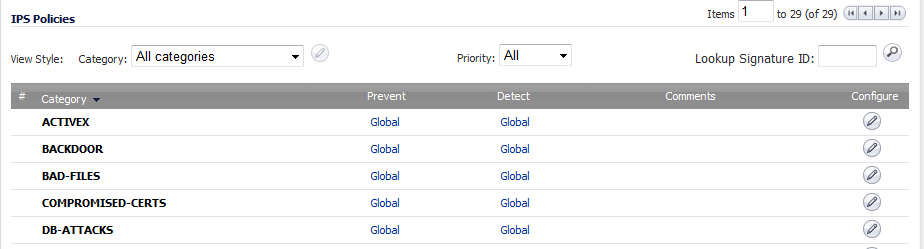
In the View Style row, the Category menu lets you choose the categories or signatures you want to display in the Category column. You can choose All categories, All signatures, or an individual category, such as ACTIVEX or DNS. If you choose an individual category, the signatures for that category are displayed.
The Category column allows you to sort categories and signatures in ascending or descending order by clicking the up or down arrow next to the column heading.
|
1
|
|
2
|
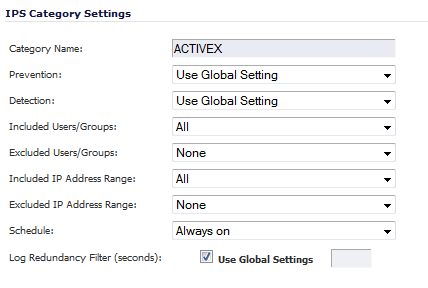
Click the Edit icon in the Configure column for that category. The Edit IPS Category dialog appears.
|
|
3
|
From the Prevention and Detection menus, select Use Global Setting, Enable, or Disable. If you select Use Global Setting, the values configured in the IPS Global Settings section are used, but you can override the IPS Global Settings by selecting Enable or Disable from these menus.
|
|
5
|
For the Log Redundancy Filter (seconds) option, if you want to use the values that you configured in the IPS Global Settings section, select Use Global Settings.
|
|
6
|
Click OK.
|
|
1
|
|
2
|
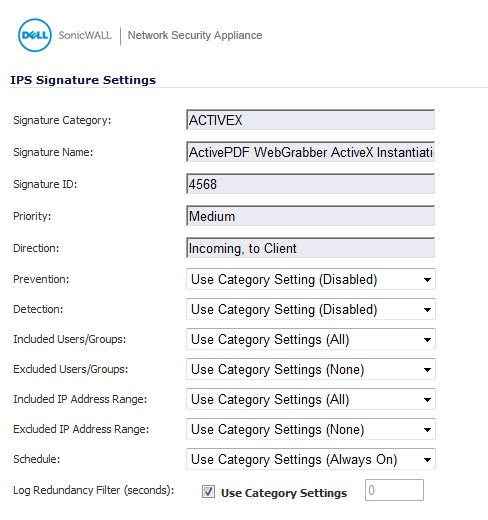
Click the Edit icon in the Configure column for that signature. The Edit IPS Signature dialog appears.
|
|
3
|
From the Prevention and Detection menus, select Enable or Disable. The Use Category Setting option is disabled.
|
|
5
|
For the Log Redundancy Filter (seconds) option, if you want to use the values that you configured in the IPS Global Settings section, select Use Category Settings.
|
|
6
|
Click OK.
|
|
1
|
Select one of the individual categories from the Category menu. The signatures for that category are displayed.
|
|
2
|
Click the Edit icon in the Configure column for that signature. The Edit IPS Signature dialog appears.
|
|
3
|
From the Prevention and Detection menus, select Enable or Disable. The Use Category Setting option is disabled.
|
|
5
|
For the Log Redundancy Filter (seconds) option, if you want to use the values that you configured in the IPS Global Settings section, select Use Category Settings.
|
|
6
|
Click OK.
|
The Priority menu lets you specify the priority of the signatures you want to display.
|
•
|
Select one of the following priorities from the Priority menu:
|
|
•
|
|
•
|
|
•
|
|
•
|
You can use the Lookup Signature ID box to view or change the IPS signature settings for a particular signature.
|
1
|
Enter the signature ID in the Lookup Signature ID box.
|
|
2
|
|
3
|
From the Prevention and Detection menus, select Enable or Disable. The Use Category Setting option is disabled.
|
|
5
|
For the Log Redundancy Filter (seconds) option, if you want to use the values that you configured in the IPS Global Settings section, select Use Category Settings.
|
|
6
|
Click OK.
|