Active scanning occurs when the security appliance starts up. You can also scan access point at any time by clicking Scan All… on the SonicPoint > IDS page. When the security appliance performs a scan, the wireless clients will be interrupted for a few seconds. The scan will effect traffic in the following ways:
|
1
|
Select the SonicPoint to view in the SonicPoint: drop-down menu.
|
|
2
|
Click the drop-down menu for --Perform SonicPoint Scan--.
|
|
1
|
Navigate to the SonicPoint > IDS page
|
|
2
|
Click the drop-down menu for --Perform SonicPoint Scan--.
|
|
3
|
Select the type of scan to perform, for example, Scan Both Radios. A pop-up message warns that performing the scan will cause all current wireless clients to be disconnected.
|
|
4
|
Click OK.
|
|
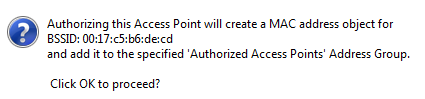
1
|
Click the Edit icon in the Authorize column for the access point you want to authorize. A pop-up is displayed.
|
|
2
|
Click OK.
|
|
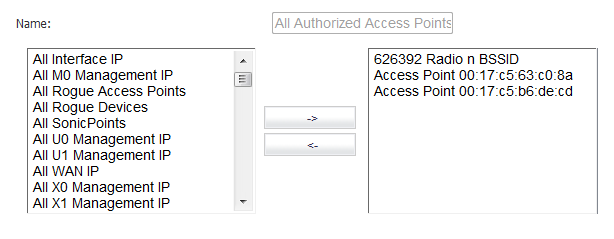
1
|
Navigate to the Firewall > Address Objects page.
|
|
2
|
|
4
|
Click OK.
|