|
1
|
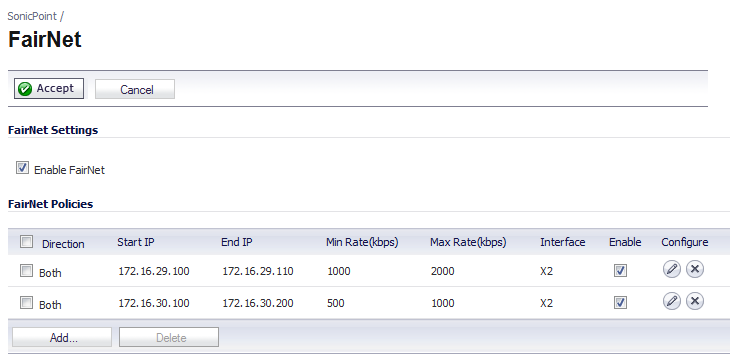
Navigate to the SonicPoint > FairNet page.
|
|
2
|
|
3
|
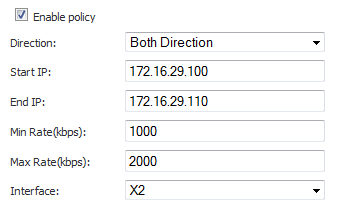
Enure the Enable Policy checkbox is selected. This checkbox is enabled by default.
|
|
4
|
From the Direction drop-down menu, select Both Directions. This applies the policy to clients uploading content and downloading content. This is the default value.
|
|
5
|
In the Start IP field, enter the starting IP address (for example, 172.16.29.100) for the FairNet policy.
|
|
6
|
In the End IP field, enter the ending IP address (for example, 172.16.29.110) for the FairNet policy.
|
|
7
|
In the Min Rate (kbps) field, enter the minimum bandwidth (for example, 1000 Kbps) for the FairNet policy.
|
|
8
|
In the Max Rate (kbps) field, enter the maximum bandwidth (for example, 2000 Kbps) for the FairNet policy.
|
|
9
|
From the Interface drop-down menu, select the interface (for example, X2) that the SonicPoint appliance is connected to.
|
|
10
|
|
11
|
Click the Enable checkbox.
|
|
12
|
Click the Accept button.
|