You can configure App Control policies from the Dashboard > AppFlow Monitor page by selecting one or more applications or categories and then clicking the Create Rule button. A policy is automatically created on the Firewall > App Rules page, and can be edited just like any other policy.
You can configure Application Control global blocking or logging policies for application categories, signatures, or specific applications on the Firewall > App Control Advanced page. Corresponding match objects are created. You can also configure match objects for these application categories, signatures, or specific applications on the Firewall > Match Objects page. The objects can be used in an App Rules policy, no matter how they were created.
You can configure policies in App Rules using the wizard or manually on the Firewall > App Rules page. The wizard provides a safe method of configuration and helps prevent errors that could result in unnecessary blocking of network traffic. Manual configuration offers more flexibility for situations that require custom actions or policies.
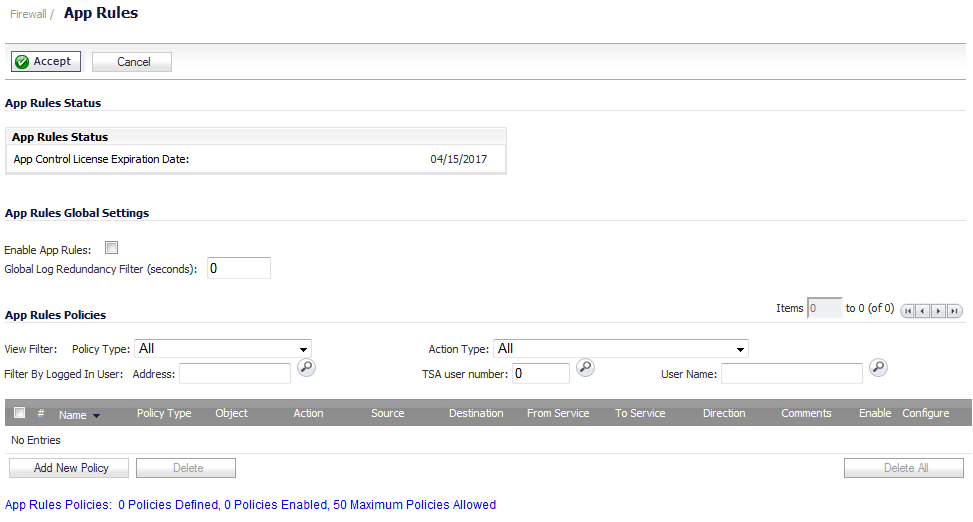
The Firewall > App Rules page contains two global settings:
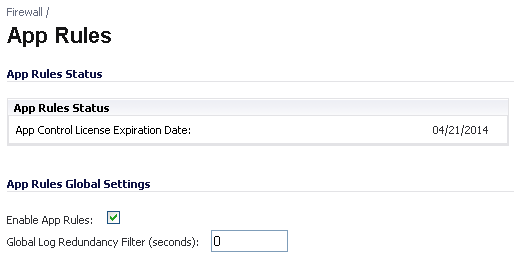
You must enable App Rules to activate the functionality. App Rules is licensed as part of App Control, which is licensed on www.mysonicwall.com on the Service Management - Associated Products page under GATEWAY SERVICES. You can view the status of your license at the top of the Firewall > App Rules page:
|
1
|
Navigate to the Firewall > App Rules page.
|
|
2
|
To enable App Rules, select the Enable App Rules checkbox.
|
|
3
|
To log all policy matches, leave the Global Log Redundancy Filter field set to zero. To enforce a delay between log entries for matches to the same policy, enter the number of seconds to delay.
|
Global log redundancy settings apply to all App Rules policies. If set to zero, a log entry is created for each policy match found in passing traffic. Other values specify the minimum number of seconds between log entries for multiple matches to the same policy. For example, a log redundancy setting of 10 will log no more than one message every 10 seconds for each policy match. Log redundancy can also be set on a per-policy basis in the Add/Edit Policy dialog where each individual policy configuration has its own log redundancy filter setting that can override the global log redundancy filter setting.
For information about configuring App Rules, see the following sections:
For information about using the App Control Wizard to create a policy, see Using the Application Control Wizard .
For information about policies and policy types, see App Rules Policy Creation .
|
NOTE: Rules configures through the Firewall > App Control Advanced page take precedence over rules configured on through the Firewall > App Rules page.
|
|
1
|
|
2
|
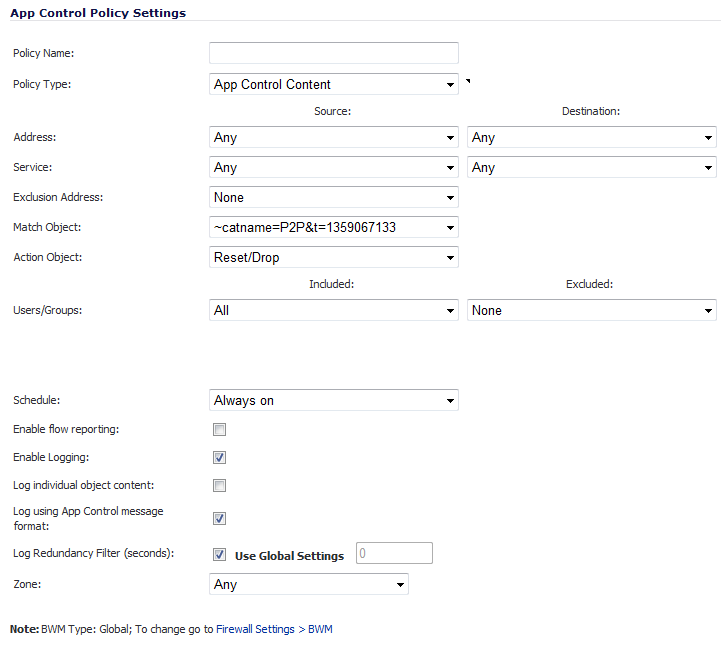
In the App Rules Policies panel, click Add New Policy. The App Control Policies Settings dialog displays
|
|
3
|
Enter a descriptive name into the Policy Name field.
|
|
4
|
Select a Policy Type from the drop-down menu. Your selection here affects options available in the dialog. For information about available policy types, see App Rules Policy Creation .
|
|
5
|
Select a source and destination Address Group or Address Object from the Address drop-down menus. Only a single Address field is available for IPS Content, App Control Content, or CFS policy types.
|
|
6
|
Select the source or destination service from the Service drop-down menus. Some policy types do not provide a choice of service.
|
|
7
|
For Exclusion Address, optionally select an Address Group or Address Object from the drop-down menu. This address is not affected by the policy.
|
|
8
|
For Match Object, select a match object from the drop-down menu containing the defined match objects applicable to the policy type. When the policy type is HTTP Client, you can optionally select an Excluded Match Object.
|
The excluded match object provides the ability to differentiate subdomains in the policy. For example, if you wanted to allow news.yahoo.com, but block all other yahoo.com sites, you would create match objects for both yahoo.com and news.yahoo.com. You would then create a policy with Match Object yahoo.com and Excluded Match Object news.yahoo.com.
|
NOTE: The Excluded Match Object does not take effect when the match object type is set to Custom Object. Custom Objects cannot be selected as the Exclusion Match Object.
|
|
9
|
For Action Object, select an action from the drop-down menu containing actions applicable to the policy type, and can include predefined actions plus any customized actions. The default for all policy types except CFS is Reset/Drop; the default for CFS is No Action.
|
|
10
|
For Users/Groups, select from the drop-down menus for both Included and Excluded. The selected users or group under Excluded are not affected by the policy.
|
|
11
|
If the policy type is SMTP Client, select from the drop-down menus for MAIL FROM and RCPT TO, for both Included and Excluded. The selected users or group under Excluded are not affected by the policy.
|
|
12
|
For Schedule, select from the drop-down menu, which contains a variety of schedules for the policy to be in effect.
|
Specifying a schedule other than the default, Always On, turns on the rule only during the scheduled time. For example, specifying Work Hours for a policy to block access to non-business sites allows access to non-business sites during non-business hours.
|
13
|
If you want the policy to create a log entry when a match is found, select the Enable Logging checkbox.
|
|
14
|
To record more details in the log, select the Log individual object content checkbox.
|
|
15
|
If the policy type is IPS Content, select the Log using IPS message format checkbox to display the category in the log entry as Intrusion Prevention rather than Application Control, and to use a prefix such as IPS Detection Alert in the log message rather than Application Control Alert. This is useful if you want to use log filters to search for IPS alerts.
|
|
16
|
If the policy type is App Control Content, select the Log using App Control message format checkbox to display the category in the log entry as Application Control, and to use a prefix such as Application Control Detection Alert in the log message. This is useful if you want to use log filters to search for Application Control alerts.
|
|
17
|
If the policy type is CFS, select the Log using CFS message format checkbox to display the category in the log entry as Network Access, and to use a log message such as Web site access denied in the log message rather than no prefix. This is useful if you want to use log filters to search for content filtering alerts.
|
|
18
|
For Log Redundancy Filter, you can either select Global Settings to use the global value set on the Firewall > App Rules page, or you can enter a number of seconds to delay between each log entry for this policy. The local setting overrides the global setting only for this policy; other policies are not affected.
|
|
19
|
For Connection Side, select from the drop-down menu. The available choices depend on the policy type and can include Client Side, Server Side, or Both, referring to the side where the traffic originates. IPS Content, App Control Content, or CFS policy types do not provide this configuration option.
|
|
20
|
For Direction, click either Basic or Advanced and select a direction from the drop-down menu. Basic allows you to select incoming, outgoing, or both. Advanced allows you to select between zones, such as LAN to WAN. IPS Content, App Control Content, or CFS policy types do not provide this configuration option.
|
|
21
|
If the policy type is IPS Content, App Control Content, or CFS, select a zone from the Zone drop-down menu. The policy will be applied to this zone.
|
|
22
|
If the policy type is CFS, select an entry from the CFS Allow List drop-down menu. The menu contains any defined CFS Allow/Forbidden List type of match objects, and also provides None as a selection. The domains in the selected entry will be affected by the policy.
|
|
23
|
If the policy type is CFS, select an entry from the CFS Forbidden List drop-down menu. The menu contains any defined CFS Allow/Forbidden List type of match objects, and also provides None as a selection. The domains in the selected entry will be denied access to matching content, instead of having the defined action applied.
|
|
24
|
If the policy type is CFS, select the Enable Safe Search Enforcement checkbox to prevent safe search enforcement from being disabled for all search engines. This setting is disabled by default.
|
|
25
|
If the policy type is CFS, select Enable YouTube for Schools and enter your School ID to enable the YouTube for Schools feature. For more information, see YouTube for Schools Content Filtering Support .
|
|
26
|
Click OK.
|