You can add up to 4000 local users to the internal database on the firewall from the Users > Local Users page.
|
1
|
|
2
|
|
3
|
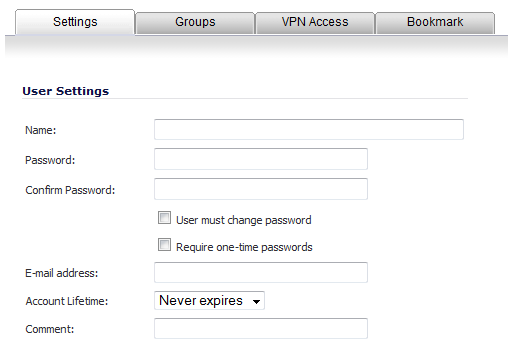
In the Password field, type a password for the user. Passwords are case-sensitive and should consist of a combination of letters and numbers rather than names of family, friends, or pets.
|
|
4
|
Confirm the password by retyping it in the Confirm Password field.
|
|
•
|
User must change password checkbox to force users to change their passwords the first time they login.
|
|
•
|
Require one-time passwords checkbox to enable this functionality requiring SSL VPN users to submit a system-generated password for two-factor authentication.
|
|
6
|
Enter the user’s email address in the E-mail address field so they may receive one-time passwords.
|
|
7
|
In the Account Lifetime drop-down menu, select Never expires to make the account permanently. Or select Minutes, Hours, or Days to specify a lifetime after which the user account will either be deleted or disabled.
|
|
•
|
If you select a limited lifetime, select the Prune account upon expiration checkbox to have the user account deleted after the lifetime expires. Disable this checkbox to have the account simply be disabled after the lifetime expires. The administrator can then re-enable the account by resetting the account lifetime.
|
|
8
|
Optionally enter a comment in the Comment field.
|
|
9
|
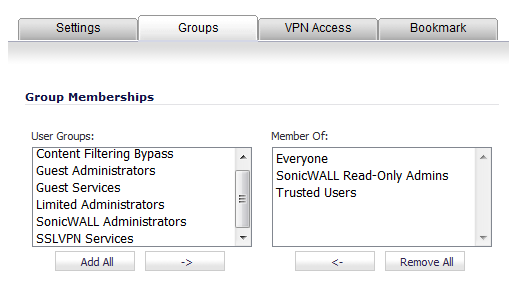
Click the Groups tab.
|
|
10
|
Under User Groups, select one or more groups to which the user will belong.
|
|
11
|
Click the Right Arrow -> button to move the group name(s) into the Member of list. The user will be a member of the selected groups.
|
To remove the user from a group, select the group from the Member of list, and click the Left Arrow <- button.
|
12
|
Click the VPN Access tab to configure which network resources VPN users (either GVC, NetExtender, or Virtual Office bookmarks) can access.
|

|
NOTE: The VPN access tab affects the ability of remote clients using GVC, NetExtender, and Virtual Office bookmarks to access network resources. To allow GVC, NetExtender, or Virtual Office users to access a network resource, the network address objects or groups must be added to the “allow” list on the VPN Access tab.
|
|
13
|
Select one or more networks from the Networks list and click the Right Arrow button (->) to move them to the Access List column.
|
To remove the user’s access to a network, select the network from the Access List, and click the Left Arrow button.
|
14
|
Click OK to complete the user configuration.
|