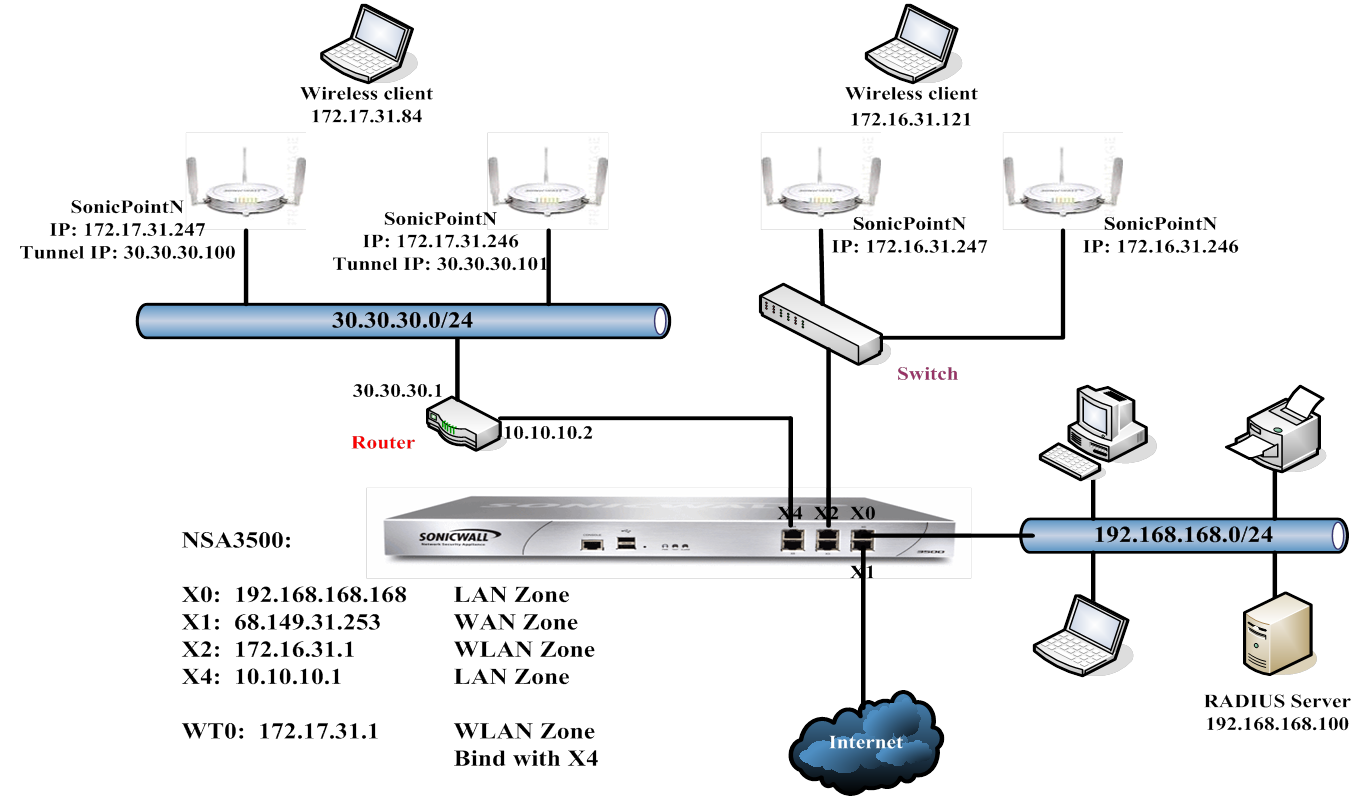
Basic SonicPoint Layer 3 Management Configuration
|
1
|
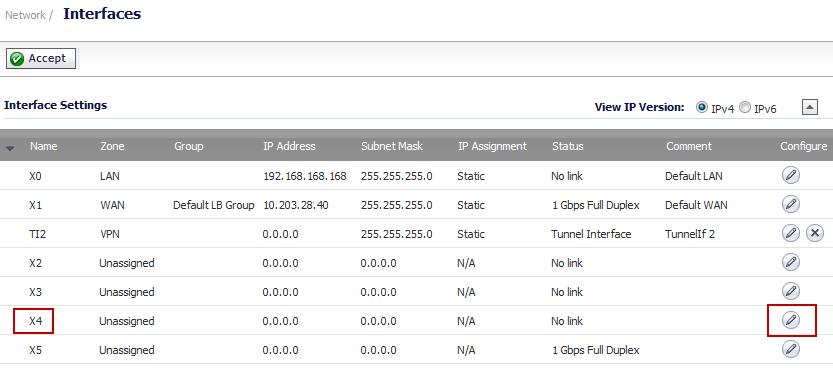
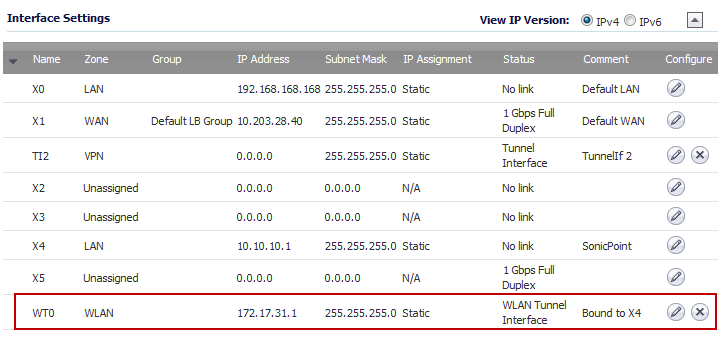
Navigate to the Network > Interfaces page.
|
|
2
|
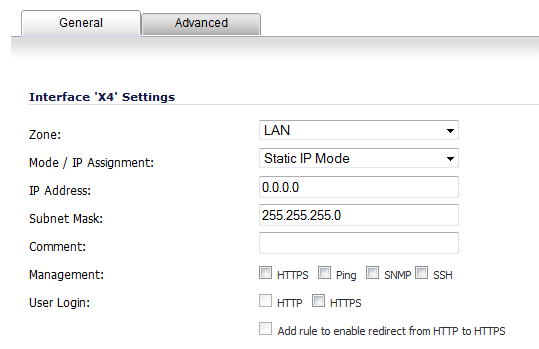
In the Interface Settings section, click the Configure icon for the X4 interface. The Edit Interface dialog appears.
|
|
3
|
|
4
|
|
5
|
In the IP Address field, enter the IP address of the interface. For example, 10.10.10.1. A default value of 0.0.0.0 is displayed.
|
|
6
|
in the Subnet Mask field, enter the subnet mask for the interface. For example, 255.255.255.0 (this is the default value).
|
|
7
|
Optionally, enter a comment in the Comment field. This comment will display in the Comment column of the Interface Settings table of Network > Interfaces.
|
|
•
|
HTTPS – Enables remote management of the SonicWall through the HTTPS protocol.
|
|
NOTE: If you select HTTPS, the Add rule to enable redirect from HTTP to HTTPS option is enabled automatically.
|
|
•
|
Ping – Enables remote management of the SonicWall through the Ping protocol.
|
|
•
|
SNMP – Enables remote management of the SonicWall through the SNMP protocol.
|
|
•
|
SSH – Enables remote management of the SonicWall through the SSH protocol.
|
|
9
|
Optionally, select HTTPS for User Login to enable users with management rights to log in to the SonicWall.
|
|
10
|
If you did not select HTTPS for Management, but did select HTTPS for User Login, to enable users logging in from HTTP to be redirected to HTTPS, select Add rule to enable redirect from HTTP to HTTPS.
|
|
11
|
Click OK.
|
The X4 entry in the Interface Settings table is updated.

|
1
|
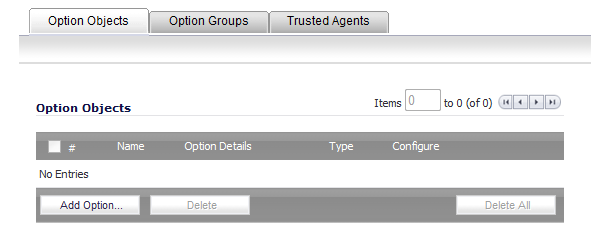
Navigate to the Network > DHCP Server page.
|

|
2
|
|
3
|
|
4
|
|
5
|
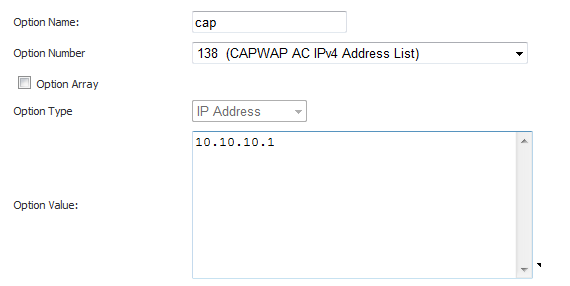
From the Option Number drop-down menu, select 138 (CAPWAP AC IPv4 Address List). The Option Array option becomes active, and the Option Type is set to IP Address.
|
|
6
|
Select the Option Array option.
|
|
7
|
In the Option Value field, enter the IP address for the X4 interface you configured in Configuring the Access Controller Interface. For example, 10.10.10.1.
|
|
8
|
Click OK. The new Option Object is displayed in the Option Objects section of the DHCP Advanced Settings dialog.
|

|
9
|
Click OK.
|
|
1
|
Navigate to the Network > DHCP Server page.
|

|
2
|
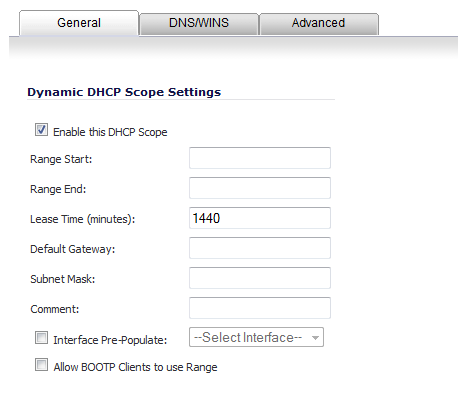
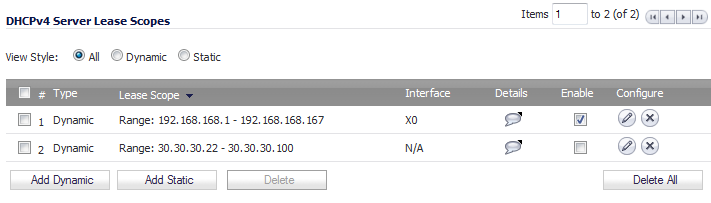
Under the DHCPv4 Server Lease Scopes table, click the Add Dynamic button. The Dynamic Range Configuration dialog appears.
|
|
3
|
Select the Enable this DHCP Scope option. This is selected by default.
|
|
4
|
Enter the appropriate IP addresses or values in the Range Start, Range End, Lease Time (minutes) (default is 1440 minutes), Default Gateway, and Subnet Mask fields.
|

|
5
|
Click the Advanced tab.
|
|
6
|
In the DHCP Generic Option Group drop-down menu, select the DHCP Option Object you created in Configuring the DHCP Server.
|
|
7
|
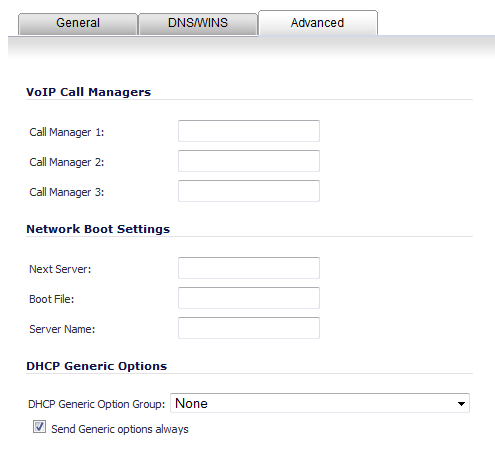
Select the Send Generic options always option.
|
|
8
|
|
1
|
Navigate to the Network > Interfaces page.
|
|
2
|
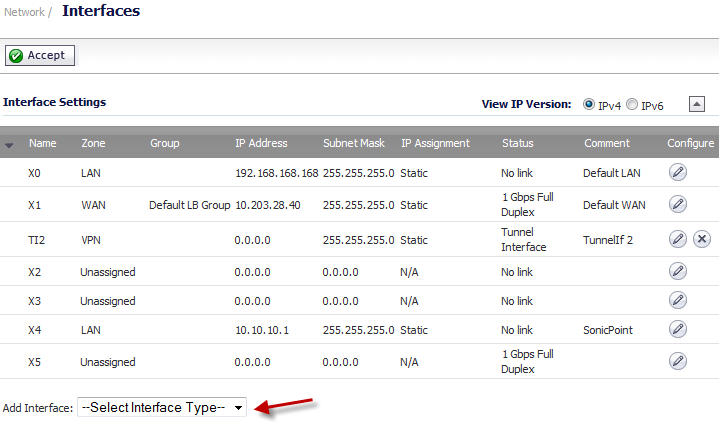
From the Add Interface drop-down menu, select WLAN Tunnel Interface. The Add WLAN Tunnel Interface dialog displays.
|
|
3
|

|
4
|
|
5
|
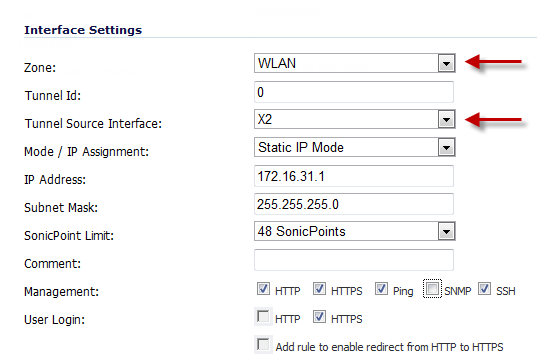
From the Tunnel Source Interface drop-down menu, select the interface, such as X4 in this scenario.
|
|
6
|
|
7
|
In the IP Address field, enter the IP address for the WLAN tunnel interface. For example, 172.17.31.1.
|
|
8
|
|
9
|
From the SonicPoint Limit drop-down menu, select the maximum number of SonicPoints for this interface.
|
|
10
|
(Optional) In the Comment field, enter a descriptive comment. This comment is displayed in the Comment field.
|
|
11
|
If you did not specify a web management protocol in Configuring the Access Controller Interface, select one or more Management options: HTTPS, Ping, SNMP, SSH.
|
|
NOTE: If you select HTTPS, the Add rule to enable redirect from HTTP to HTTPS option is enabled automatically.
|
|
12
|
If you did not specify a login protocol in Configuring the Access Controller Interface, optionally select HTTPS for User Login to enable users with management rights to log in to the SonicOS.
|
|
13
|
If you did not select HTTPS for Management, but did select HTTPS for User Login, to enable users logging in from HTTP to be redirected to HTTPS, select Add rule to enable redirect from HTTP to HTTPS.
|
|
14
|
|
NOTE: A default DHCP IP address pool, such as 172.17.31.1/24, is automatically created for wireless clients.
|
|
15
|
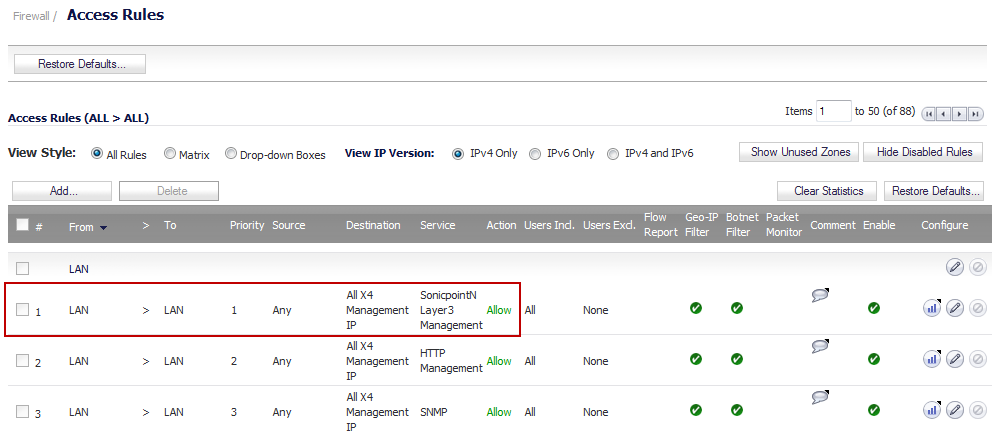
To verify, navigate to the Firewall > Access Rules page. You should see a Layer 3 Management option in the Access Rules table.
|
|
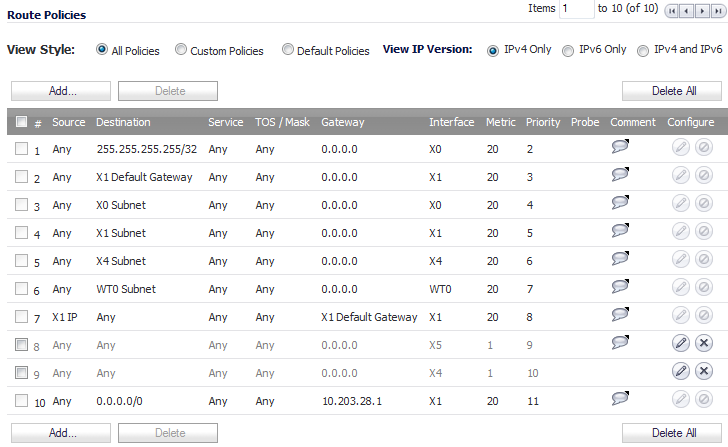
1
|
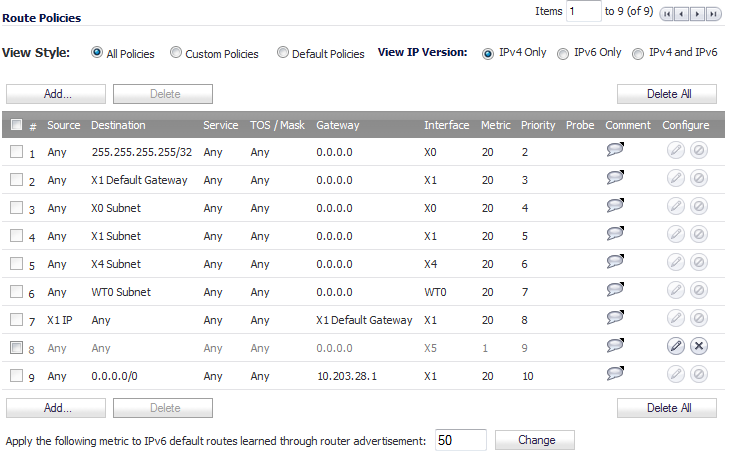
Navigate to the Network > Routing page.
|
|
2
|
|
3
|
|
4
|
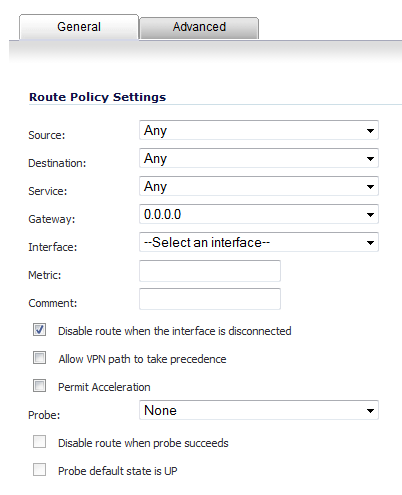
From the Destination drop-down menu, select the address object of the default gateway. The default is Any.
|
|
5
|
|
6
|
|
7
|
|
8
|
|
9
|
|
1
|
|
2
|