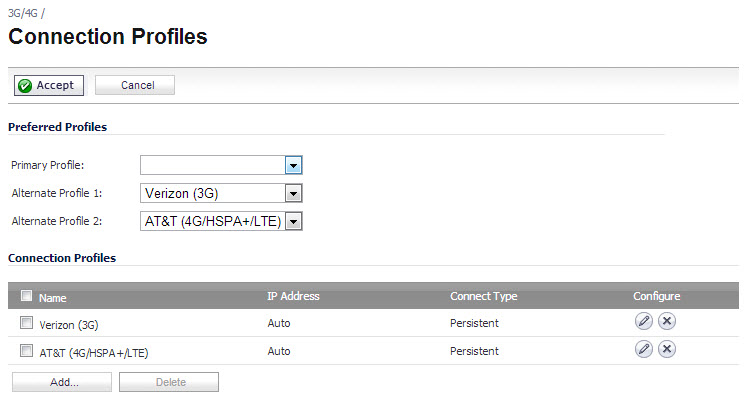
The Modem > Connection Profiles page allows you to configure modem profiles on the SonicWall security appliance using your dial-up ISP information for the connection. Multiple modem profiles can be used when you have a different profile for individual ISPs.
The current profile is displayed in the Connection Profiles table, which displays the following profile information:
|
•
|
Name - The name you've assigned to the profile. You can use names such as Home, Office, or Travel to distinguish different profiles from each other.
|
|
•
|
IP Address - The IP address of the Internet connection.
|
|
•
|
Connection Type - Displays Persistent, Connect on Data, or Manual Dial, depending on what you selected in the Profile Configuration window for the profile.
|
|
•
|
Configure - Clicking the Edit icon allows you to edit the profile. Clicking on the Delete icon deletes the profile.
|
|
1
|
In the Modem > Connection Profiles page, click the Add button. The Modem Profile Configuration dialog displays for configuring a dialup profile.
|
|
2
|
|
3
|
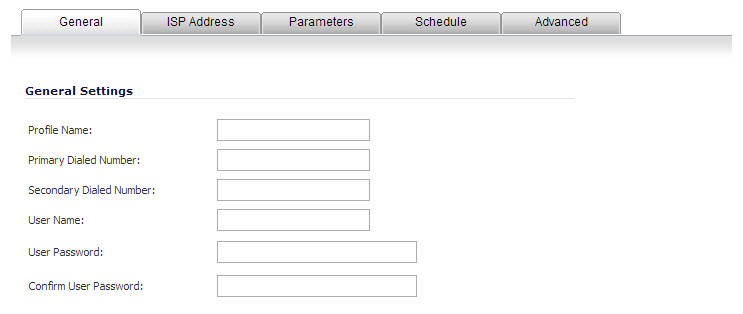
Enter the primary number used to dial your ISP in the Primary Dialed Number field.
|
|
4
|
Enter the secondary number used to dial your ISP in the Secondary Dialed Number field (optional).
|
|
5
|
|
6
|
Enter the password provided by your dialup ISP in the User Password field.
|
|
7
|
|
8
|
If your ISP has given you a script that runs when you access your ISP connection, cut and paste the script text in the Chat Script field. See the Information in Chat Scripts section for more information on using chat scripts.
|
|
9
|
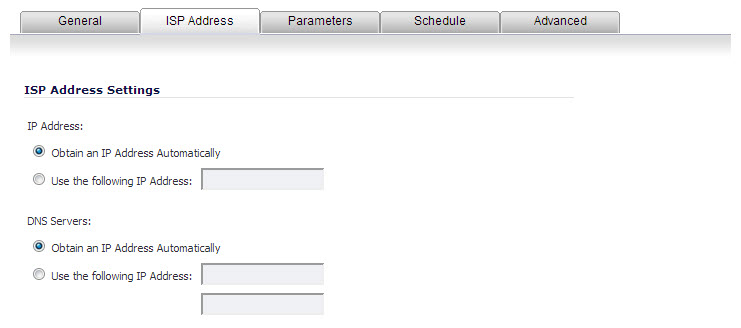
Click the ISP Address tab.
|
|
10
|
In the ISP Address Setting section, select Obtain an IP Address Automatically if you do not have a permanent dialup IP address from your ISP. If you have a permanent dialup IP address from your ISP, select Use the following IP Address and enter the IP address in the corresponding field.
|
|
11
|
If you obtain an IP address automatically for your DNS server(s), select Obtain an IP Address Automatically. If your ISP has a specific IP address for the DNS server(s), select Use the following IP Address and enter the IP address of the primary DNS server in the corresponding field. You can also add a secondary DNS server address in the field below.
|
|
12
|
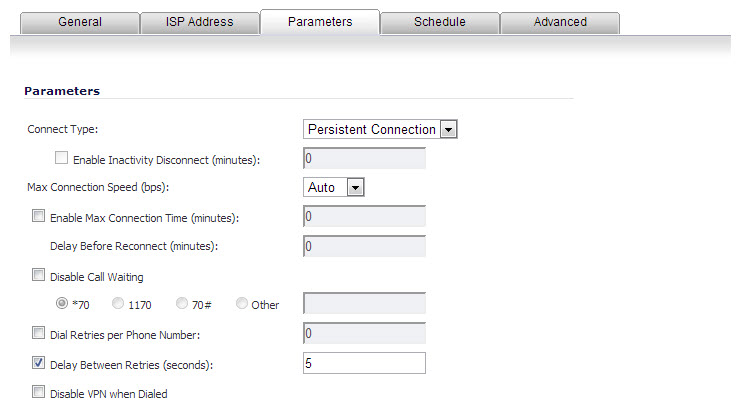
Click on the Parameters tab. Use the settings in the page to configure modem dialup behavior.
|
|
13
|
In the Connect Type menu select one of the following options:
|
|
•
|
Persistent Connection - By selecting Persistent Connection, the modem stays connected unless you click the Disconnect button on the Network > Settings page. Depending on settings selected on the Network > Failover & LB page, the modem dials automatically when a WAN connection fails. If the Primary Profile cannot connect, the modem uses the Alternate Profile 1 to dial an ISP.
|
|
•
|
Connect on Data - Using Connect on Data requires that outbound data is detected before the modem dials the ISP. Outbound data does not need to originate from computers on the LAN, but can also be packets generated by the SonicWall security appliance internal applications such as AutoUpdate and Anti-Virus. If Enable WAN Failover is selected on the Modem > Failover page, the pings generated by the probe can trigger the modem to dial when no WAN Ethernet connection is detected. If the Primary Profile cannot connect, the modem uses the Alternate Profile 1 to dial an ISP.
|
|
•
|
Manual Connection - Selecting Manual Connection for a Primary Profile means that a modem connection does not automatically occur. You must click the Connect button on the Network > Settings page for the dialup connection to be established. Also, WAN Failover does not automatically occur.
|
|
14
|
If you selected either Connect on Data or Manual Connection, enter the number of minutes a dial-up connection is allowed to be inactive in the Enable Inactivity Disconnect (minutes) field.
|
|
15
|
Select the connection speed from the Max Connection Speed (bps) menu. Auto is the default setting as the SonicWall security appliance automatically detects the connection speed when it connects to the ISP or you can select a specific speed option from the menu.
|
|
16
|
Select Enable Max Connection Time (minutes) if the connection is terminated after the specified time. Enter the number of minutes for the connection to be active. The value can range from 0 to 1440 minutes. This feature does not conflict with the Inactivity Disconnect setting. If both features are configured, the connection is terminated based on the shortest configured time.
|
|
17
|
If you select Enable Max Connection Time (minutes), enter the number of minutes to delay before redialling the ISP in the Delay Before Reconnect (minutes). The value can range from 0 to 1440, and the default value is 0 which means there is no delay before reconnecting to the ISP.
|
|
18
|
If you have call waiting on your telephone line, you should disable it or another call can interrupt your connection to your ISP. Select Disable Call Waiting and then select command from the list. If you do not see your command listed, select Other, and enter the command in the field. If you are not sure which command to use, see the documentation that came with your phone service or contact your phone service provider.
|
|
19
|
If the phone number for your ISP is busy, you can configure the number of times that the SonicWall security appliance modem attempts to connect in the Dial Retries per Phone Number field. The default value is 0.
|
|
20
|
Enter the number of seconds between attempts to redial in the Delay Between Retries (seconds) field. The default value is 5 seconds.
|
|
21
|
Select Disable VPN when Dialled if VPN Security Associations (SAs) are disabled when the modem connects to the ISP. Terminating the dial-up connection re-enables the VPN SAs. This is useful if you want to deploy your own point-to-point RAS network and want packets to be sent in the clear to your intranets.
|
|
22
|
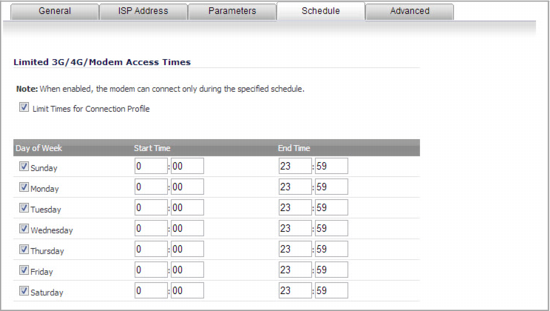
Click the Schedule tab.
|
|
23
|
If you want to specify scheduled times the modem can connect, select Limit Times for Dialup Profile. Enter times for each day in 24-hour format that you want the modem to be able to make a connection.
|
|
24
|
Click OK to add the dial-up profile to the SonicWall security appliance. The Dialup Profile appears in the Connection Profiles table.
|