Configuring a Numbered VPN Tunnel Interface

Routing protocols can use a numbered tunnel interface to establish a routing session. To support this requirement, SonicOS must add an interface in the VPN zone with an IP address from a private subnet assigned to it. This numbered tunnel interface can be used for the routing protocol session.

After a numbered tunnel interface is added to the interface list, a static route policy can use it as the interface in a static route policy configuration for a static route based VPN. Routing protocols (OSPF, RIP, and BGP) can use it for dynamic route based VPN.

Configuring a Numbered VPN Tunnel Interface is done in two parts:

Topics:
Configuring the VPN Policy
To configure a Numbered VPN Tunnel Interface:
1
Go to the VPN > Settings page.
2
In the VPN Policies panel, click the Add button. The VPN Policy dialog appears.

3
From the Policy Type menu, select Tunnel Interface.
4
From the Authentication Method menu, select IKE using Preshared Secret.
5
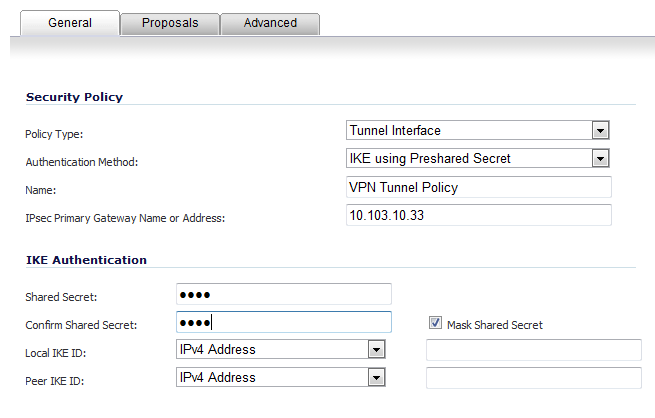
In the Name box, enter the name of the policy.
6
In the IPsec Primary Gateway Name or Address box, enter the name or the IP address of the primary gateway.
7
In the Shared Secret and Confirm Shared Secret boxes, enter your shared secret.
8
Click OK.
Configuring the Tunnel Interface
1
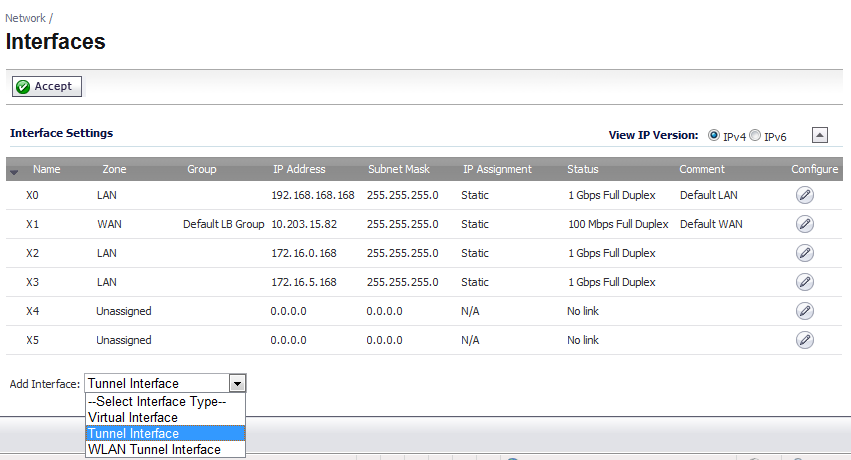
Go to the Network > Interfaces page.

2
From the Add Interface menu, select Tunnel Interface. The Add Tunnel Interface dialog appears.

3
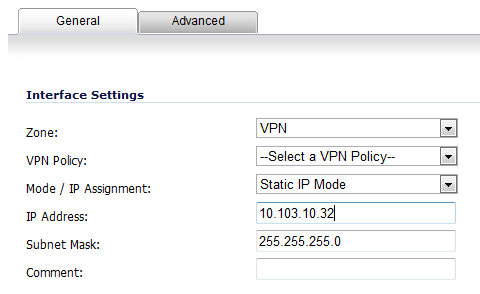
From the Zone drop-down menu, select VPN.
4
From the VPN Policy drop-down menu, select the VPN Policy that you just created.
5
From the Mode / IP Assignment drop-down menu, select Static IP Mode.
6
In the IP Address check box, enter the IP address for the interface.
7
In the Subnet Mask check box, enter the subnet mask.
8
Click OK.

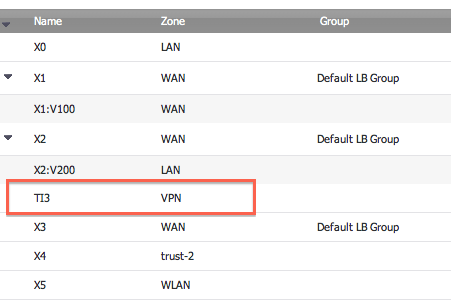
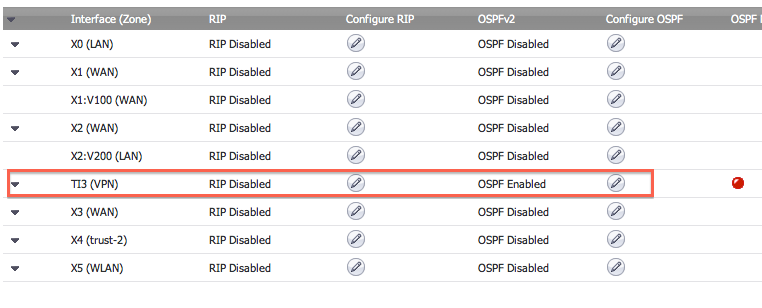
The numbered VPN tunnel interface should appear on the Network > Interfaces page and on the Network > Routing page when you select Advanced Routing from the Routing Mode drop-down menu.