
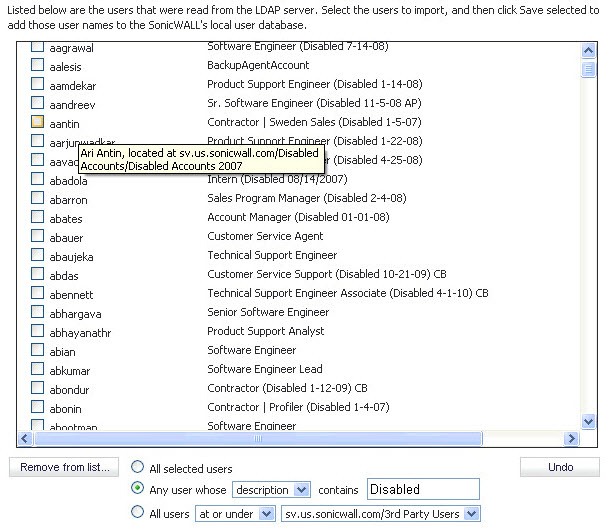
You can configure local users on the SonicWall by retrieving the user names from yoSonicWallur LDAP server. The Import from LDAP button launches a dialog box containing the list of user names available for import to the SonicWall.
The list of users read from the LDAP server can be quite long, and you will probably only want to import a small number of them. A Remove from list button is provided, along with several methods of selecting unwanted users.You can use these options to reduce the list to a manageable size and then select the users to import.
|
1
|
Navigate to the Users > Settings page.
|
|
2
|
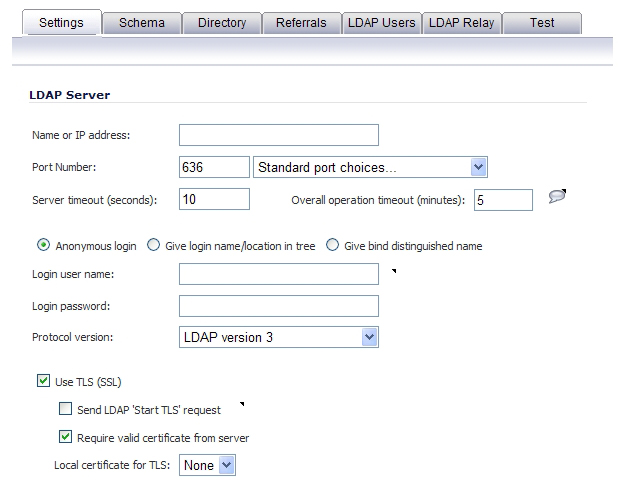
From the User Authentication method drop-down menu, select either LDAP or LDAP + Local Users. The page changes slightly.
|
|
3
|
|
4
|
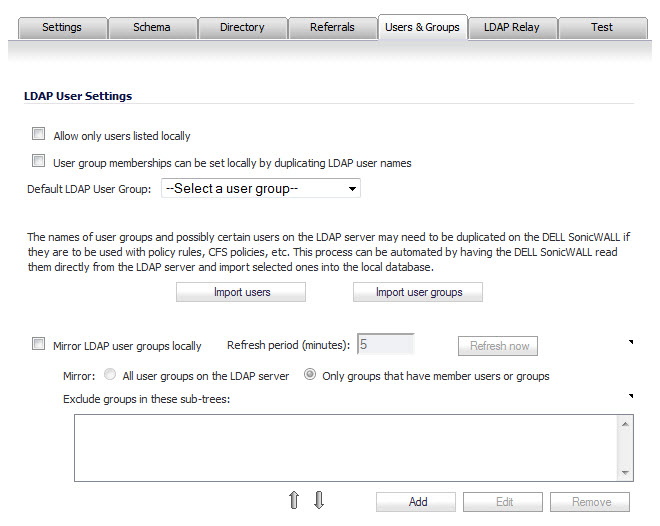
Click the Users & Groups tab.
|
|
5
|
Optionally, select Allow only users listed locally.
|
|
6
|
To import users from the LDAP server, click the Import Users button. The LDAP Import Users dialog displays.
|
|
7
|
In the LDAP Import Users dialog, you can select individual users or select all users. To select all users in the list, select the Select/deselect all check box at the top of the list. To clear all selections, click it again.
|
|
8
|
|
•
|
To remove the users whose checkboxes you have selected, select the All selected users radio button.
|
|
a)
|
|
•
|
name – The user name displayed in the left column of the list.
|
|
•
|
description – The description displayed to the right of the user name (not present for all users).
|
|
•
|
For example, you might want to remove accounts that are marked as “Disabled” in their descriptions. In this case, select description in the first field and type Disabled in the second field. The second field is case-sensitive, so if you typed disabled you would prune out a different set of users.
|
•
|
To remove certain users from the list on the basis of their location in the LDAP directory, select the All users <field1> <field2> radio button. In the first field, select either at or at or under from the drop-down menu. In the second field, select the LDAP directory location from the drop-down menu.
|
|
9
|
|
a
|
Click Undo. A confirmation message displays.
|
|
b
|
Click OK.
|
|
11
|
When finished pruning out as many unwanted accounts as possible with the Remove from list options, use the checkboxes in the list to select the accounts to import.
|
|
12
|
Click Save selected.
|
|
13
|
Click OK.
|
|
15
|
Click Apply.
|
|
16
|
Click Accept. A confirmation message displays.
|

|
17
|
Click OK.
|