|
1
|
Click on the Edit icon in the Configure column for the Unassigned interface you want to configure. The Edit Interface dialog displays.
|
|
2
|
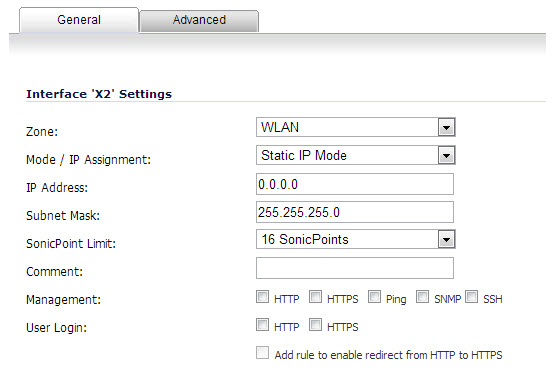
Select the WLAN interface. If you want to create a new zone for the interface, select Create a new zone. The Add Zone dialog displays. See Chapter 11 for instructions on adding a zone.
|
|
3
|
Select one of the following WLAN Network Addressing Mode from the Mode / IP Assignment menu. Depending on the option you choose from the IP Assignment menu, complete the corresponding fields that are displayed after selecting the option.
|
|
•
|
Static IP Mode—the IP address for the interface is manually entered
|
|
•
|
Layer 2 Bridge Mode—an interface placed in this mode becomes the Secondary Bridge Interface to the Primary Bridge Interface to which it is paired. The resulting Bridge-Pair will then behave like a two-port learning bridge with full L2 transparency, and all IP traffic that passes through will be subjected to full stateful failover and deep packet inspection
|
|
•
|
PortShield Switch Mode—this architecture enables you to configure some or all of the LAN ports into separate security contexts, providing protection not only from the WAN and DMZ, but between devices inside your network as well. In effect, each context has its own wire-speed PortShield that enjoys the protection of a dedicated, deep packet inspection firewall.
|
|
4
|
|
5
|
Enter any optional comment text in the Comment field. This text is displayed in the Comment column of the Interface table.
|
|
6
|
|
7
|
If you want to allow selected users with limited management rights, select HTTP and/or HTTPS in User Login.
|
|
8
|
Click OK.
|
|
9
|
Click the Advanced tab.
|
|
10
|
If you want to allow multicast reception on this interface, select the Enable Multicast Support option.
|