Policy Configuration : Managing SonicPoints

SonicPoint Auto Provisioning
Topics:
Automatic Provisioning (SDP & SSPP)
The Dell SonicWALL Discovery Protocol (SDP) is a layer 2 protocol employed by SonicPoints and devices running SonicOS. SDP is the foundation for the automatic provisioning of SonicPoint units through the following messages:
Advertisement—SonicPoint devices without a peer periodically and on startup announce or advertise themselves through a broadcast. The advertisement includes information that is used by the receiving SonicOS device to ascertain the state of the SonicPoint. The SonicOS device then reports the state of all peered SonicPoints, and takes configuration actions as needed.
Discovery—SonicOS devices periodically send discovery request broadcasts to elicit responses from L2 connected SonicPoint units.
Configure Directive—A unicast message from a SonicOS device to a specific SonicPoint unit to establish encryption keys for provisioning, and to set the parameters for and to engage configuration mode.
Configure Acknowledgement—A unicast message from a SonicPoint to its peered SonicOS device acknowledging a Configure Directive.
Keepalive—A unicast message from a SonicPoint to its peered SonicOS device used to validate the state of the SonicPoint.
If through the SDP exchange the SonicOS device ascertains that the SonicPoint requires provisioning or a configuration update (such as on calculating a checksum mismatch, or when a firmware update is available), the Configure directive engages a 3DES encrypted, reliable TCP based Dell SonicWALL Simple Provisioning Protocol (SSPP) channel. The SonicOS device then sends the update to the SonicPoint through this channel, and the SonicPoint restarts with the updated configuration. State information is provided by the SonicPoint, and is viewable on the SonicOS device throughout the entire discovery and provisioning process.
Enabling Auto Provisioning
SonicPoint Auto Provisioning can be enabled to automatically provision the following wireless SonicPoint provisioning profiles:
Initial configuration of a wireless SonicPoint is provisioned from a SonicPoint profile that is attached to the wireless LAN managing zone. After a wireless SonicPoint is provisioned, the profile remains an offline configuration template that is not directly associated with any SonicPoint. So, modifying a profile does not automatically trigger a SonicPoint for reprovisioning.
Before SonicPoint Auto Provisioning was introduced, administrators had to manually delete all SonicPoints, and then synchronize new SonicPoints to the profile that was time consuming. To simplify configuration and ease management overhead, SonicPoint Auto Provisioning was introduced.
Checkboxes to enable Auto Provisioning for each of the SonicPoint Provisioning Profiles are provided in the Network > Zones > Configure > Wireless configuration window.
When the checkbox for a provisioning profile is checked and that profile is changed, all SonicPoint devices linked to that profile are reprovisioned and rebooted to the new operational state.
Topics:
Enabling SonicPoint Auto-Provisioning for a WLAN Zone
To enable SonicPoint Auto Provisioning:
1
2
Click the Edit icon for a WLAN (or any other wireless) SonicPoint profile. The Edit Zone window displays.
3
Select the Wireless tab.
4
Under SonicPoint Settings, select Auto Provisioning for each of the SonicPoint Provisioning Profiles that you want to be auto provisioned.
5
Remote MAC Access Control for SonicPoints
Enable Remote MAC Access Control has been added for SonicPoints and for VAPs:
To enable Remote MAC Access Control on a SonicPoint:
1
Go to the SonicPoint > SonicPoints page.
2
The Add/Edit SonicPoint Profile dialog appears. The Remote MAC Address Access Control Settings panel appears at the bottom of the dialog.
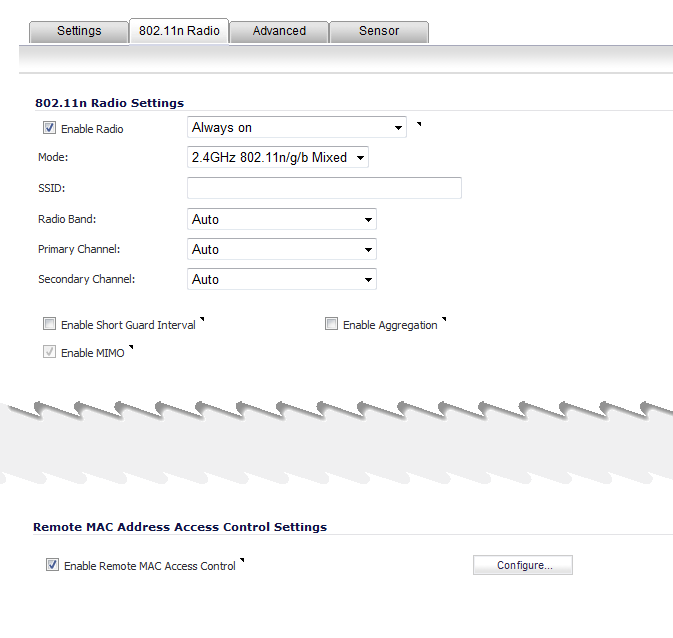
SonicPoint N Profile Dialog
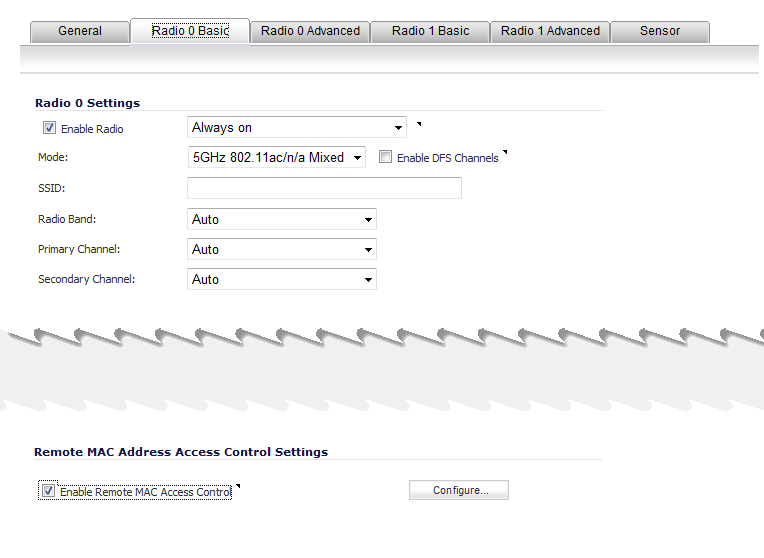
SonicPoint NDR and SonicPoint ACe/ACi/N2 Radio 0 Profile Dialog
 
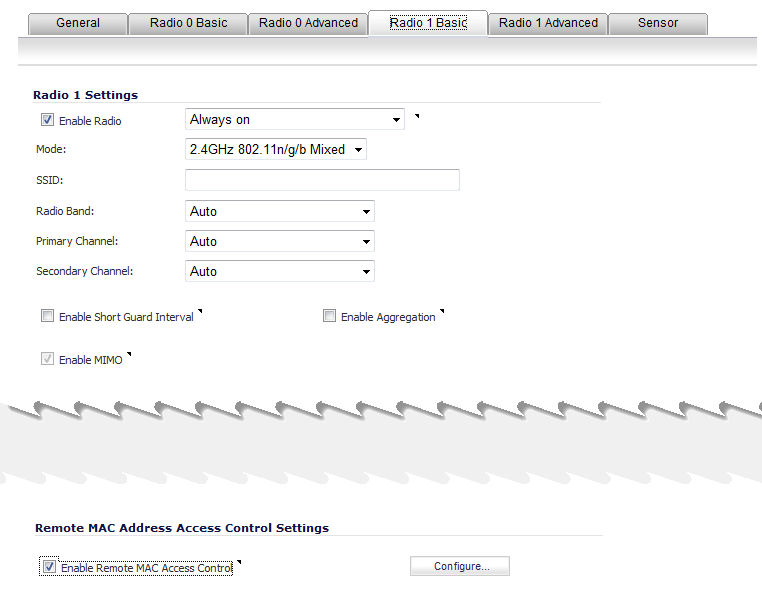
SonicPoint NDR and SonicPoint ACe/ACi/N2 Radio 1 Profile Dialog
3
For SonicPoint N, click the 802.11n Radio tab.
For SonicPoint NDR or SonicPoint ACe/ACi/N2, click the Radio 0 or Radio 1 tabs.
4
Select Enable Remote MAC Access Control.
5
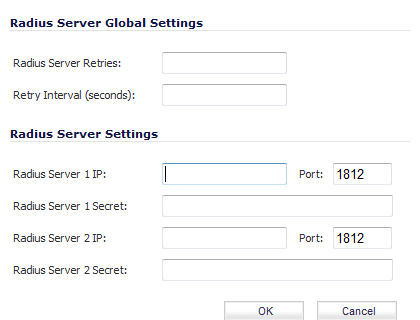
Click Configure. The Radius Server Settings appear.
6
7
Click OK.
Provisioning SSL VPN Server Information to SonicPoint N
To provision SSL VPN Server information to a SonicPoint N device:
1
Go to the SonicPoint > SonicPoints page.
2
3
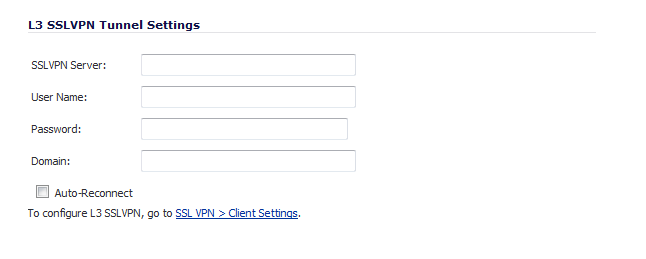
Under L3 SSLVPN Tunnel Settings, enter the SSL VPH Server, User Name, Password, and Domain.
4
Select the Auto Reconnect option.
To push the settings to the SonicPoint device, connect the SonicPoint device to SSL VPN Server through a Layer 2 connection.
Establishing an SSL VPN Tunnel to a Remote Network
If the remote network site supports DHCP, set the SonicPoint to the factory default settings and connect it to the network. The SonicPoint automatically gets the IP address and the Gateway from DHCP. The SSL VPN server information is saved when the factory default settings are in place. After the SonicPoint gets its DHCP lease, it connects to the remote SonicWALL Gateway.
If the remote network site does not support DHCP, set the SonicPoint to the factory default settings and set the network parameters. Then the SonicPoint automatically connects to the remote SonicWALL Gateway.