|
1
|
|
2
|
|
3
|
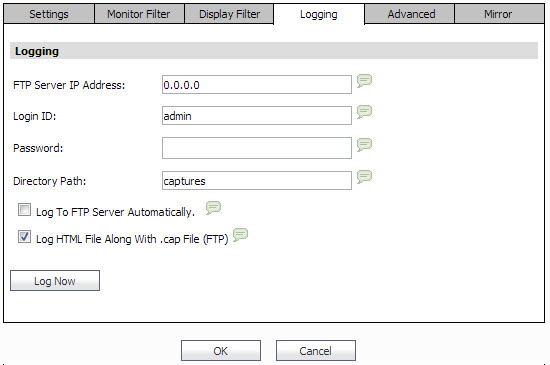
In the FTP Server IP Address box, type the IP address of the FTP server.
|
|
4
|
In the Login ID box, type the login name that the SonicWALL appliance should use to connect to the FTP server.
|
|
5
|
In the Password box, type the password that the SonicWALL appliance should use to connect to the FTP server.
|
|
6
|
In the Directory Path box, type the directory location for the transferred files. The files are written to this location relative to the default FTP root directory.
For libcap format, files are named “packet-log--<>.cap”, where the <> contains a run number and date including hour, month, day, and year. For example, packet-log--3-22-08292006.cap. For HTML format, file names are in the form “packet-log_h-<>.html”. For example, an HTML file name is: packet-log_h-3-22-08292006.html. |
|
7
|
To enable automatic transfer of the capture file to the FTP server when the buffer is full, select Log To FTP Server Automatically. Files are transferred in both libcap and HTML format.
|
|
8
|
To enable transfer of the file in HTML format as well as libcap format, select Log HTML File Along With .cap File (FTP).
|
|
9
|
To test the connection to the FTP server and transfer the capture buffer contents to it, click Log Now. In this case the file name contains an ‘F’.
For example, packet-log-F-3-22-08292006.cap or packet-log_h-F-3-22-08292006.html. |