Authorized Access Points In the Group level view, you can specify authorized access points for SonicOS Standard and Enhanced. To enter authorized access points, complete the following steps: SonicOS Standard In SonicOS Standard only, to prevent rogue access points, you must specify each authorized access point within the network. 1 
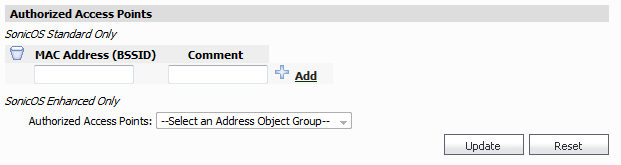
Enter the MAC address of an access point in the MAC Address (BSSID) field. 2 Enter a comment about the access point. 3 Click Add. The Modify Task Description and Schedule pop-up window displays. 4 Enter a Description. 5 Select a Schedule: • Default • Immediate • At: (select a custom date and time) 6 Click Update. To clear all screen settings and start over, click Reset. SonicOS Enhanced For SonicOS Enhanced only, to authorize access points: 1 Select one of the options from the Authorized Access Points pull-down list. 2 Click Update. To clear all screen settings and start over, click Reset.