In Events > Settings, you can specify the following:
|
1
|
|
2
|
Under Email Alert Format Preferences, select whether the email alert will be sent as HTML, Plain Text, or Plain Text (Simple). The Simple setting sends a very short email to ensure that the email is not cut off by character limits.
|
|
3
|
Click Update.
|
In the Events > Severity screen, you can create your own severity levels or use predefined severity levels. You can delete severity levels in this screen as well. Defining the severity priority can also be performed in this screen. Users with permissions to the Severity screen can create and edit these severities.
|
•
|
Information: This is the lowest severity level
|
|
•
|
Warning: This is a mid-range severity level
|
|
•
|
Critical: This is the highest severity level
|
|
1
|
On the Console panel, navigate to the Events > Severity screen. On this screen, you can resequence the severities in importance by entering a severity sequence number in each field.
|
|
•
|
To add a new severity level, click Add Severity.
|
|
3
|
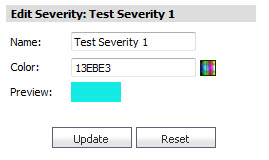
In the Add Severity dialog box, type a name for the new severity level in the Name field.The Domain pull-down list is only available for a Super Admin.
|
|
5
|
Click Update.
|
|
6
|
In the Console > Events > Severity screen, assign the level for the new severity you created by changing the numbering in the Sequence column of the Severity table.
|
|
7
|
Click Update.
|
|
1
|
To edit a Severity, click the Edit icon.
|
|
3
|
To delete a Severity(s), select the check box(es) for the severitie(s) you wish to delete, then click Update. You can also click Delete in the Edit column, to delete a single report.
|
In the Events > Threshold screen, you can view existing event thresholds, enable or disable them, and configure their elements. A threshold defines the condition for which an event is triggered. Predefined thresholds have names similar to predefined Alert Types. Each threshold can contain one or more threshold elements. An element consists of an Operator, a Value, and a Severity.
|
1
|
|
2
|
Click Add Threshold to add a new threshold.
|
|
4
|
Select Visible to Non-Administrators if you want the threshold to be visible to non-administrators. If this is selected, anyone can view the threshold elements and use the threshold in customized reports.
|
|
5
|
Click Update.
|
|
1
|
To add a threshold element to the threshold, click
|
|
3
|
In the Operator pull-down menu, select from the list of operators.
|
|
4
|
In the Value field, enter a value.
|
|
5
|
In the Description field, enter a description to override the auto-generated description.
|
|
6
|
In the Severity field, select a severity.
|
|
7
|
Disable allows you to temporarily disable the threshold without deleting it. Select Disable if you want to disable the threshold. For more information about the enabling and disabling feature, see Enabling/Disabling Thresholds and Threshold Elements .
|
|
8
|
Click Update.
|
|
1
|
|
2
|
|
3
|
Click Update.
|
|
1
|
On the Events > Threshold screen, click the
The Edit Threshold pop-up window displays: |
|
2
|
In the Operator field, select from the drop down menu the type of operator to apply to your threshold element.
|
|
3
|
In the Value field, enter the value for your threshold element.
|
|
4
|
In the Description field, enter the description for your threshold element.
|
|
5
|
In the Severity field, select the severity priority from the drop down menu. These are color coded for your easy reference on the Events > Threshold screen.
|
|
6
|
|
7
|
Click Update.
|
The GEM feature provides a Disable check box that allows you to disable or enable thresholds or individual elements within that threshold. Disabling an element or threshold rather than deleting it is beneficial because of the time invested in creating it. If it is needed again, you can simply enable it.
|
1
|
On the Console panel, navigate to the Events > Threshold screen. On this screen, you are able to view existing Thresholds. You can also view existing elements within those thresholds by clicking the expand button by a threshold. You have the following two options for the enabling/disabling feature:
|
|
•
|
|
3
|
|
4
|
Click Update.
|
On the Events > Threshold screen, you can delete Thresholds and Threshold Elements. This can be done by using Delete Threshold(s)/Element(s). To view the elements within a threshold, expand the threshold. You can select which threshold or elements within that threshold to delete. If you delete a threshold, the elements within that threshold are automatically deleted as well.
|
1
|
On the Events > Threshold screen, optionally expand the threshold to view the individual elements.
|
|
4
|
When you have finished with your selections, click Delete Threshold(s)/Element(s).
|
The next component on the Console panel is Events > Schedule. In this screen, you can add, delete, or configure schedules and schedule groups.
Schedule groups are one or more schedules grouped within an object. Administrators and Owners can edit these objects. Other users should be able to view or use them only if Visible to Non-Administrators is selected.
In Events > Schedules you can add, delete, or configure schedules. You will see your schedules and schedule groups, their descriptions, and whether they are enabled. You can also individually delete one schedule or schedule group at a time by selecting the trash-icon on the right hand side for each row. For quick reference, you can hover your mouse over the descriptions to quickly view the type of schedule and the days and times when it is active.
|
1
|
|
2
|
In the Name field, enter a name for the schedule.
|
|
3
|
In the Domain field, click the pull-down list and select a name. This function is for Super Admins only.
|
|
4
|
In the Description field, add a description for the schedule.
|
|
5
|
Select Visible to Non-Administrators if you want the schedule to be visible and usable by non-administrators.
|
|
6
|
|
7
|
Click Invert to create a schedule that is “off” during the dates and times that you specify.
|
|
•
|
|
•
|
|
9
|
|
10
|
To delete an entry from the Schedule List text box, select the entry that you want to delete, and then click Delete. Click Delete All to delete all entries.
|
|
11
|
Click Update when you are finished.
|
To edit an existing schedule, click the  Edit icon on the right side of the Events > Schedule screen. The screen and procedure for editing are the same as those for adding a schedule. See Adding an Event Schedule .
You can combine several schedules into a schedule group on the Events > Schedule screen.
|
1
|
|
2
|
Enter the name of your schedule group in the Name field.
|
|
3
|
Enter a description of your schedule group in the Description field.
|
|
4
|
Click Visible to Non-Administrators to allow this schedule group to be viewed and used by non administrators.
|
|
5
|
Click Disable to temporarily disable the schedule group.
|
|
6
|
In the Schedules field, select the schedule(s) to add to your schedule group, and then use the arrow buttons to move the selected schedule into or out of the group. To move multiple schedule groups and/or schedules all at once, hold the CTRL button on your keyboard while making your selections.
|
|
7
|
Click Update.
|
To edit an existing schedule group, click the Edit icon on the right side of the Events > Schedule screen. The screen and procedure for editing are the same as those for adding a event schedule group. See Adding an Event Schedule Group .
|
1
|
Navigate to the Events > Schedule screen.
|
|
2
|
Click the check boxes of the schedule groups or schedules that you want deleted. When you click Schedule Group, the schedules within that schedule group are deleted as well.
|
|
4
|
To delete the selected schedule group(s) or remove the selected schedules from a group, click Delete Schedule Group(s)/Remove Schedules from Group.
|
|
5
|
To delete the selected schedule(s), click Delete Schedule(s).
|
The Console > Events > Alert Settings screen provides predefined alerts that apply to GMS as a whole. These are status type alerts, and do not use thresholds. You can hover your mouse over these to display information about them. You can configure the predefined alerts to use different destinations and schedules.
|
1
|
|
2
|
Click the Add Alert link.
|
|
4
|
Enable Visible to Non-Administrators if you want your Alert to be visible to non-administrators.
|
|
5
|
Enable Disable to disable this Alert.
|
|
6
|
Enter a Polling Interval value (in seconds: 60-86400)
|
|
1
|
Click the Alert Type pull-down list and select an alert type.
|
Most of the Alert Types require you to edit content. Editing Contents allows the user to pick additional information, in a granular fashion, on which the alerting has to be performed.
|
2
|
Click the Edit Content link. The Edit Contents for Alert Type Unit Status pop-up window displays.
|

|
3
|
Click the Threshold pull-down list and select a threshold.
|
|
4
|
|
1
|
Click the Add Destination link under the Destination/Schedule section. The Destination field designates where you want alerts to be sent. You have a maximum number of five destinations.
|
|
2
|
Click the Schedule pull-down list, then select a schedule type. The Schedule field designates the frequency of when you want alerts to be sent to the destination(s).
|
|
3
|
Click Update to finish adding an alert.
|
|
1
|
Select Enabled of the alert(s) you wish to enable.
|
|
2
|
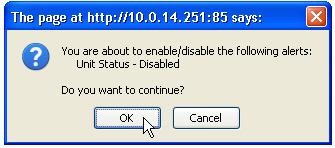
Click the Enable/Disable Alert(s) link. A confirmation window displays. Click OK to enable or disable.
|
|
1
|
Deselect Enabled of the alert(s) you wish to disable.
|
|
2
|
Click the Enable/Disable Alert(s) link. A confirmation window displays. Click OK to enable or disable.
|
|
2
|
Click the Delete Alert link. A confirmation window displays.
|
|
3
|
Click OK to delete.
|
|
1
|
Click the Configure icon of the alert you wish to edit.
|
The Edit Alert page displays.
You can view a list of current alerts on the Events > Current Alerts page of the Firewall, SRA, CDP, or ES panel. Select a global view, group, or unit to view current alerts for your selection.
