This sections provides example configurations for the Manage Backups, Immediate Backup/Restore, and Scheduled Backup Settings sections on the System > Backup/Restore page.
|
1
|
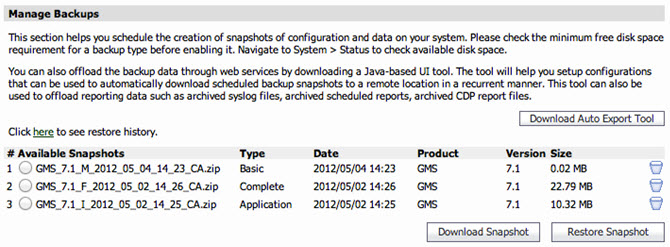
Click Download Auto Export Tool.
The tool downloads to your local system. See Data Export Wizard for configuration procedures. |
|
2
|
Click Here to view the restore history.
|
|
3
|
|
4
|
To restore a backup snapshot, select an available snapshot and then click Restore Snapshot.
The Restore Options pop up window displays. |
|
b
|
Click OK.
|

|
1
|

|
•
|
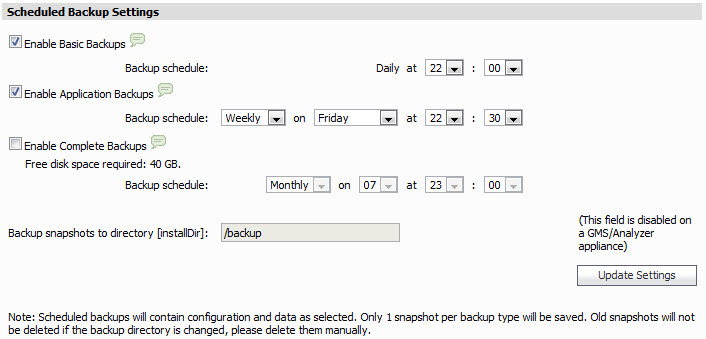
Basic—performs a daily backup of configuration files. This option is enabled by default.
|
|
•
|
Application—schedules a weekly or monthly backup of configuration files, the central/SGMS database, HM recordings, and firmware images. A weekly backup is scheduled by default.
|
|
•
|
Complete—schedules a weekly or monthly backup of configuration files, the central/SGMS database, HM recordings, firmware images, reporting database, and archived scheduled reports (only from a default active directory). This backup option is disabled by default.
|
|
b
|
|
a
|
|
b
|
Upload a snapshot by clicking Choose File, selecting a file to backup, and then clicking Restore Now.
|
|
1
|
|
2
|
|
3
|
|
4
|
Use the Backup Schedule drop down lists to select the month or week, day, and time for the Application Backup.
|
|
5
|
Select Enable Complete Backups.
This check box is disabled by default. Complete backups should be enabled only when there is enough disk space available (the free disk space required is displayed). If there is not enough space available, backups are not taken. |
|
6
|
Use the Backup Schedule drop down lists to select the month or week, day, and time for the Complete Backup.
|
|
7
|
Enter a directory to backup the snapshots in the Backup snapshots to directory [installDir]: text field.
|
|
8
|