|
1
|
Log in as admin to your UMA appliance and navigate to the System > Backup/Restore page.
|
|
2
|
Click Download Auto Export Tool under Manage Backups.
|
|
3
|
Click Extract, browse to the desired folder such as C:\Program Files, and select the Use folder names option to extract the files from the zip file into a sub-folder called auto_export.
|
|
4
|
Open the README.txt file and read the instructions for using the wizard. On a Windows machine, double-click runWizard.bat to launch the wizard. On a Linux machine, execute runWizard.sh.
|
|
6
|
Select appears. Click Select to open a dialog showing existing configuration files in the auto_export/configs directory. Click the desired file and then click Open.
|
|
•
|
GMS Serial – The serial number of the UMA system
|
|
•
|
IP/Domain – Either the domain name or the IP address of the UMA system
|
|
•
|
HTTPS Port – GMS Web Services always uses the HTTPS protocol to provide the fundamental security mechanism. By default, the port number is 8443.
|
|
•
|
Username – The GMS administrator’s username
|
|
•
|
Password – The GMS administrator’s password
|
|
9
|
The wizard displays the available export Web services. Select the check box for each service that should be included in the configuration and then click Next.
For example, select the System Backup export service to include it in the export script to offload system backups from a UMA system. |
|
10
|
The wizard displays a configuration summary. After reviewing the summary, click Save to create the configuration file.
|
|
11
|
Type the file name into the Input dialog box, or accept the pre-populated name if editing an existing configuration script. Click OK.
The wizard saves the file in the .../auto_export/configs directory with ".ec" as the file name extension. |
|
12
|
Click Done to exit the wizard.
|
|
13
|
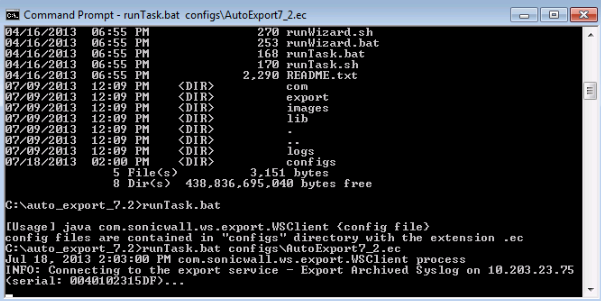
You can now set up a scheduled task (in Windows) or a cron job (in Linux) to execute runTask.bat or runTask.sh to periodically download backup data from the UMA. The downloaded backup data is stored in the …/auto_export/export directory.
|