|
1
|
|
3
|
|
1
|
|
3
|
|
4
|
|
1
|
|
3
|
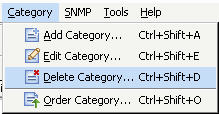
Select Forcibly delete all devices under category to delete all devices in this category.
|
|
4
|
|
1
|
|
3
|
|
4
|
|
1
|
|
2
|
Select a device or group to monitor and click Add in the center of the screen. Repeat this step for each device or group to monitor.
|
|
3
|
Click Next. The second page of the Add GMS Device Wizard appears.
|
|
4
|
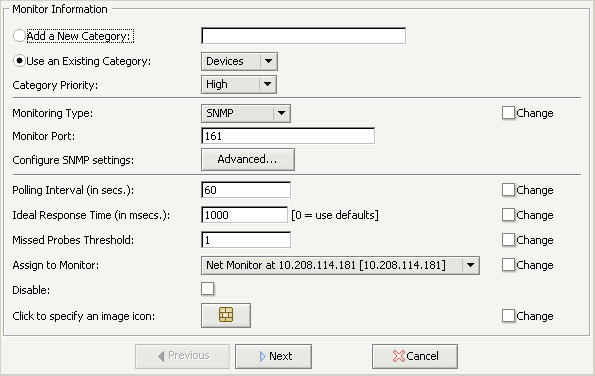
Select the category to which the SonicWALL appliance(s) are added from the Use an Existing Category list box. To add the SonicWALL appliance(s) to a new category, enter the category name in the Add a New Category field.
|
|
5
|
Select the priority of the appliance(s) from the Category Priority list box.
|
|
6
|
Select how the SonicWALL appliance(s) are monitored from the Monitoring Type list box and specify a Port if applicable.
If choosing SNMP as the monitoring type, you must enter a Monitor Port. Configure the following advanced settings by clicking Advanced. |
|
7
|
Press OK to save SNMP advanced settings.
|
|
8
|
Specify how often the SonicWALL appliance(s) will be tested in the Polling Interval field.
|
|
9
|
Enter the ideal response time (IRT) in the Ideal Response Time field (default: 500 milliseconds). SonicWALL appliances that take between 1 and 1.5 times the IRT are marked as Slow. SonicWALL appliances that take between 1.5 and 2 times the IRT are marked as Very Slow.
|
|
10
|
Select the Agent that completes the testing from the Assign to Monitor list box.
|
|
11
|
Optional. To disable monitoring of the SonicWALL appliance(s), select Disable.
|
|
13
|
Click Next to continue.
If you did not configure the Monitoring Type as SNMP, the Assign Privileges page displays. See Step 14. If you configured the Monitoring Type as SNMP, the SNMP Realtime Monitor Template Information page displays. Select the Realtime Monitor Template to apply to this device. Then, click Next. |
|
15
|
Click Finish to acquire the new device.
|
* Custom MIBs might be required for some devices. Custom MIBs allow polling Non-SonicWALL or Non-Standard based SNMP enabled devices and to poll information specific to a certain device based on Manufacturer ID. These MIBs have to be placed in the etc\mibs folder by the GMS Administrator on the Web Server and Monitoring Agent machine(s) in order to use it for probing.
|
1
|
|
2
|
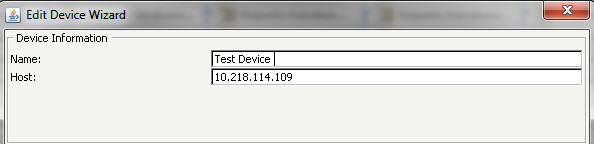
Enter a name for the device in the Name field and its IP address or hostname in the Host field and click Add. Repeat this step for each device to monitor.
|
|
3
|
Click Next. The second page of the Add Non-GMS Device Wizard displays.
|
|
4
|
Select the category to which the device(s) is added from the Use an Existing Category list box. To add the device to a new category, enter the category name in the Add a New Category field.
|
|
5
|
Select the priority of the device(s) from the Category Priority list box.
|
|
6
|
Select how the SonicWALL appliance(s) are monitored from the Monitoring Type list box and specify a Port if applicable.
If choosing SNMP as the monitoring type, you must enter a Monitor Port. Configure the following advanced settings by clicking Advanced. |
|
7
|
Press OK to save SNMP advanced settings.
|
|
8
|
Specify how often the SonicWALL appliance(s) will be tested in the Polling Interval field.
|
|
9
|
Enter the ideal response time (IRT) in the Ideal Response Time field (default: 500 milliseconds). SonicWALL appliances that take between 1 and 1.5 times the IRT is marked as Slow. SonicWALL appliances that take between 1.5 and 2 times the IRT is marked as Very Slow.
|
|
10
|
Select the Agent that executes the testing from the Assign to Monitor list box.
|
|
11
|
Optional. To disable monitoring of the SonicWALL appliance(s), select Disable.
|
|
13
|
Click Next to continue.
If you did not configure the Monitoring Type as SNMP, the Assign Privileges page displays. See Step 14. If you configured the Monitoring Type as SNMP, the SNMP Realtime Monitor Template Information page displays. Select the Realtime Monitor Template to apply to this device. Then, click Next. |
|
15
|
Click Finish to acquire the new device.
|
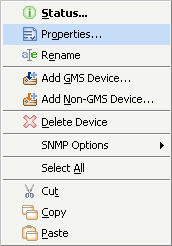
You can edit some of the properties of a specific device by right-clicking the device you want to edit, then click Properties. Multiple devices can be selected by holding Ctrl + selecting the devices.
The Change check box appears next to each of the fields that have a difference in values for that field among the devices selected. If there are no differences, the field does not appear. After Change is selected, the value for the corresponding field is overwritten on all selected fields.
Note that selecting Disable applies changes to all selected devices.
Click Finish to complete editing the device settings.
To delete a device, right click on the device you wish to delete and click Delete Device. A warning displays, confirming the device(s) you have selected to delete. Click Yes to continue.
