ActiveSync is managed through the Portals > Offload Web Application > Offloading > Security Settings page:

To configure ActiveSync authentication, clear the Disable Authentication Controls check box to display the authentication fields. Select the Enable ActiveSync authentication check box and then type the default domain name. The default domain name will not be used when the domain name is set in the email client’s setting.
The Log > View page is updated when a Web application is offloaded. Most mobile systems (iPhone, Android, etc.) support ActiveSync. These log entries identify when the client began to use ActiveSync through the offloading portal. The ActiveSync message identifies the device ID (ActiveSync: Device Id is…) for an ActiveSync request unless a client sets up the account and the request does not contain a device ID. The ActiveSync label is not used in log entries for anonymous users who use ActiveSync.
|
1
|
Create a Domain name of webmail.example.com. Set the Active Directory domain and Server address to webmail.example.com. Set the Portal name to webmail.
|


|
3
|
|
4
|
|
5
|
Set the virtual host name, for example, webmail.example.com. The virtual host name should be resolved by the DNS server. Otherwise, modify the hosts file in the Android phone.
|
|
6
|
Select the Enable ActiveSync Authentication check box. Leave the default domain name blank or input webmail.example.com.
|

|
8
|
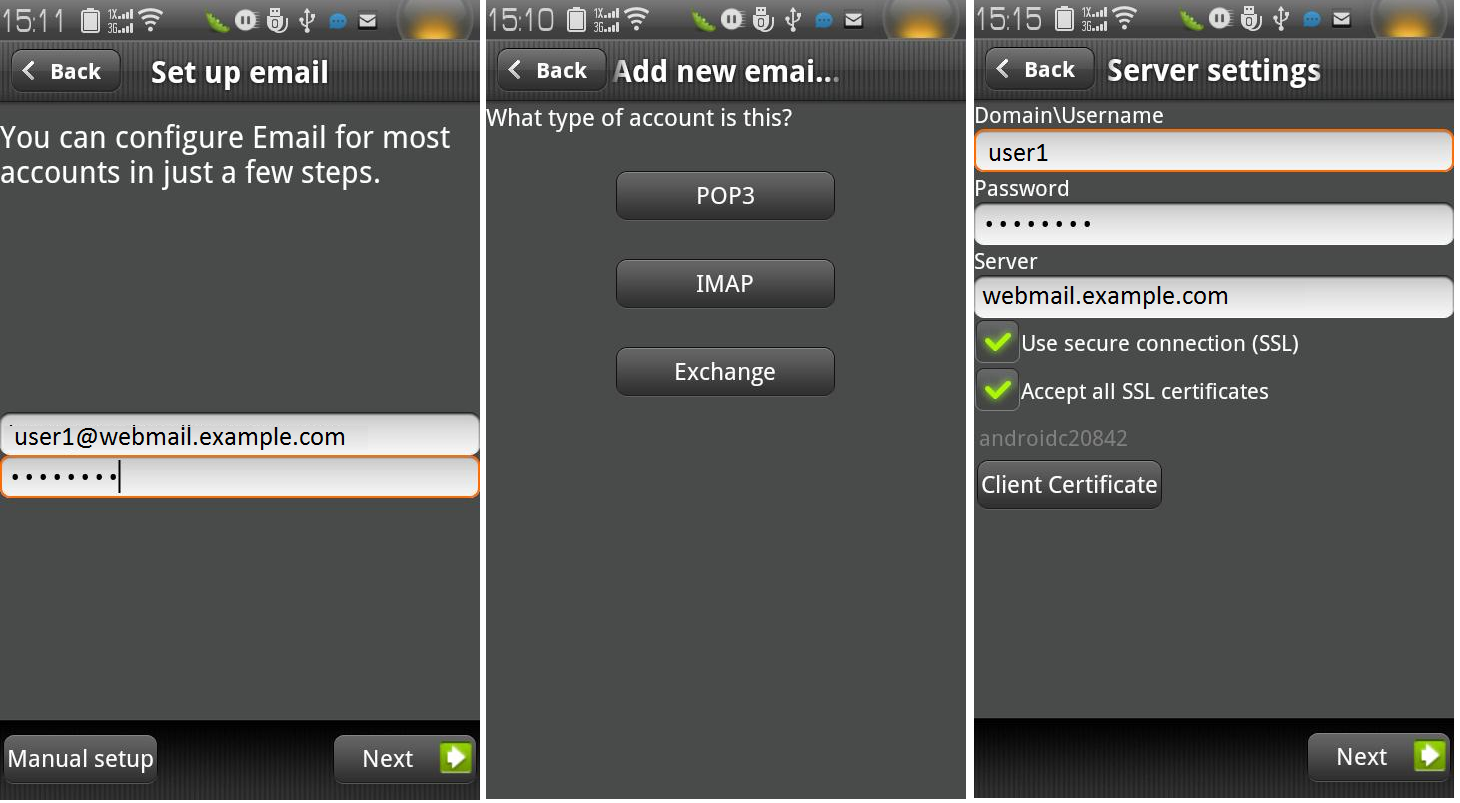
Choose Exchange.
|
|
9
|
Input your Domain\Username, Password, and Server. No domain name is displayed, so use the default domain name specified in the offloading portal’s setting. Select Accept all SSL certificates and click Next.
|
|
10
|
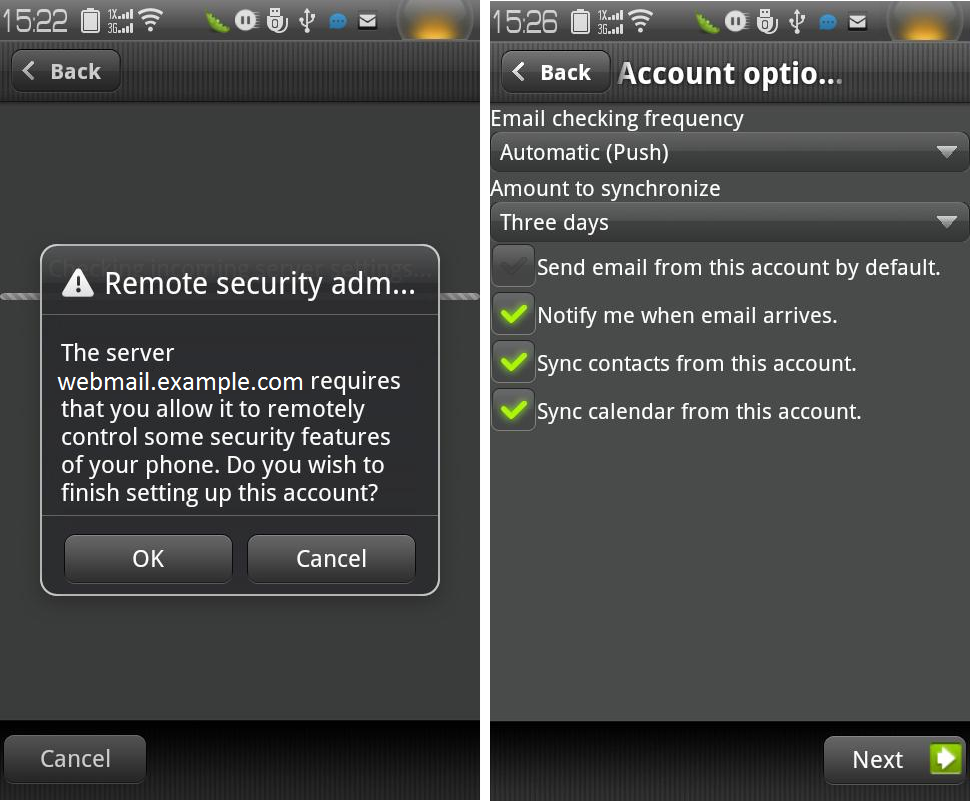
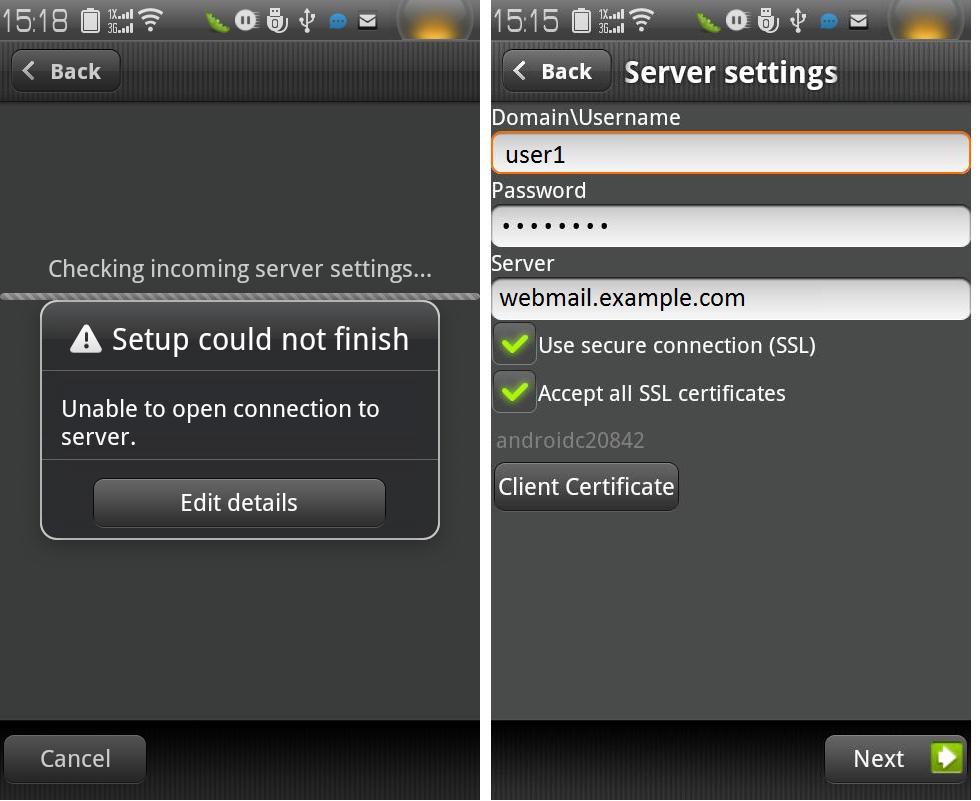
If the AD authentication times out, the Setup could not finish message is displayed. Wait about 20 seconds and try again. You can also check the SRA log to see if the user logged in successfully. You may not encounter this problem if the AD authentication is fast.
|
|
11
|
When the authentication finishes, a security warning appears. Click OK to continue, modify your account settings, and click Next.
|