Secure Virtual Assist provides the following benefits:
|
•
|
Simplified and effective customer support - Support staff can use Secure Virtual Assist to directly access customers computers to troubleshoot and fix problems. This eliminates the need for customers to try to explain their problems and their computer’s behavior over the phone.
|
|
•
|
Time and cost savings - Secure Virtual Assist eliminates the need for support staff to visit customers to troubleshoot problems and reduces the average time-to-resolution of support calls.
|
|
•
|
Educational tool - Trainers and support staff can use Secure Virtual Assist to remotely show customers how to use programs and tools.
|
|
•
|
Seamless integration with existing authentication system - Ensures that the customers are who they say they are. Alternatively, the local database of the SRA appliance and tokenless two-factor authentication can be utilized.
|
|
•
|
Secure connections - 256-bit AES SSL encryption of the data by the SRA appliance provides a secure environment for the data and assists in the effort to be compliant with regulations like Sarbanes-Oxley and HIPAA.
|
|
•
|
Greater flexibility for remote access - Using the Secure Virtual Access functionality, support staff can access their personal systems located outside the LAN of the SRA appliance.
|
The following sections describe how the Secure Virtual Assist feature works:
|
9
|
If at anytime the customer wants to end the session, they can take control and click on the End Virtual Assist button in the bottom right corner of the screen.
|
Secure Virtual Assist includes a chat feature that allows the technician and customer to communicate using an instant message-style chat function. Either the technician or the customer can initiate a chat session by clicking on the Chat button in the Secure Virtual Assist taskbar.
Installing and using Secure Virtual Access requires administrative privileges.
|
1
|
|
2
|
Click on the Virtual Assist button.
|
![]()
|
3
|

|
4
|
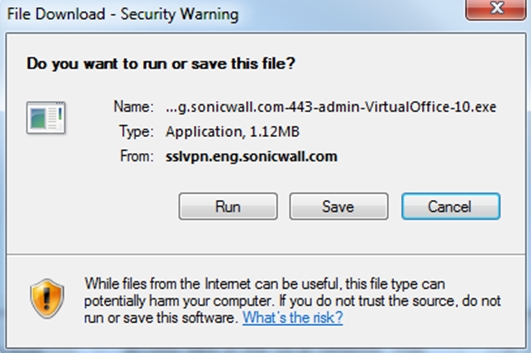
If the Virtual Assist plug-in is not installed, the File Download window displays, and Secure Virtual Assist attempts to automatically install. Click Run to launch the program directly, or click Save to save the installer file to your computer, and then manually launch it.
|
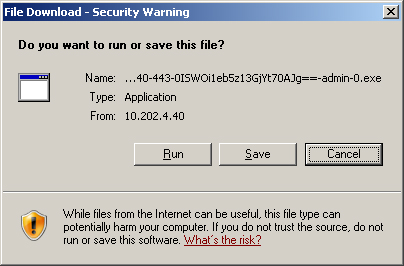
When downloading through IPv6, the File Download window displays IPv6 information.
|
6
|
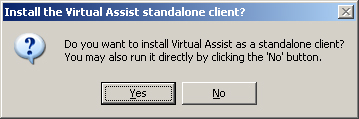
A pop-up window asks if you would like to install Secure Virtual Assist as a standalone client. Click Yes to save the application. A shortcut will be added to your desktop and a link to the application will be added to the program list on your Start Menu. Click No to launch Secure Virtual Assist without saving the application for future use.
|
|
7
|
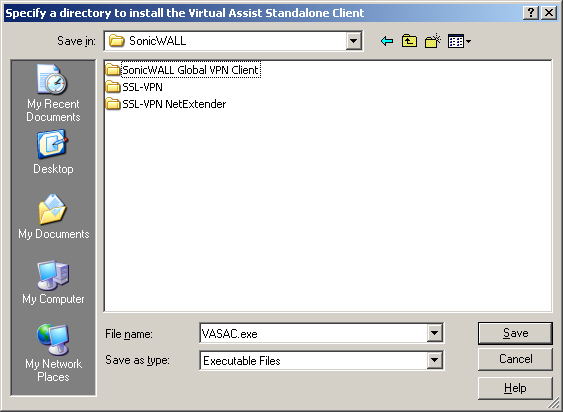
If you clicked Yes to save the application, you will be prompted to select a location to save the file. Select an appropriate location, such as C:\Program Files\SonicWALL.
|
|
8
|
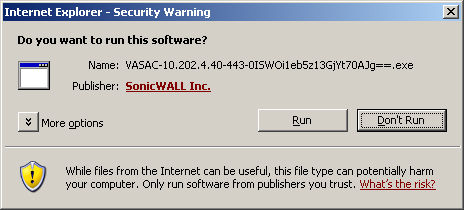
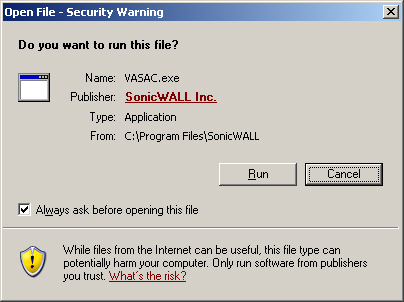
When Secure Virtual Assist launches for the first time, you may see a security warning pop-up window. De-select the Always ask before opening this file check box to avoid this window in the future. Click Run.
|
To invite a customer to a Secure Virtual Assist session by email:
|
2
|
Enter the customer’s email address in the Customer E-mail field.
|
|
3
|
Optionally, enter Technician E-mail to use a different return email address than the default technician email.
|
|
4
|
Optionally, enter an Additional Message to the customer.
|
|
5
|
Click Invite. The customer will receive an email with an HTML link to launch Secure Virtual Assist.
|

The customer has a small tool bar in the bottom right of their screen, with three options.
|
•
|
Active - Toggles to the View Only mode, where the technician can view the customer’s computer but cannot control the computer.
|
|
•
|
Chat - Initiates a chat window with the technician.
|
|
•
|
End Virtual Assist - Terminates the session.
|
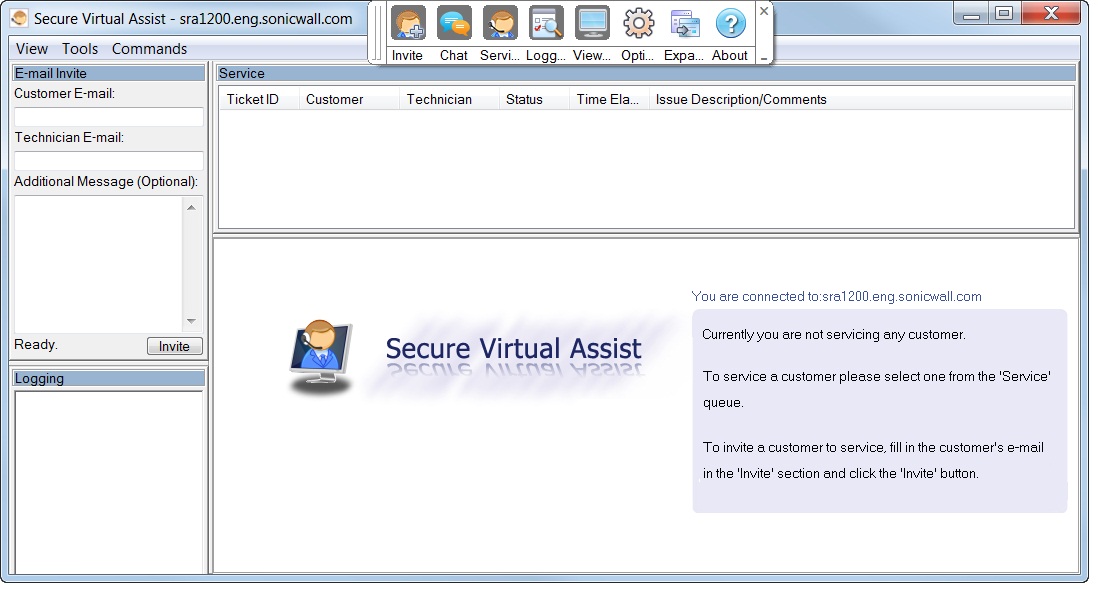
The Technician’s view of Secure Virtual Assist includes a taskbar with a number of options.
In Windows, the taskbar contains the following buttons:

|
•
|
Refresh - Refreshes the display of the customer’s computer.
|
|
•
|
File Transfer - Launches a window to transfer files to and from the customer’s computer. see Using the Secure Virtual Assist File Transfer for more information.
|
|
•
|
Chat - Launches the chat window to communicate with the customer. The technician can also use the dedicated chat window in the bottom left window of the Secure Virtual Assist application.
|
|
•
|
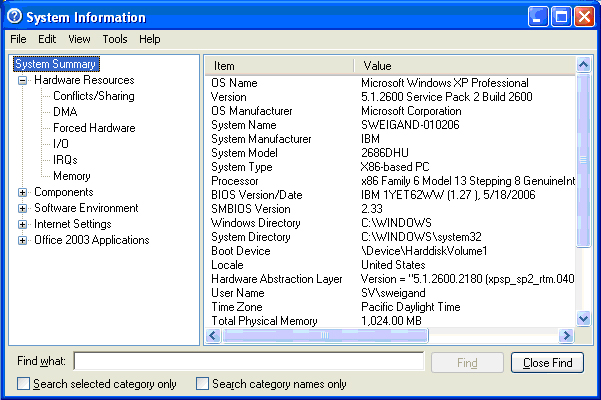
System Info -Displays detailed information about the customer’s computer.
|
|
•
|
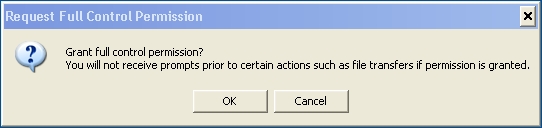
Reboot Customer - Reboot the customer’s computer. Unless you have Requested full control, the customer will be warned about and given the opportunity to deny the reboot.
|
|
•
|
Switch Screen - Switches to a second monitor if the customer’s computer has more than one monitor configured.
|
In MacOS, the taskbar contains the following buttons:

|
•
|
Refresh - Refreshes the display of the customer’s computer.
|
|
•
|
Auto Scale - Adjusts the screen to fit the window size.
|
|
•
|
Full Screen - Adjusts the screen to fill the entire window.
|
|
•
|
System Info -Displays detailed information about the customer’s computer similar to that shown for a Windows computer.
|
|
•
|
Reboot - Reboot the customer’s computer. Unless you have Requested full control, the customer will be warned about and given the opportunity to deny the reboot.
|
|
•
|
Chat - Launches the text chat window to communicate with the customer. The technician can also use the dedicated chat window in the bottom left window of the Secure Virtual Assist application.
|
|
•
|
File Transfer - Launches a window to transfer files to and from the customer’s computer. see Using the Secure Virtual Assist File Transfer for more information.
|
|
•
|
Hide Toolbar - Hides the taskbar from view.
|
|
•
|
Gray Color - Displays everything in grey monochrome
|
|
•
|
Full Screen - Hides all of the Secure Virtual Assist toolbars and displays the customer’s desktop on the technician’s entire screen with the Secure Virtual Assist taskbar in the top left corner.
|
If the Secure Virtual Assist taskbar doesn’t display, move your mouse to the top middle of the screen. Right-click on the taskbar and click Restore to exit full-screen mode.
|
•
|
Auto Scaling - Zooms the display to fill the entire Secure Virtual Assist window.
|
|
•
|
True Size - Zooms to 100%.
|
|
•
|
Side Bar - Toggles the display of the side bar with the email invitation and chat windows.
|
|
•
|
Top Bar - Toggles the display of the top bar with the customer queue and toolbar.
|
|
•
|
All Bars - Displays both the side bar and top bar.
|
|
•
|
No Bar - Hides both the side bar and top bar.
|
![]()
|
•
|
Desktop
|
|
•
|
Up
|
|
•
|
Download
|
|
•
|
Upload
|
|
•
|
Delete
|
|
NOTE: When deleting or over-writing files, the customer is warned and must give the technician permission unless the technician has elected Request Full Control and the customer has confirmed.
|
|
•
|
New folder
|
|
•
|
Rename
|
When a file is transferring, the transfer progress is displayed at the bottom of the File Transfer window. Click the Exit button to cancel a transfer in progress.
|
NOTE: File Transfer supports the transfer of single or multiple files. It does not currently support the transfer of directories. To select multiple files, hold down the Ctrl button while clicking on the files.
|
If Secure Virtual Access has been enabled on the Virtual Assist tab on the Portals > Portals page of the management interface, users should see a link on the portal to set-up a system for Secure Virtual Access. To enable Secure Virtual Access within the SRA management interface, see Configuring Per-Portal Virtual Assist Settings .
|
1
|
|
•
|
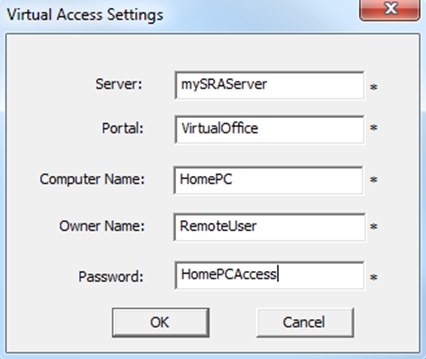
Server: This should be the name or IP address of the appliance the technician normally accesses the Virtual Office from outside the management interface (Do not include “https://”).
|
|
•
|
Portal: The name of the portal the technician would normally login to.
|
|
•
|
Computer Name: This is an identifier for the system to help differentiate between other systems that may be waiting for support in the queue.
|
|
•
|
Password: This is a password the technician must enter prior to accessing the system through the support queue.
|
This system’s identifier name should now appear in the technician’s support queue displayed on the Secure Virtual Assist > Status page within the management interface.Upon double-clicking the system listing, the technician will be prompted to provide the password established during system set-up to gain Secure Virtual Access to the system.