Creating a virtual host allows users to log in using a different hostname than your default URL. For example, sales members can access https://sales.company.com instead of the default domain, https://vpn.company.com that you use for administration. The Portal URL (for example, https://vpn.company.com/portal/sales) will still exist even if you define a virtual host name. Virtual host names enable administrators to give separate and distinct login URLs to different groups of users.
|
1
|
Navigate to Portals > Portals.
|
|
2
|
Click the Add Portal button or the configure button next to the portal you want to configure. The Add Portal or Edit Portal screen displays.
|
|
3
|
Click the Virtual Host tab.
|
|
4
|
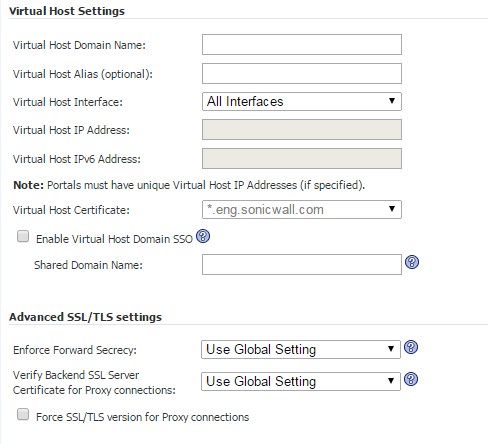
Enter a host name in the Virtual Host Domain Name field, for example, sales.company.com. This field is optional.
|
Only alphanumeric characters, hyphen (-) and underscore (_) are accepted in the Virtual Host Name/Domain Name field.
|
5
|
Select a specific Virtual Host Interface for this portal if using IP based virtual hosting.
|
If your virtual host implementation uses name based virtual hosts — where more than one hostname resides behind a single IP address — choose All Interfaces from the Virtual Host interface.
|
6
|
If you selected a specific Virtual Host Interface for this portal, enter the desired Virtual Host IP Address in the field provided. This is the IP address users will access in order to access the Virtual Office portal.
|
|
7
|
If you selected a specific Virtual Host Interface for this portal, you can specify an IPv6 address in the Virtual Host IPv6 Address field. You can use this address to access the virtual host. Enter the IPv6 address using decimal or hexadecimal numbers in the form:
|
|
8
|
Unless you have a certificate for each virtual host domain name, or if you have purchased a *.domain SSL certificate, your users may see a Certificate host name mismatch warning when they log into the SRA appliance portal. The certificate hostname mismatch affects the login page, NetExtender, and Secure Virtual Access/Assist/Meeting clients; Other SRA client applications will not be affected by a hostname mismatch.
To achieve a single point of access for users, configure External Website Bookmarks for application offloading portals by selecting the Enable Virtual Host Domain SSO check box to enable cross domain Single Sign-On (SSO). Cross Domain SSO shares the credentials for all portals in the same shared domain. Enabling Virtual Host Domain SSO automatically sets the Shared Domain Name one level up from the Virtual Host Domain name and displays it in the Shared Domain Name field. For example, the Shared Domain Name is example.com if the Virtual Host Domain is webmail.example.com.
|
10
|
Verify Backend SSL Server Certificate for Proxy connections — When this option is enabled, the connection will be dropped if the backend SSL/TLS server certificate is not trusted. The verification depth is 10. Alert level log messages will also be generated when this option is enabled.
|