For more information on how two-factor authentication works see Two-Factor Authentication Overview .
To configure two-factor authentication, you must first configure a RADIUS domain. For information see Adding or Editing a Domain with RADIUS Authentication .
The following sections describe how to configure the supported third-party authentication servers:
If you will be using VASCO instead of RSA, see Configuring the VASCO IdentiKey Solution .
|
2
|
|
3
|
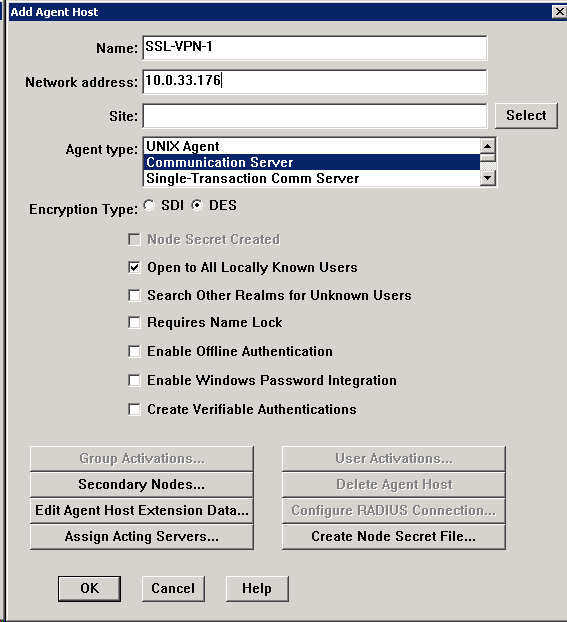
Enter a hostname for the SRA appliance in the Name field.
|
|
4
|
Enter the IP address of the SRA appliance in the Network address field.
|
|
5
|
|
6
|
By default, the Enable Offline Authentication and Enable Windows Password Integration options are enabled. Dell SonicWALL recommends disabling all of these options except for Open to All Locally Known Users.
|
|
7
|
Click OK.
|
|
1
|
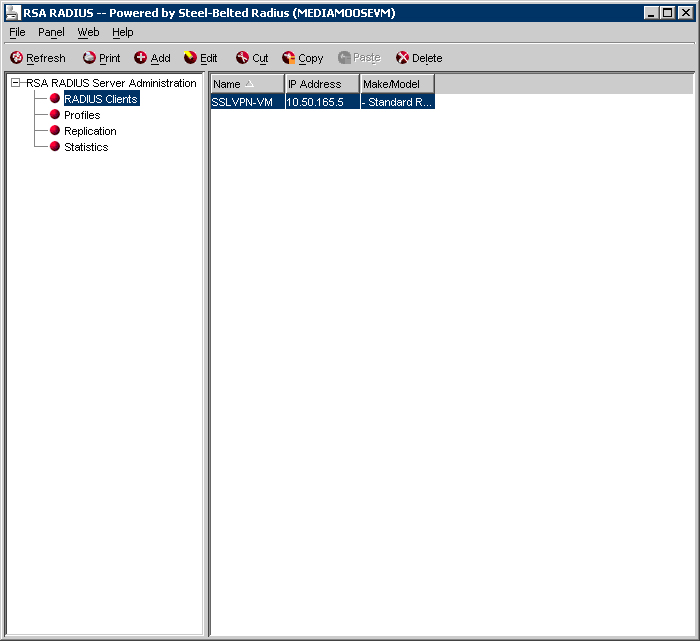
In RSA Authentication Manager, go to the RADIUS menu and select Manage RADIUS Server. The RSA RADIUS Manager displays.
|
|
2
|
|
3
|
|
5
|
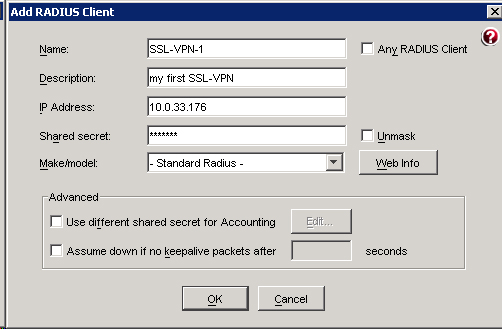
Enter the IP address of the SRA in the IP Address field.
|
|
6
|
Enter the shared secret that is configured on the SRA in the Shared secret field.
|
|
7
|
Click OK and close the RSA RADIUS Manager.
|
|
1
|
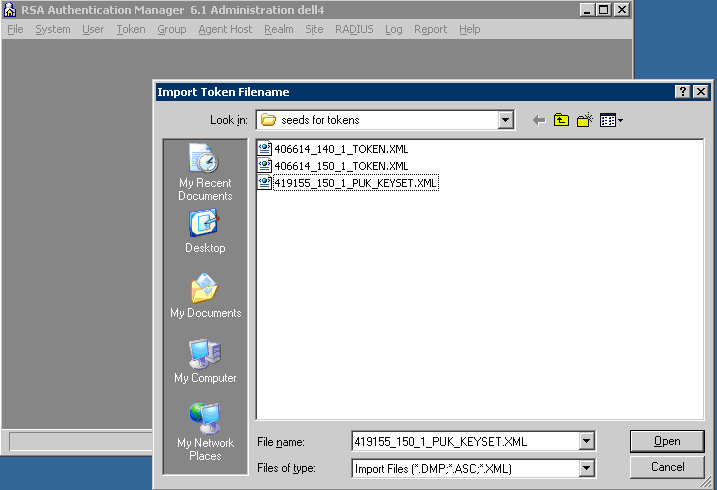
To import the token file, select Token > Import Tokens.
|
|
2
|
|
3
|
The Import Status window displays information on the number of tokens imported to the RSA Authentication Manager.
|

|
4
|
To create a user on the RSA Authentication Manager, click on User > Add user.
|
|
5
|
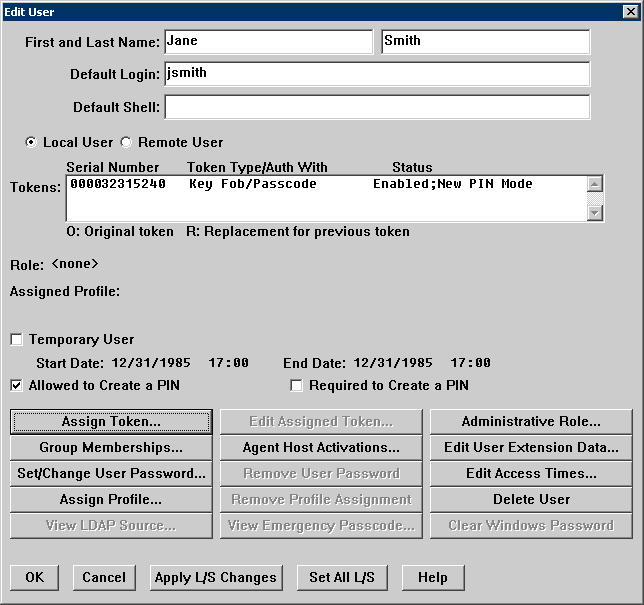
Enter the user’s First and Last Name.
|
|
6
|
Enter the user’s username in the Default Login field.
|
|
7
|
Select either Allowed to Create a PIN or Required to Create a PIN. Allowed to Create a PIN gives users the option of either creating their own PIN or having the system generate a random PIN. Required to Create a PIN requires the user to create a PIN.
|
|
8
|
To assign a token to the user, click on the Assign Token button. Click Yes on the confirmation window that displays. The Select Token window displays.
|

|
•
|
To manually select the token for the user, click Select Token from List. In the window that displays, select the serial number for the token and click OK.
|
|
•
|
To automatically assign the token, you can optionally select the method by which to sort the token: the token’s import date, serial number, or expiration date. Then click the Unassigned Token button and the RSA Authentication Manager assigns a token to the user. Click OK.
|
|
10
|
|
11
|
Give the user their RSA SecurID Authenticator and instructions on how to log in, create a PIN, and user the RSA SecurID Authenticator. See the Dell SonicWALL SRA User Guide for more information.
|
If you will be using RSA instead of VASCO, see Configuring the RSA Authentication Manager .
Navigate to System > Time on the SRA appliance to select the correct time zone.
|
2
|
|
1
|
Navigate to NetExtender > Client Addresses to set the NetExtender Client Address Range.
|
Click the Add Client Route button to select the correct Client Routes for the authenticated remote users accessing the private networks via the SRA connection.
|
1
|
Navigate to Portal > Domains and click Add Domain.
|
|
2
|
|
3
|
Enter the Domain Name that users will use in order to log into the SRA appliance portal.
|
|
2
|
Use the following settings for the policy:
|
1
|
|
2
|
|
4
|
In the Policy ID field, select your new policy.
|
|
5
|
Fill in the Shared Secret you entered for the RADIUS server properties on the SRA appliance.
|
|
6
|
Click Create.
|
|
1
|
|
2
|
Fill in the User ID field.
|
|
3
|
Select the Domain.
|
|
4
|
Select the Organizational Unit.
|
|
5
|
Click the Create button.
|
|
1
|
|
2
|
Browse for the *.DPX file.
|
|
3
|
Enter the Transport Key.
|
|
4
|
Click UPLOAD.
|
A confirmation message pops up when the DIGIPASS is imported successfully.
|
•
|
|
•
|
|
NOTE: If the User ID is left blank, press the Find button and a list of all the available users in the same domain will appear. If no users appear, make sure the domains of the DIGIPASS and the user match.
|
When a user is assigned to a DIGIPASS, a confirmation message will pop up.
|
3
|
Navigate to Portal > Domains and click Configure to test the RADIUS connectivity to VASCO IdentiKey.
|