|
2
|
Click on the configure icon
|
|
1
|
Navigate to the Users > Local Users page.
|
|
2
|
Click on the configure icon
|
|
3
|
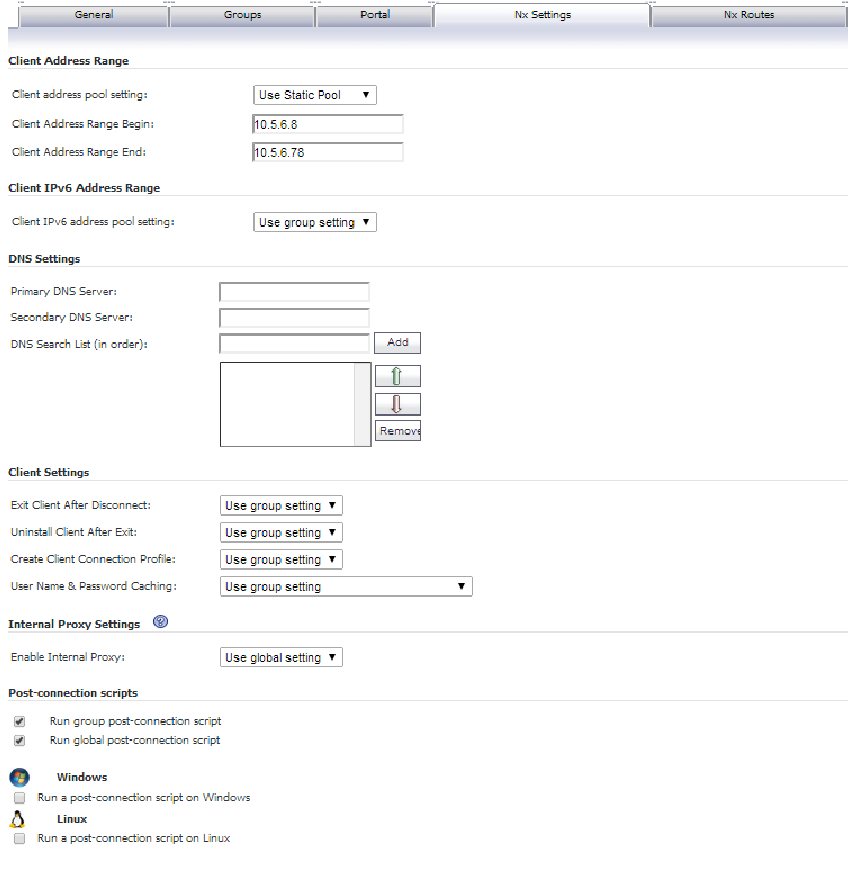
Click on the Nx Settings tab.
|
|
1
|
To configure an IPv4 address range for this user, enter the beginning of the range in the Client Address Range Begin field and the end of the range in the Client Address Range End field.
|
|
3
|
To configure an IPv6 address range for this user, enter the beginning of the range in the Client IPv6 Address Range Begin field and the end of the range in the Client IPv6 Address Range End field. IPv6 configuration is optional.
|
|
4
|
Click Accept.
|
|
1
|
In the Primary DNS Server field, type in the IP address of the main DNS server.
|
|
2
|
In the Secondary DNS Server field, optionally type the IP address of the backup DNS server.
|
|
3
|
In the DNS Domain field, type the domain for the DNS servers.
|
|
4
|
Click Accept.
|
The following NetExtender settings can be configured for the user:
|
•
|
Exit Client After Disconnect - The NetExtender client exits when it becomes disconnected from the SRA server. To reconnect, users will have to either return to the SRA portal and click NetExtender or launch NetExtender from their Programs menu.
|
|
•
|
Uninstall Client After Exit - The NetExtender client automatically uninstalls when it terminates or when the user selects Exit (as opposed to simply disconnecting). To reconnect, users will have to return to the SRA portal and click NetExtender. This option only applies to Windows clients. It does not apply to Android, Mac, or Linux clients.
|
|
•
|
Create Client Connection Profile - The NetExtender client will create a connection profile recording the SRA Server name, the Domain name and optionally the username and password.
|
|
•
|
The User Name & Password Caching options provide flexibility in allowing users to cache their usernames and passwords in the NetExtender client. The three options are Allow saving of user name only, Allow saving of user name & password, and Prohibit saving of user name & password. These options enable administrators to balance security needs against ease of use for users.
|
To have the user inherit the NetExtender settings from the group it belongs to (or from the global NetExtender settings if the user does not belong to a group), select Use Group Settings for any of the above options.
|
1
|
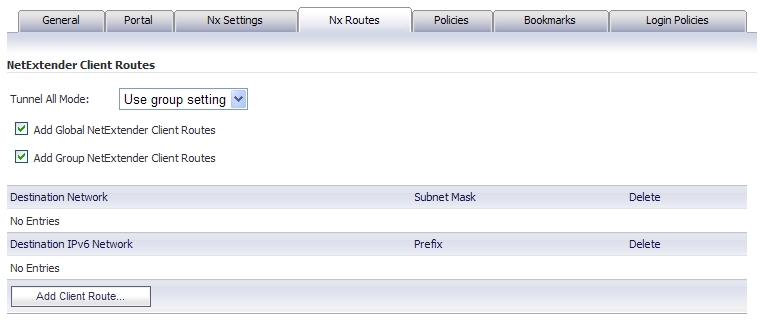
To add a NetExtender client route that will only be added to this user, click the Nx Routes tab in the Edit User Settings window.
|
|
2
|
Add Client Route button.
|
|
3
|
|
4
|
For an IPv4 client route, type the subnet mask in the Subnet Mask/Prefix field. For an IPv6 client route, type the prefix in this field.
|
|
5
|
Click Add.
|
|
7
|
Select Enabled from the Tunnel All Mode drop-down list to force all traffic for this user—including traffic destined to the remote users’ local network—over the SRA NetExtender tunnel.
|
|
8
|
To also add the global NetExtender client routes (which are configured on NetExtender > Client Routes page) to the user, select the Add Global NetExtender Client Routes check box.
|
|
9
|
To also add the group NetExtender client routes for the group the user belongs to, select the Add Group NetExtender Client Routes check box. Group NetExtender routes are configured on the NetExtender tab of the Edit Group window, which is accessed through the Users > Local Groups page.
|
|
10
|
Click Accept.
|
|
NOTE: When using an external authentication server, local usernames are not typically configured on the SRA appliance. In such cases, when a user is successfully authenticated, a local user account is created with the Add Global NetExtender Client routes and Add Group NetExtender Client routes settings enabled.
|