|
1
|
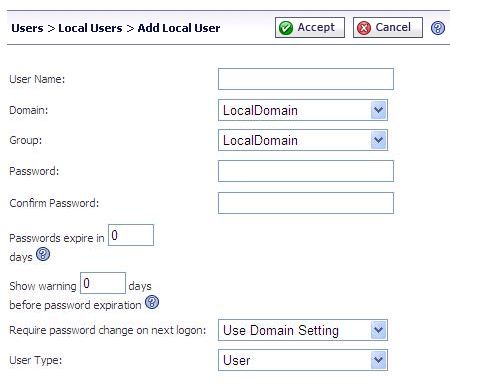
Navigate to the Users > Local Users page and click Add User. The Add Local User window is displayed.
|
|
2
|
In the Add Local User window, enter the username for the user in the User Name field. This will be the name the user will enter in order to log into the SRA user portal.
|
|
3
|
Select the name of the domain to which the user belongs in the Domain drop-down list.
|
|
4
|
Select the name of the group to which the user belongs in the Group drop-down list.
|
|
5
|
Type the user password in the Password field.
|
|
6
|
Retype the password in the Confirm Password field to verify the password.
|
|
7
|
|
8
|
If you set a password expiration interval, type the number of days before expiration that users should receive notifications in the Show warning x days before password expiration field.
|
|
9
|
Optionally, use Require password change on next logon to force a user to change their password the next time they log in by selecting Use Domain Setting or Enabled. Selecting Use Domain Setting uses the setting configured on the Portals > Domains page.
|
|
10
|
From the User Type drop-down list, select a user type option. The available user types are User, Administrator, or Read-only Administrator.
|
|
TIP: If the selected group is in a domain that uses external authentication, such as Active Directory, RADIUS, NT Domain or LDAP, then the Add User window will close and the new user will be added to the Local Users list.
|
|
11
|
Click Accept to update the configuration. Once the user has been added, the new user will be displayed on the Local Users window.
|