More than 50 IPS and GAV events currently trigger SNMP traps. The SonicOS Log Event Reference Guide contains a list of events that are logged by SonicOS, and includes the SNMP trap number where applicable. The guide is available online at https://support.sonicwall.com/technical-documents.
To determine the traps that are possible when using IPS Sniffer Mode with Intrusion Prevention enabled, search for Intrusion in the table found in the Index of Log Event Messages section in the SonicOS Log Event Reference Guide. The SNMP trap number, if available for that event, is printed in the SNMP Trap Type column of the table.
To determine the possible traps with Gateway Anti-Virus enabled, search the table for Security Services, and view the SNMP trap number in the SNMP Trap Type column.
|
1
|
|
2
|
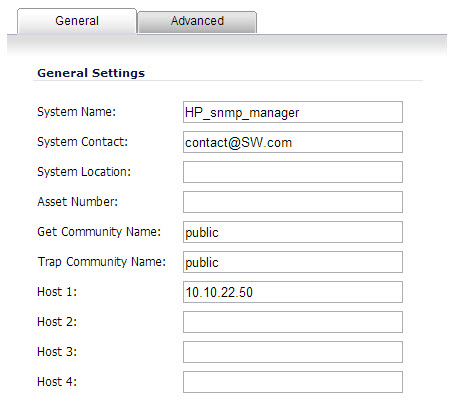
The SNMP Settings dialog box is displayed:
|
3
|
In the SNMP Settings dialog box, for System Name, type the name of the SNMP manager system that will receive the traps sent from the SonicWall.
|
|
4
|
|
7
|
For Get Community Name, type the community name that has permissions to retrieve SNMP information from the SonicWall, such as public.
|
|
8
|
For Trap Community Name, type the community name that will be used to send SNMP traps from the SonicWall to the SNMP manager, for example, public.
|
|
9
|
For the Host fields, type in the IP address(es) of the SNMP manager system(s) that will receive the traps.
|
|
10
|
Click OK.
|