|
VIDEO: Informational videos with more CFS policy configuration examples are available online. For example, see How to Configure Per-policy Forbidden Domains with Multiple CFS Policies or How to Configure CFS Policies per IP Addresses.
Additional videos are available at: https://support.software.dell.com/videos-product-select.
|
|
1
|
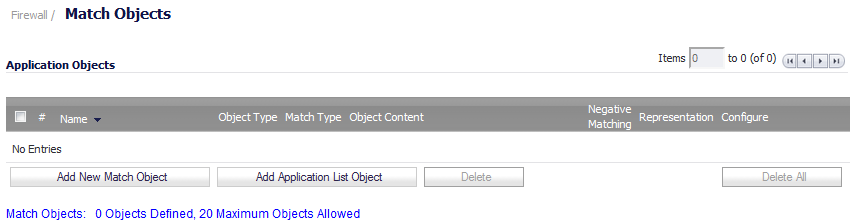
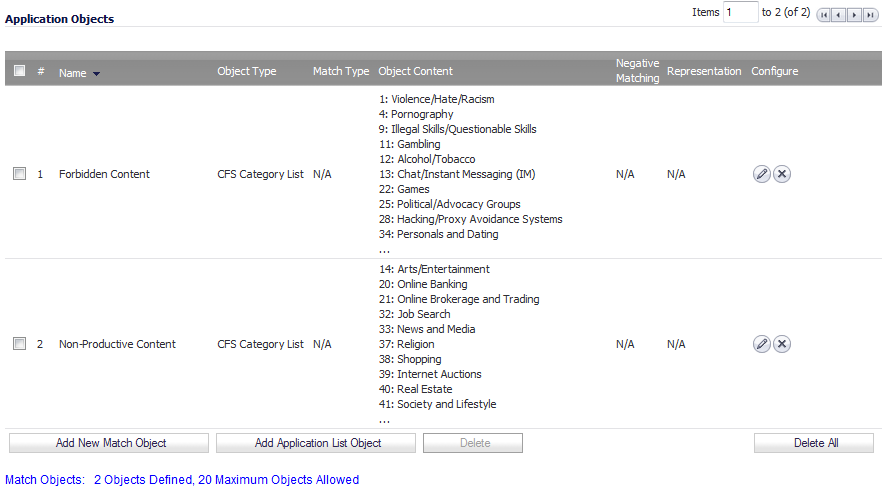
Navigate to the Firewall > Match Objects page in the SonicOS management interface.
|
|
2
|
|
3
|
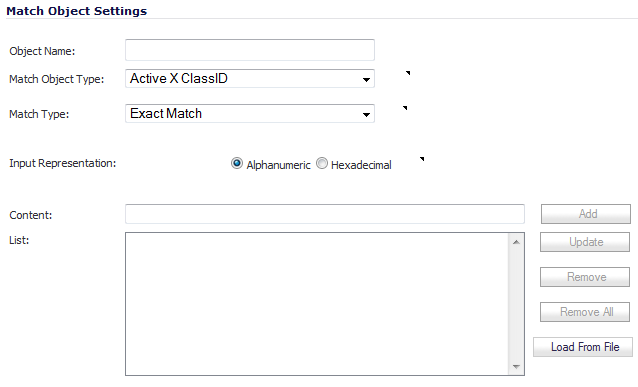
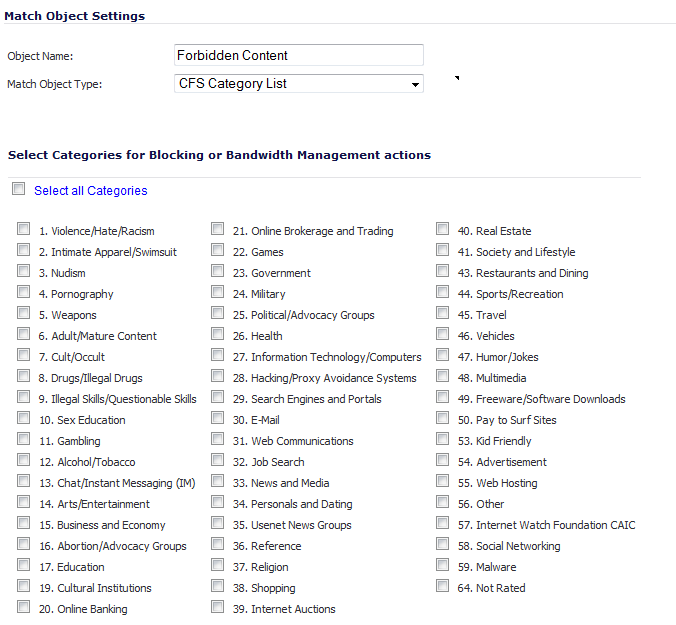
Enter a descriptive Object Name, such as Forbidden Content. The minimum length is 1 character, the maximum is 96 characters.
|
|
4
|
Select CFS Category List from the Match Object Type drop-down menu. The Add/Edit Match Object dialog changes to list categories to select for blocking or bandwidth management.
|
|
6
|

|
1
|
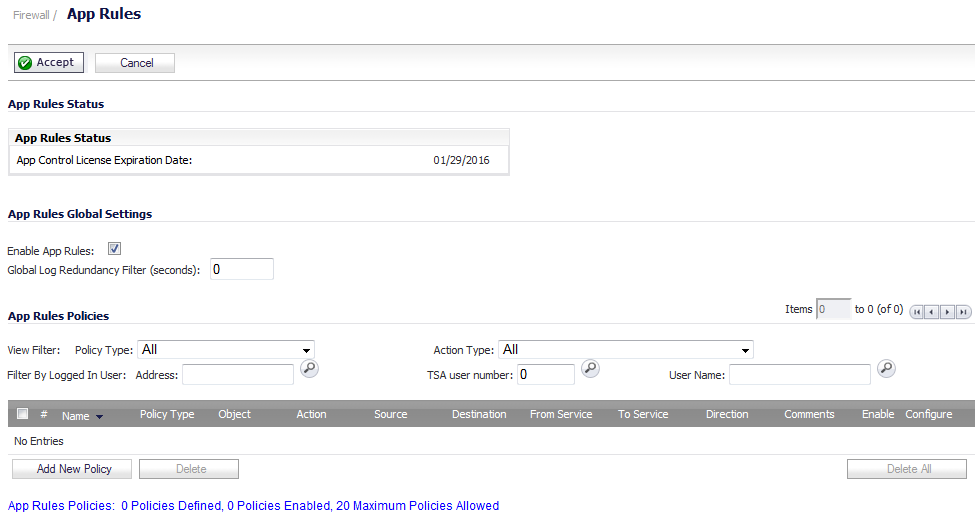
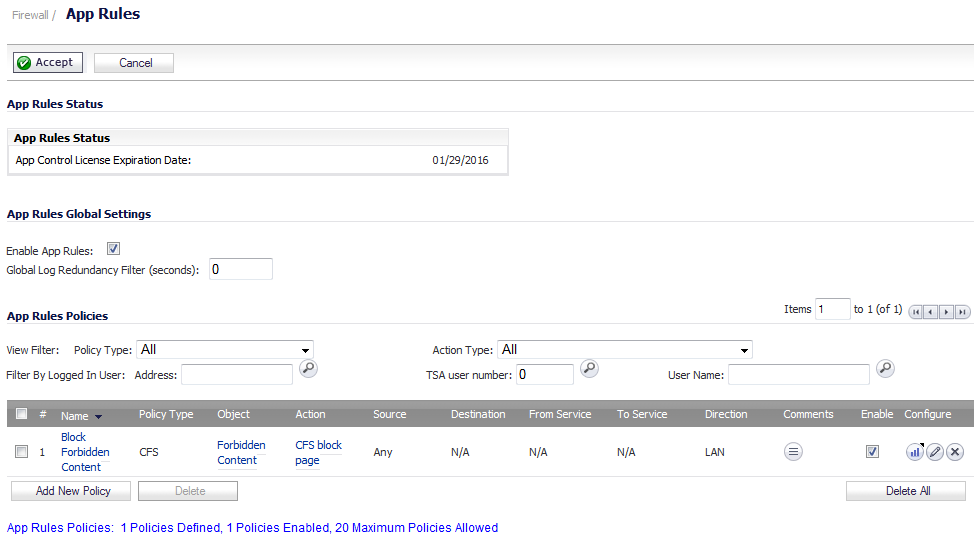
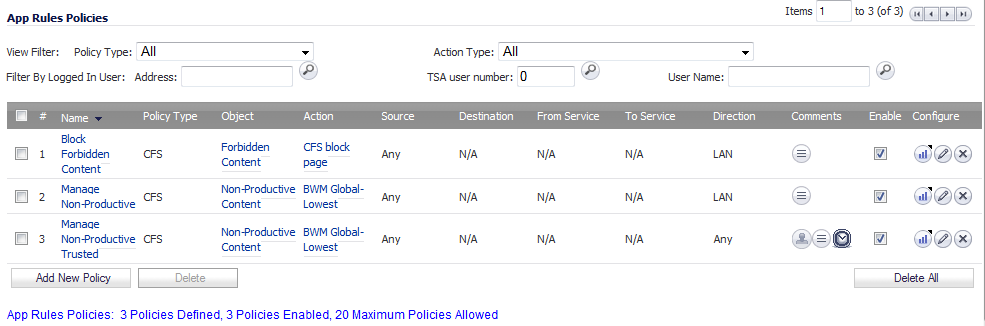
Navigate to the Firewall > App Rules page.
|
|
2
|
|
3
|
|
4
|
|
5
|
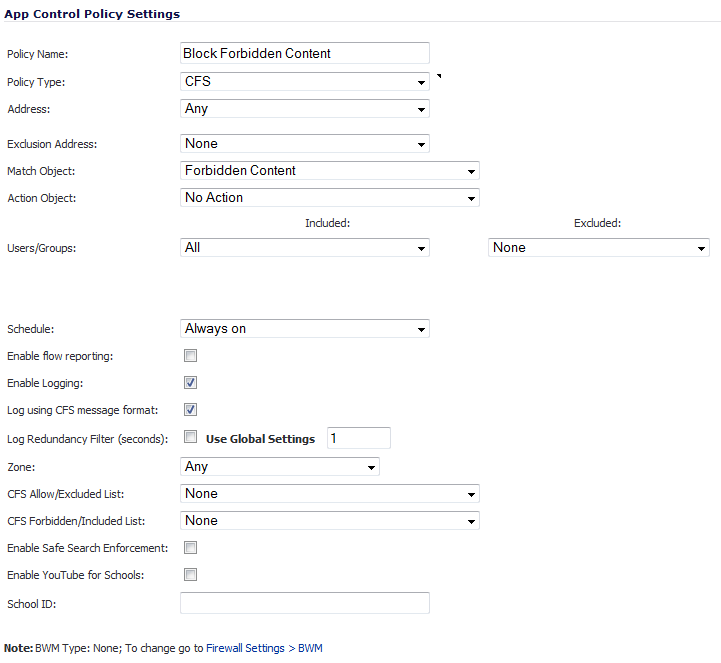
From the Match Object drop-down menu, select the object you created in the previous section. In the case of our example, this object is named Forbidden Content.
|
|
6
|
From the Action Object drop-down menu, select CFS block page to display a pre-formatted blocked-content page when users attempt to access forbidden content.
|
|
7
|
Optionally, select the users/groups this policy will include or exclude from the Users/Groups Included and/or Excluded drop-down menus. Our example uses the defaults of including All and excluding None.
|
|
8
|
Optionally, select the days and times when this rule is to be enforced from the Schedule drop-down menu. Our example uses the default, Always On, to always enforce this policy.
|
|
9
|
|
10
|
Optionally, select the appropriate zone where the policy is to be enforced from the Zone drop-down menu. Our example uses LAN to enforce the policy on all traffic traversing the local network. The default is Any.
|
|
11
|
Optionally, to enforce a CFS allow/excluded list on this particular policy, select one from the CFS Allow/Excluded List drop-down menu. The default is None.
|
|
12
|
Optionally, select the appropriate CFS forbidden/included list to enforce on the particular policy from the CFS Forbidden/Included List drop-down menu. The default is None.
|
|
13
|
Optionally, to enable safe-search enforcement for all search engines, select the Enable Safe Search Enforcement checkbox. This setting is disabled by default.
|
|
14
|
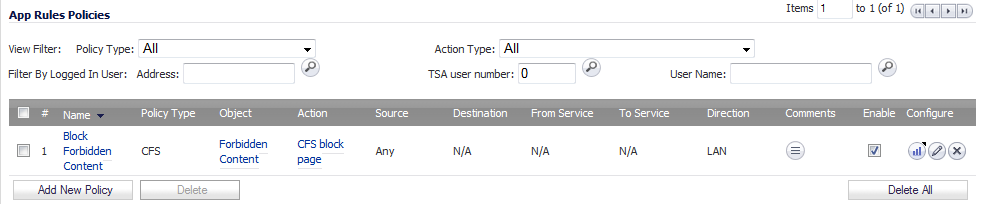
Click the OK button to create this policy.
|
|
1
|
Navigate to the Firewall > Match Objects page.
|
|
2
|
|
3
|
|
4
|
Select CFS Category List from the Match Object Type drop-down menu. The Add/Edit Match Object dialog changes to list categories to select for blocking or bandwidth management.
|
|
6
|
Click the OK button to add the object to the Application Objects list.
|
For information on configuring bandwidth management, see Configuring BWM in an Action Object in Firewall Settings > BWM.
|
1
|
Navigate to the Firewall > App Rules page.
|
|
2
|
|
3
|
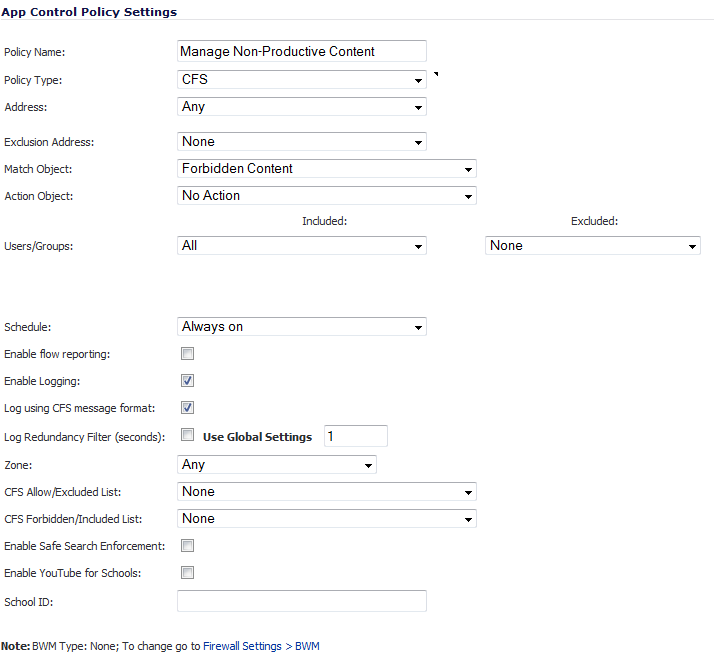
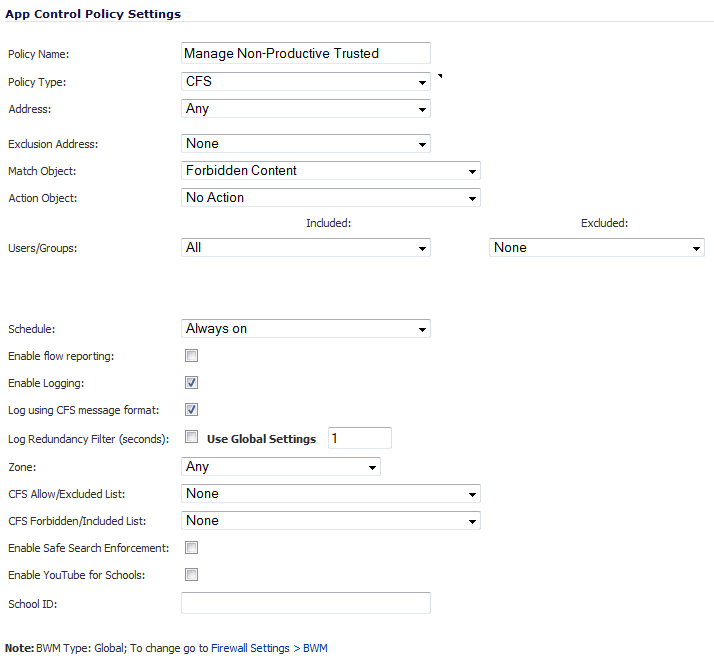
Enter a descriptive name for this action in the Policy Name field, such as Manage Non-Productive Content. The minimum length is 0 and the maximum length is 96 characters.
|
|
4
|
|
5
|
From the Match Object drop-down menu, select the object created in Create an Application Object for Non-Productive Content . In the case of our example, this object is named Non-Productive Content.
|
|
6
|
From the Action Object drop-down menu, select one of these to apply this custom BWM rule when users attempt to access non-productive content. Out example uses BWM Global-Lowest.
|
|
•
|
No Action (default)
|
|
7
|
Optionally, select the users/groups this policy will include or exclude from the Users/Groups Included and/or Excluded drop-down menus. Our example uses the defaults of including All and excluding None.
|
|
8
|
Optionally, select the days and times when this rule is to be enforced from the Schedule drop-down menu. Our example uses the pre-defined Work Hours selection to enforce this policy only during weekday work hours. The default is Always On.
|
|
9
|
|
10
|
Optionally, select the appropriate zone where the policy is to be enforced from the Zone drop-down menu. Our example uses LAN to enforce the policy on all traffic traversing the local network. The default is Any.
|
|
11
|
Optionally, to enforce a CFS allow/excluded list on this particular policy, select one from the CFS Allow/Excluded List drop-down menu. The default is None.
|
|
12
|
Optionally, select the appropriate CFS forbidden/included list to enforce on the particular policy from the CFS Forbidden/Included List drop-down menu. The default is None.
|
|
13
|
Optionally, to enable safe-search enforcement for all search engines, select the Enable Safe Search Enforcement checkbox. This setting is disabled by default.
|
|
14
|
Click the OK button to create this policy.
|
|
1
|
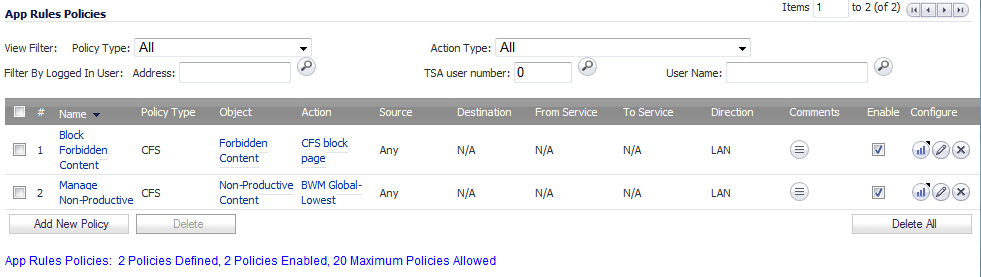
Navigate to the Firewall > App Rules page.
|
|
2
|
|
3
|
Enter a descriptive name for this action in the Policy Name field. such as Manage Non-Productive Trusted. The minimum length is 0 and the maximum length is 96 characters.
|
|
4
|
|
5
|
From the Match Object drop-down menu, select the object created in Create an Application Object for Non-Productive Content . In the case of our example, this object is named Non-Productive Content.
|
|
6
|
From the Action Object drop-down menu, select one of these to apply this custom BWM rule when users attempt to access non-productive content. Out example uses BWM Global-Lowest.
|
|
•
|
No Action (default)
|
|
7
|
Select the users/groups this policy includes or excludes from the Users/Groups Included and/or Excluded drop-down menus. Our example includes the Trusted Users group and excludes Guests, although you may choose different or custom groups depending on your needs. The defaults include All and exclude None.
|
|
8
|
Select the days and times when this rule is to be enforced from the Schedule drop-down menu. Our example uses the pre-defined Work Hours selection to enforce this policy only during weekday work hours. The default is Always On.
|
With this the selections in this example, Nonproductive Content will be Bandwidth Managed for Trusted Users only during Work Hours.
|
9
|
|
10
|
To create a policy for each required group, repeat Step 2 through Step 9 with variations required by your implementation.
|
|
1
|
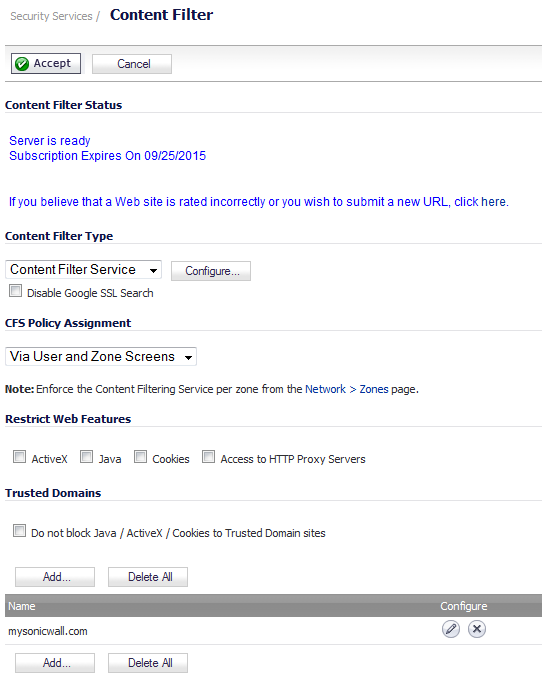
Navigate to the Security Services > Content Filter page.
|
|
2
|
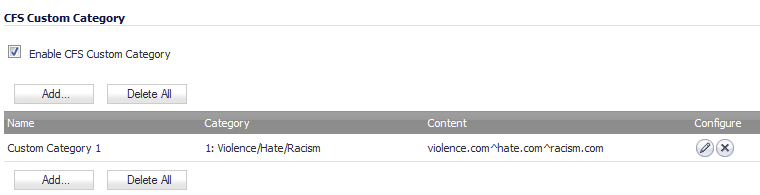
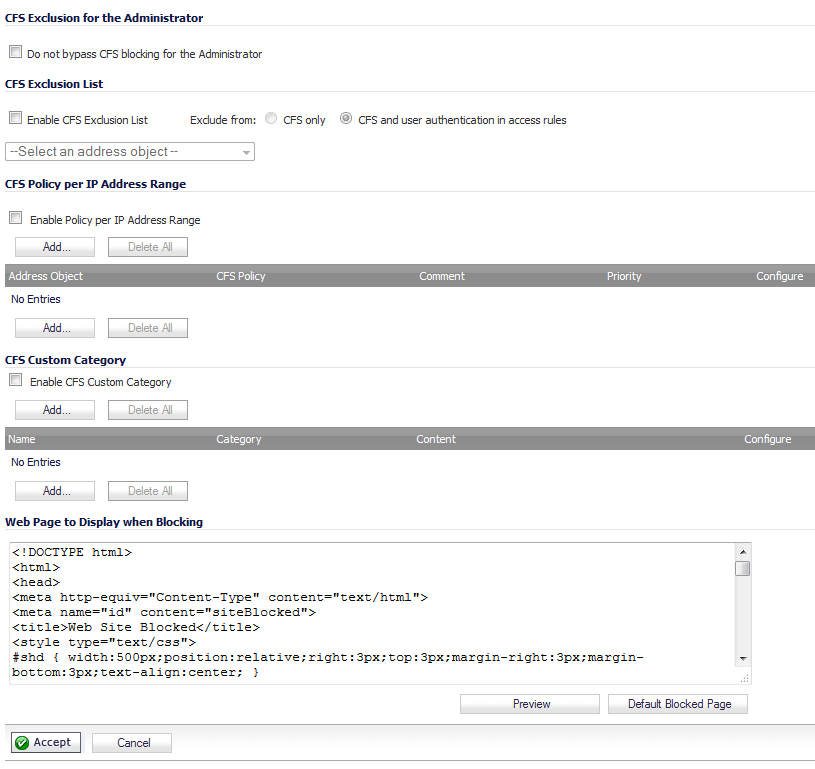
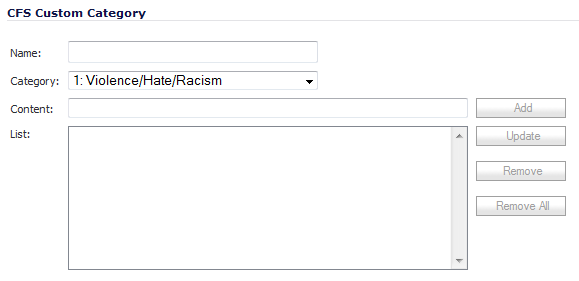
Scroll down to the CFS Custom Category section.
|
|
3
|
Select the Enable CFS Custom Category checkbox.
|
|
4
|
Click the Accept button to save your changes and enable the Custom Category feature.
|
|
1
|
|
2
|
|
3
|
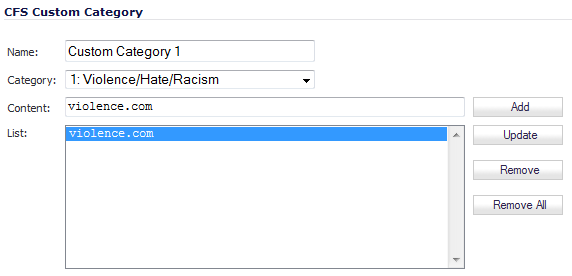
Enter a descriptive Name for the custom entry.
|
|
4
|
Choose the pre-defined category to which this entry will be added from the Category drop-down menu.
|
|
5
|
Enter a domain name into the Content field.
|
|
NOTE: All subdomains of the domain entered are affected. For example, entering yahoo.com applies to mail.yahoo.com and my.yahoo.com; hence, it is not necessary to enter all FQDN entries for subdomains of a parent domain.
|
|
8
|
Click the OK button to add this custom category. The CFS Custom Category table on the Security Services > Content Filter page is updated.
|