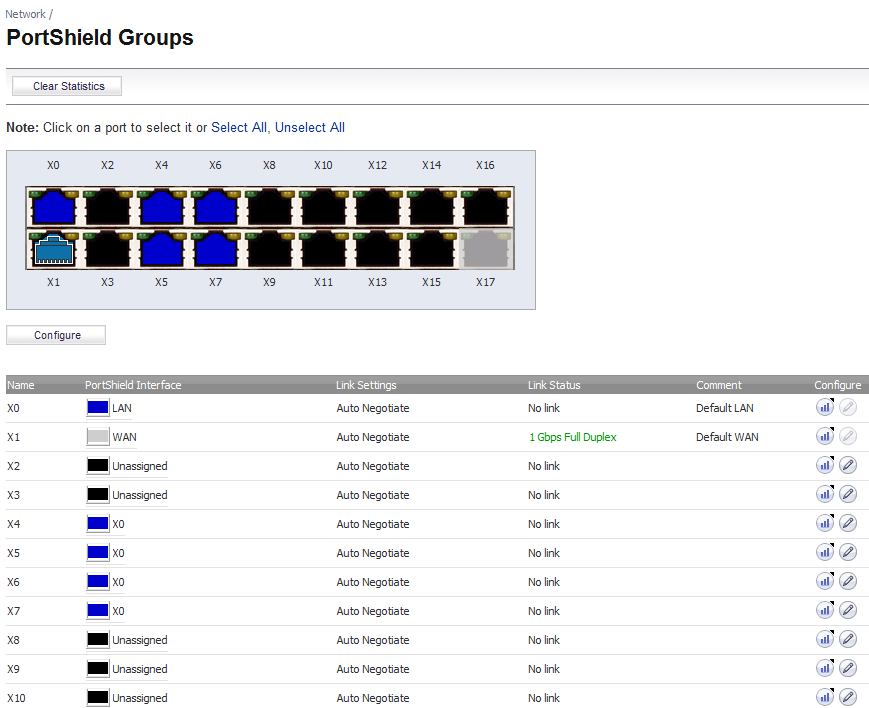
The Network > PortShield Groups page allows you to manage the assignments of ports to PortShield interfaces.
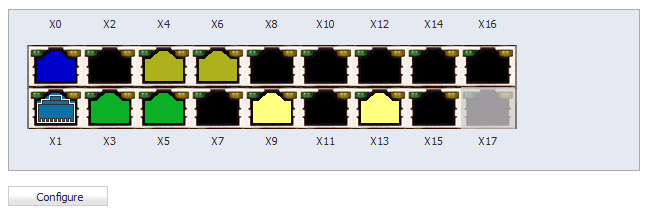
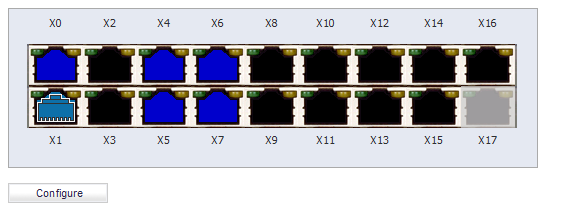
Each port graphic is labeled with its associated port name: X0 - Xn. When you select an interface or interfaces, you can configure them as described in Configuring PortShield Interfaces on Network > PortShield Groups .
|
•
|
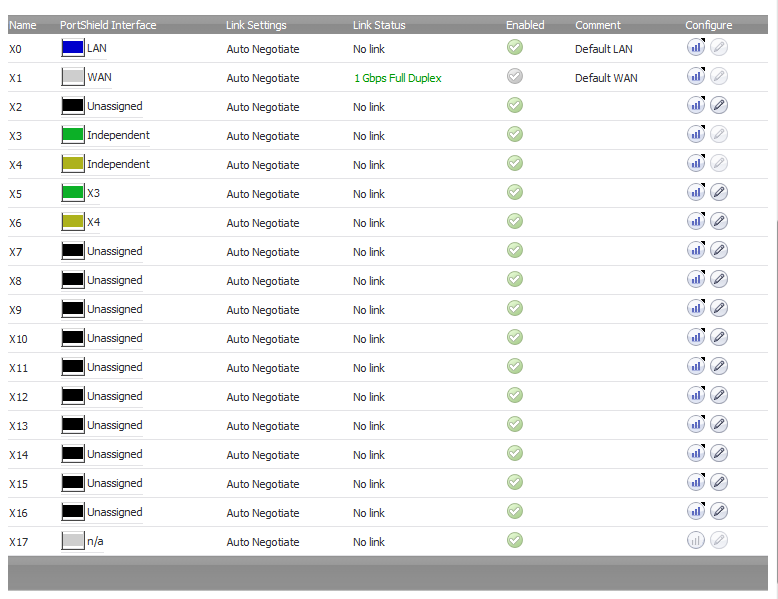
Name – Displays the port name associated with the PortShield interface, such as X0 or X15.
|
|
•
|
PortShield Interface – Displays a color-coded graphic reflecting the PortShield interface’s assignment and to which PortShield group it belongs. This graphic is a smaller version of the larger graphic above the table. Next to the graphic is more information about the assignment and PortShield group.
|
|
•
|
Link Settings – Indicates the link speed:
|
|
•
|
Link Status – Indicates the status of the link or if there is no link.
|
|
•
|
Enabled – Displays a checkmark graphic that is green if the interface is enabled.
|
|
•
|
Comment – Displays any comment entered when the interface was configured.
|
|
•
|
Configure – Displays two icons:
|
|
•
|
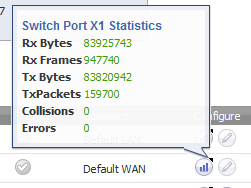
Statistics – When clicked, displays a pop-up balloon containing statistics about the interface:
|
|
NOTE: To clear the statistics, click the Clear Statistics button at the top of the Network > PortShield Groups page.
|
|
•
|
Edit – When clicked, displays the Edit Port dialog. For more information about this dialog, see the procedure in Configuring PortShield Interfaces on Network > PortShield Groups .
|
PortShield groups can be configured on several different pages in the SonicOS management interface:
|
1
|
Navigate to the Network > Interfaces page.
|
|
2
|
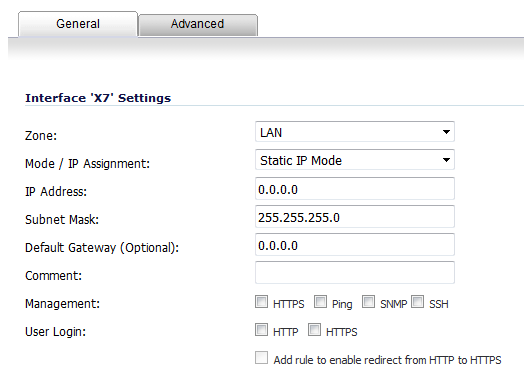
In the Interface Settings table, click the Configure icon for the interface you want to configure. The Edit Interface dialog displays.
|
|
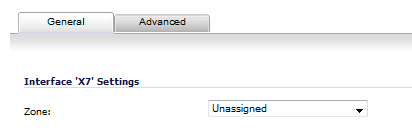
3
|
In the Zone drop-down menu, select on a zone type option to which you want to map the interface. More options display.
|
|
4
|

|
5
|
In the PortShield to drop-down menu, select the interface you want to map this port to. Only ports that match the zone you have selected are displayed.
|
|
6
|
Click OK.
|
The Network > PortShield Groups page displays a graphical representation of the current configuration of PortShield interfaces.
|
2
|
|
3
|
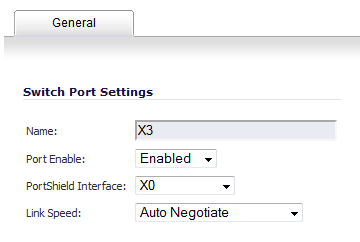
From the Port Enable drop-down menu, select whether you want to enable or disable the interfaces. The default is Enabled.
|
|
4
|
From the PortShield Interface drop-down menu, select which interface you want to assign as the master interface for these PortShield interfaces. The default is Unassigned.
|
|
5
|
From the Link Speed drop-down menu, select the link speed for the interfaces:
|
|
•
|
Auto Negotiate (default)
|
|
6
|
Click OK.
|