CDP_Agents
Managing and Accessing Agent Workstations
Managing Agents
This section provides configuration information for the Agents > Manage page in the Web Management Interface.
This section includes the following subsections:
|
|
|
“To exit the dialog box without making any changes, click Cancel.Resetting an Agent’s Key” section |
Adding a New Agent Friendly Name
The Add New Agent feature within the Web Management Interface allows the administrator to add friendly names for agents to SonicWALL CDP. SonicWALL CDP recognizes agents by agent name, which is the same as the computer name. Follow the tasks in this section to add a friendly name for an agent whenever you have a new server, laptop or PC that you would like to backup using SonicWALL CDP.
Adding an agent to a SonicWALL CDP appliance is accomplished by installing the Agent software on the agent computer, then launching it and connecting to the appliance. For instructions on installing the Agent software on a client computer, refer to the SonicWALL CDP Agent User’s Guide .
To add a friendly name for an agent, perform the following steps:
|
|
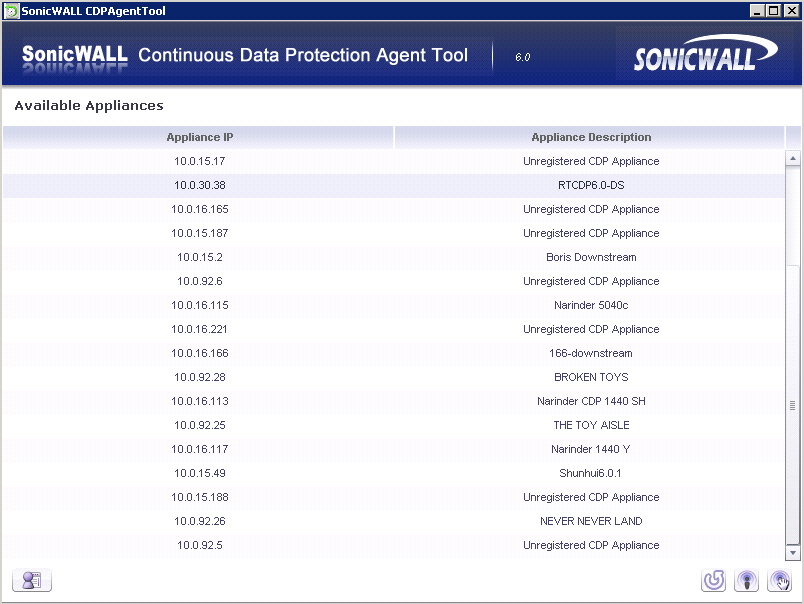
In the Web Management Interface, navigate to the Agents > Manage page. |
|
|
On the Configure tab, click the Add button to open the Configure dialog box. |
|
|
Enter the name of the agent you want to add in the Agent Name field. |
The agent name is the same as the computer name. On Windows, the computer name can be viewed and edited by right-clicking My Computer , selecting Properties , and clicking the Computer Name tab.
|
|
Type a descriptive name for the agent in the Friendly Name field. |
|
|
Click OK to add the friendly name for the agent. |
To exit the dialog box without making any changes, click Cancel .
|
|
Install the SonicWALL CDP Agent application on the added computer, if it is not already installed. |
E diting an Agent’s Name
The Edit Name function allows the administrator to change an inoperable agent’s name in the Web Management Interface. SonicWALL CDP recognizes agents by agent name, which is the same as Computer Name.
In order to recover backed up data from an agent that has been rendered inoperable, it is necessary to change the name of that agent in Web Management Interface to match the name of a new agent. The new name must be the same as the computer name of the new agent.
Editing an inoperable agent’s name to match a new agent allows Web Management Interface to recognize the new agent and associate backed up data from the inoperable agent with the newly assigned agent.
|
|
|
The Edit Name function should only be used to recover data from disabled agents. An alternate solution is to configure the new agent with the same computer name as the disabled agent. To change the computer name, right click My Computer and select Properties . Click the Computer Name tab and select Change , then type in the computer name of your previous computer. |
To edit an agent’s name in the Web Management Interface, perform the following steps:
|
|
In the Web Management Interface, navigate to the Agents > Manage page. |
|
|
On the Configure tab, click the Edit Agent icon in the Configure column for the agent you want to rename. The edit dialog box opens. |
|
|
Type the new name for the agent computer in the Agent Name field. |
|
|
Type a descriptive name for the agent in the Friendly Name field. |
|
|
Click OK . |
To exit the dialog box without making any changes, click Cancel . Resetting an Agent’s Key
The first time an agent computer communicates with a SonicWALL CDP appliance, it securely requests a security key, which will be stored in the local registry and used for future validation.
The administrator may need to reset the security key for an agent. To reset the security key, perform the following tasks:
|
|
In the Web Management Interface, navigate to the Agents > Manage page. |
|
|
On the
Configure
tab, click the Reset Security Key
icon |
 Deleting an Agent
The administrator can delete agents in the Web Management Interface. Deleting an agent allows the administrator to remove the rights of an agent to connect to the SonicWALL CDP appliance. If an agent is deleted and tries to connect, the agent will be blocked from connecting or backing up to the SonicWALL CDP.
Deleting an agent requires the following two steps:
If a user uninstalls the Agent software from an agent, or removes the agent from the network, the agent settings will not be changed and previously backed up data will remain on the SonicWALL CDP appliance. Similarly, if an administrator deletes an agent, and the Agent software remains on the agent computer, the agent will reappear in the Web Management Interface at the next startup.
|
|
|
If you delete an agent from the agents list in the Web Management Interface, any data associated with the agent will be purged from the appliance. |
To delete an agent in the Web Management Interface, perform the following steps:
|
|
In the Web Management Interface, navigate to the Agents > Manage page. |
|
|
On the Configure tab, click the Delete Agent icon in the Configure column for the agent you want to remove. |
|
|
Click OK in the confirmation dialog box. |
To exit the dialog box without making any changes, click Cancel .
Selecting an Agent’s Policy
The administrator can assign an agent to a new administrative policy. If an agent is moved from a default policy to a custom policy, the data previously backed up will remain on the appliance. However, if the agent is moved from a custom policy to a different custom policy, the data previously backed up will be purged from the appliance.
To select an agent’s policy, perform the following steps:
|
|
In the Web Management Interface, navigate to the Agents > Manage page. |
|
|
Click the Policy tab |
|
|
Click the Edit Policy icon in the Change Policy column for the agent you want to edit. The edit dialog box opens. |
|
|
Select a policy from the Select Admin Policy drop-down list. |
|
|
Click OK . |
To exit the dialog box without making any changes, click Cancel .
Browsing Agents Files
The Agents > Browse Agents Files page allows the administrator to view agent files and applications that are configured for backup, and to make changes to the SonicWALL CDP appliance, such as deleting backed up data.
|
|
|
Deleting backed up data from the SonicWALL CDP appliance may need to be accompanied by changing the Backup Task in Policies > Backup Tasks . Otherwise, another revision of the same data will be backed up on the appliance at the next scheduled backup. |
To browse and manage agent backups, perform the following steps:
|
|
In the Web Management Interface, navigate to the Agents > Browse Agents Files page. |
|
|
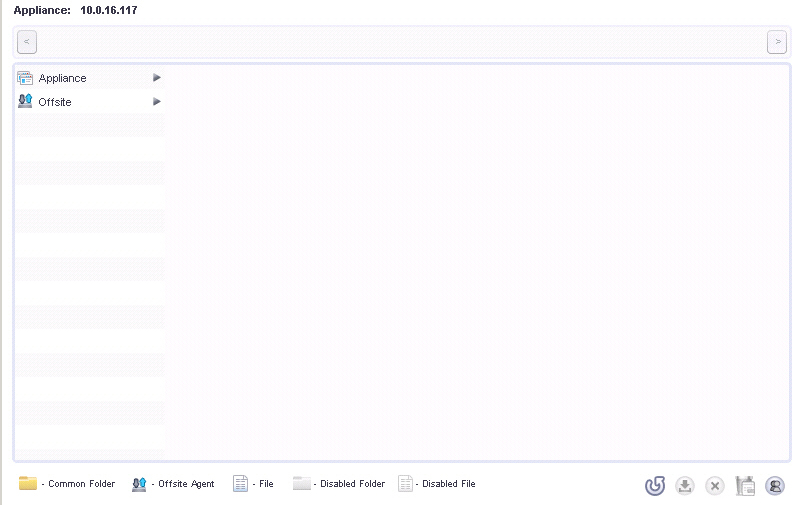
Select the arrow for either Appliance or Offsite to expand the view to the agents that are configured to use either a local SonicWALL CDP appliance or an offsite appliance for backups. |

|
|
After you select the Agent, click one of the three types of backups: CDP , FileSets , or Applications . |
![]()
Deleting backed up data from the SonicWALL CDP appliance may need to be accompanied by changing the Backup Task in Policies > Backup Tasks. Otherwise, another revision of the same data will be backed up on the appliance at the next scheduled interval.
About the SonicWALL CDP Agent User Interface
The SonicWALL CDP Agent User Interface provides individual users and system administrators the ability to configure, create, and apply local backup and restore policies on individual workstations. Users can set files and applications for backup (if so configured by the administrator in the Web Management Interface) and can recover backed up files.
The SonicWALL CDP Agent software is installed on every agent (server, laptop or PC intended to be backed up on the SonicWALL CDP Appliance). The SonicWALL Agent Service is installed automatically with the Agent User Interface and runs in the background, communicating with the SonicWALL CDP appliance. The administrator can elect to install just the Agent Service on agent machines, without installing the the Agent User Interface.
The Agent User Interface is the same on Windows, Linux, and Mac OS computers.
Agent User Interface Overview
The Agent User Interface includes four tabs or pages: Status , My Backups , Policies , and Help . User access to these pages is granted and administered by the administrator using the Web Management Interface. Table 1 provides an overview of the four default Agent User Interface controls:
|
|
Agent User Interface Pages |
|
Status provides the user with the SonicWALL CDP appliance IP address, the agent name and state, quota information including file count, size, size on disk, quota remaining, and the current backup policy name. Recent tasks are displayed in right pane with task name, start time, duration, and status. |
|
|
My Backups provides access to all backed up data, including backups created using the CDP, FileSets, and Applications backup methods. It also provides the ability to enable or disable file or folder backups, refresh the display, search by all or part of the file name, restore data, remove items, and remove old file versions. |
|
|
Policies provides the user with access to all backup status and configuration pages, including Summary, Files and Folders, Applications, Schedules, and Backup Tasks. Users can configure and schedule backups on the Policies tab. |
|
|
Help provides links to online help, the SonicWALL knowledge base, the Agent log file, and Agent version information. |
|
|
|
For more information on using the SonicWALL CDP Agent User Interface, refer to the SonicWALL CDP Agent User’s Guide . |
Administrative Use of the Agent User Interface
The Agent software allows Administrators to log into the Agent User Interface to manage and configure agent backups. You can access any appliance, and then view, manage, or restore any files backed up by any agent that is associated with that appliance, when logged in as an administrator in the Agent User Interface.
When you launch the Agent User Interface, there is a button in the lower left pane that allows you to log in as an Administrator.

When you click the Change Appliance icon, this button appears in the lower left corner to allow you to log in as an Administrator.
To log in and browse backed up files using the Administrator File Browser, perform the following steps:
|
|
In the SonicWALL CDP Agent User Interface, click the Login to Administrator File Browser button. |
![]()
|
|
In the login dialog box, type in the IP address of the SonicWALL CDP appliance to which you want to connect. |

|
|
Type in the password for the admin account, and click Login . The Agent User Interface displays the starting screen for the appliance. |
|
|
Click the arrow for either Appliance or Offsite to expand the display to include all associated agents, then click any agent to expand the display further and view specific backups. |
![]()
|
|
|
Refresh – refreshes the window contents |
|
|
|
Restore – restores the selected item |
|
|
|
Remove Items – removes the selected items |
|
|
|
Remove Deleted Items – removes items that are no longer on the agent machine |
|
|
|
Logoff from Administrator File Browser – logs off |
Creating and Managing Backup Policies
While using the SonicWALL CDP Agent User Interface, an administrator creates and manages backup policies, schedules, and tasks the same way a user would using the Agent User Interface. Refer to the SonicWALL CDP 6.0 Agent User Guide for directions on creating and managing backup policies, schedules, and tasks.