|
1
|
|
2
|
|
3
|
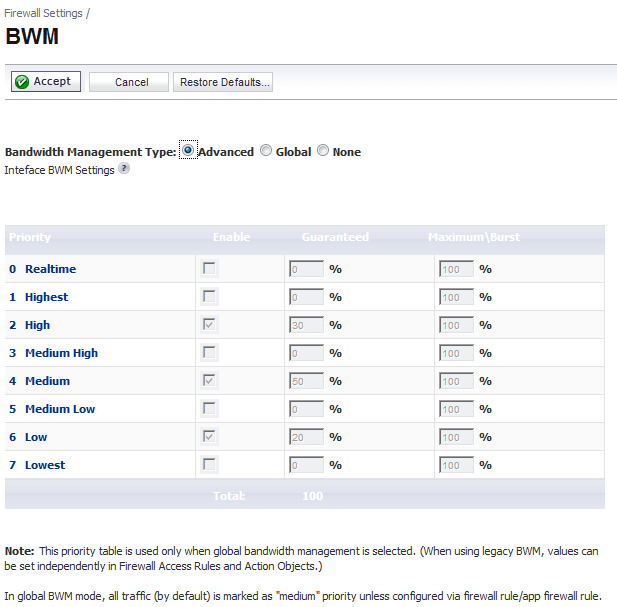
Click Accept.
|
|
1
|
|
•
|
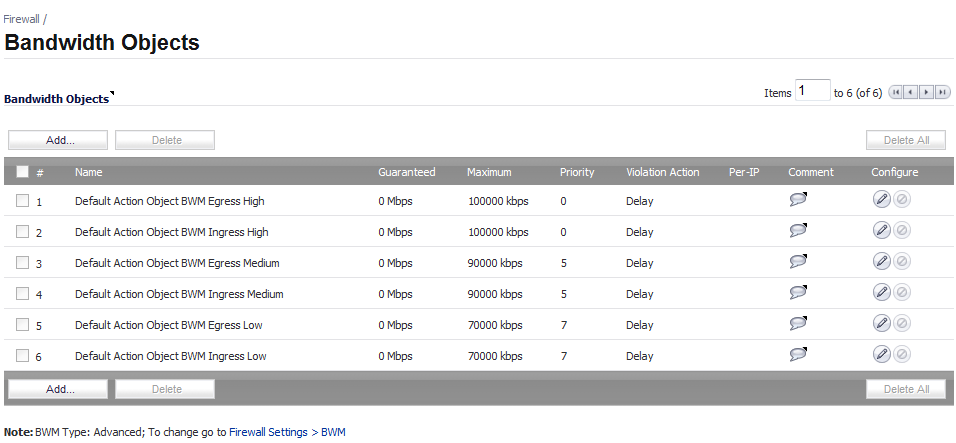
Click the Add button to create a new Bandwidth Object.
|
|
•
|
Click the Configure button of the Bandwidth Object you want to change.
|
|
3
|
Click the General tab.
|
|
4
|
In the Name box, enter a name for this bandwidth object.
|
|
5
|
In the Guaranteed Bandwidth box, enter the amount of bandwidth that this bandwidth object will guarantee to provide for a traffic class (in kbps or Mbps).
|
|
6
|
In the Maximum Bandwidth box, enter the maximum amount of bandwidth that this bandwidth object will provide for a traffic class.
|
|
7
|
In the Traffic Priority box, enter the priority that this bandwidth object will provide for a traffic class. The highest priority is 0. The lowest priority is 7.
|
|
8
|
In the Violation Action box, enter the action that this bandwidth object will provide (delay or drop) when traffic exceeds the maximum bandwidth setting.
|
|
9
|
Delay specifies that excess traffic packets will be queued and sent when possible.
|
|
10
|
Drop specifies that excess traffic packets will be dropped immediately.
|
|
11
|
In the Comment box, enter a text comment or description for this bandwidth object.
|
|
12
|
Click OK.
|
|
1
|
|
2
|
Click the Configure button of the Bandwidth Object you want to change.
|

|
3
|
Click the Elemental tab.
|
|
4
|
Select the Enable Per-IP Bandwidth Management option.
|
|
5
|
In the Maximum Bandwidth box, enter the maximum elemental bandwidth that can be allocated to a protocol under the parent traffic class.
|
|
6
|
Click OK.
|
|
1
|
|
•
|
Click the Add button to create a new Access Rule.
|
|
•
|
Click the Configure button for the appropriate Access Rule.
|
|
3
|
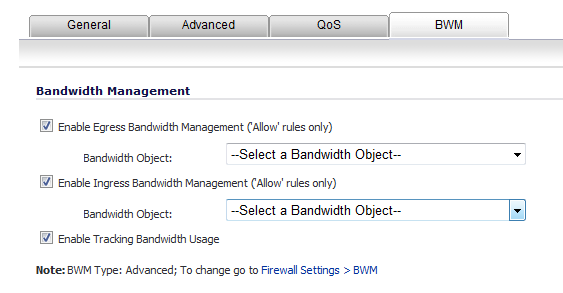
Click the BWM tab.
|
|
4
|
To enable a bandwidth object for the egress direction, under Bandwidth Management, select the Enable Egress Bandwidth Management box.
|
|
5
|
From the Select a Bandwidth Object list, select the bandwidth object you want for the egress direction.
|
|
6
|
To enable a bandwidth object for the ingress direction, under Bandwidth Management, select the Enable Ingress Bandwidth Management box.
|
|
7
|
From the Select a Bandwidth Object list, select the bandwidth object you want for the ingress direction.
|
|
8
|
To enable bandwidth usage tracking, select the Enable Tracking Bandwidth Usage option.
|
|
9
|
Click OK.
|
|
1
|
|
2
|
If creating a new action object, in the Action Name list, click on the Add New Action Object button. the Add/Edit Action Object window displays.
|
|
3
|
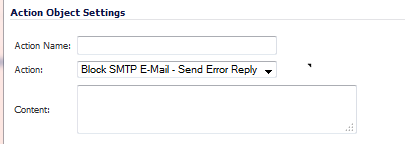
Enter a name for the action object in the Action Name field.
|
|
4
|
From the Action list, select Bandwidth Management, which allows control and monitoring of application-level bandwidth usage.
|
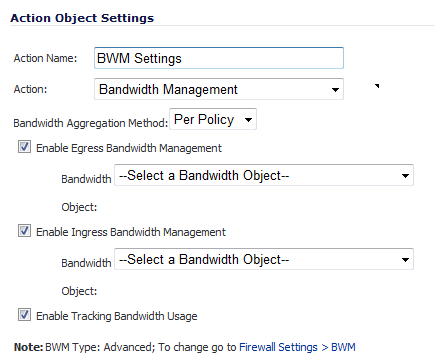
The options on the Add/Edit Action Object window change.
|
5
|
In the Bandwidth Aggregation Method list, select the appropriate bandwidth aggregation method.
|
|
6
|
To enable bandwidth management in the egress direction, select the Enable Egress Bandwidth Management option.
|
|
7
|
From the Bandwidth Object list, select the bandwidth object for the egress direction.
|
|
8
|
To enable bandwidth management in the ingress direction, select the Enable Ingress Bandwidth Management option.
|
|
9
|
From the Bandwidth Object list, select the bandwidth object for the ingress direction.
|
|
10
|
To enable bandwidth usage tracking, select the Enable Tracking Bandwidth Usage option.
|
|
11
|
Click OK.
|
|
1
|
|
2
|
Click the Configure button for the appropriate interface.
|
|
3
|
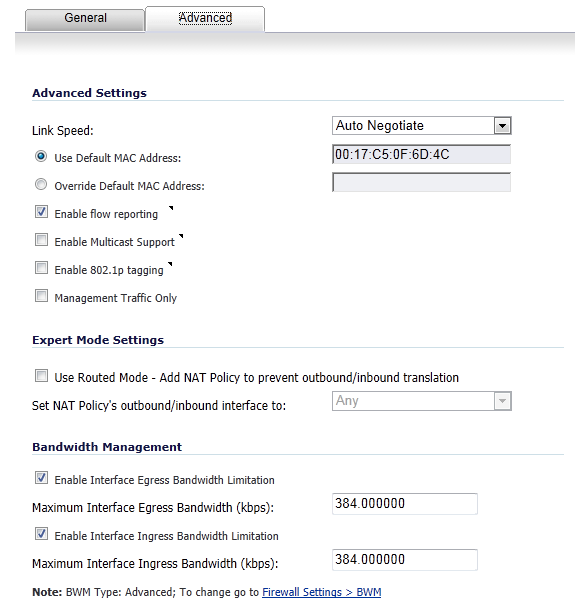
Click the Advanced tab.
|
|
4
|
When this option is selected, the total egress traffic on the interface is limited to the amount specified in the Enable Interface Ingress Bandwidth Limitation box. When this option is not selected, no bandwidth limitation is set at the interface level, but egress traffic can still be shaped using other options.
|
5
|
In the Maximum Interface Egress Bandwidth (kbps) box, enter the maximum egress bandwidth for the interface (in kilobytes per second).
|
|
6
|
Select the Enable Interface Ingress Bandwidth Limitation option.
|
When this option is selected, the total ingress traffic is limited to the amount specified in the Maximum Interface Ingress Bandwidth box. When this option is not selected, no bandwidth limitation is set at the interface level, but ingress traffic can still be shaped using other options.
|
7
|
In the Maximum Interface Ingress Bandwidth (kbps) box, enter the maximum ingress bandwidth for the interface (in kilobytes per second).
|
|
8
|
Click OK.
|