|
1
|
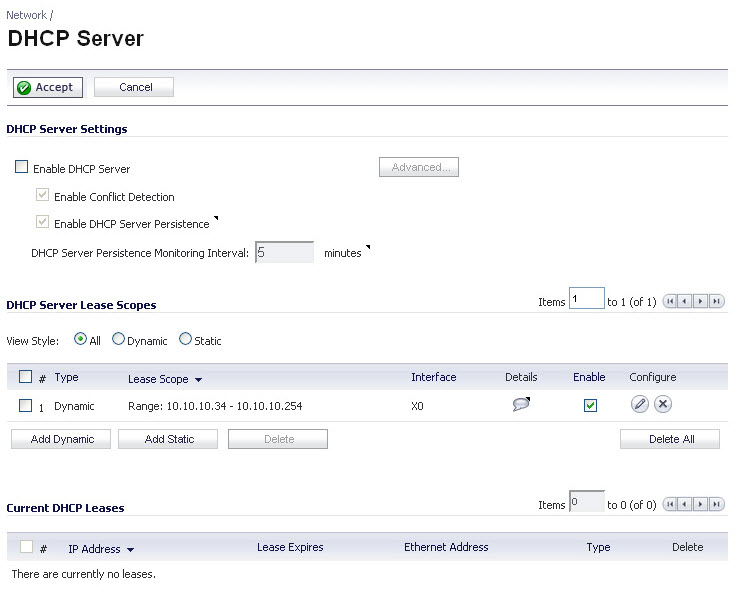
Login to the Primary unit of the Cluster Node and navigate to the Network > DHCP Server page.
|
|
2
|
Clear the Enable DHCP Server checkbox.
|
|
3
|
Under DHCP Server Lease Scopes, select the checkbox at the top left corner of the table heading to select all lease scopes in the table.
|
|
4
|
Click the Delete All button.
|
|
5
|
Click OK in the confirmation dialog box.
|
|
6
|
|
1
|
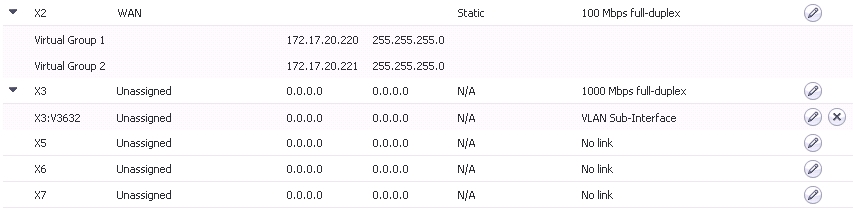
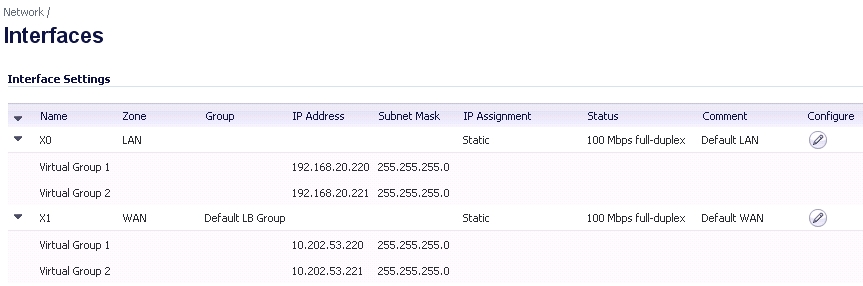
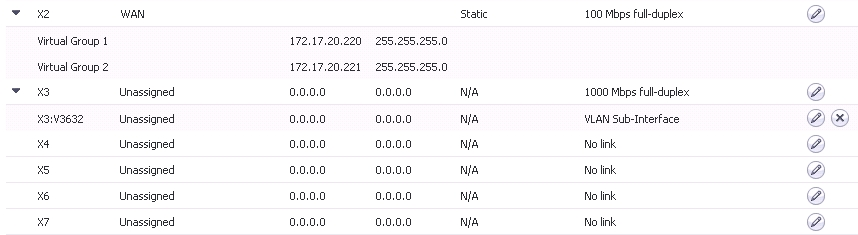
Login to the Primary unit of the Cluster Node and navigate to the Network > Interfaces page.
|
|
2
|
|
3
|
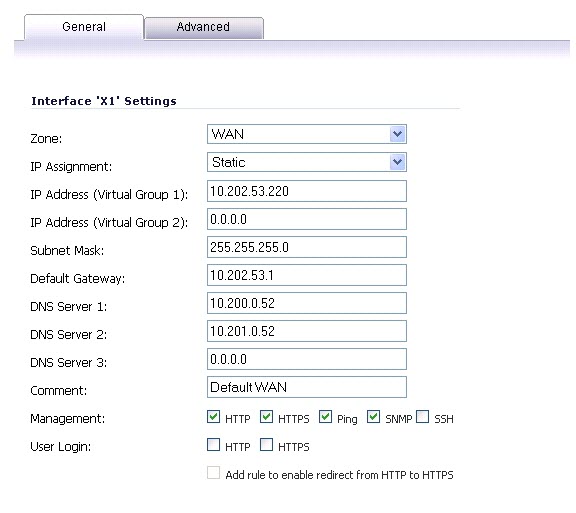
In the Edit Interface window, type the virtual IP address into the IP Address (Virtual Group X) field, where ‘X’ is the virtual group number.
|
|
4
|
Click OK. The configured virtual IP address appears in the Interface Settings table.
|
You can configure a redundant port on the Advanced tab of the Edit Interface window. The Redundant Port field is only available when Active/Active Clustering is enabled.
For information about physically connecting redundant ports and redundant switches, see the Active/Active Clustering Full Mesh Deployment Technote.
|
1
|
Login to the Primary unit of the Cluster Node and navigate to the Network > Interfaces page.
|
|
2
|
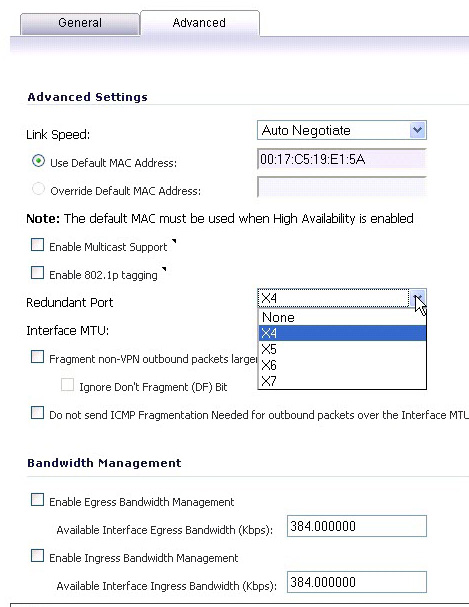
In the Interface Settings table, click the Configure icon for the primary interface for which you want to create a redundant port.
|
The Edit Interface dialog displays.
|
3
|
Click the Advanced tab.
|
|
4
|
From the Redundant Port drop-down menu, select the redundant port. Only unused interfaces are available for selection.
|
For example, select X4 for the redundant port.
|
5
|
Click OK.
|
The selected interface will be greyed-out in the Interface Settings table. A note indicates that it is a redundant Port and lists the primary interface. The interface also appears in the Redundant Port field in the Edit Interface dialog of the primary port.