To configure DHCP option objects, perform the following steps: In the left-hand navigation panel, navigate to Network > DHCP Server.
|
1
|
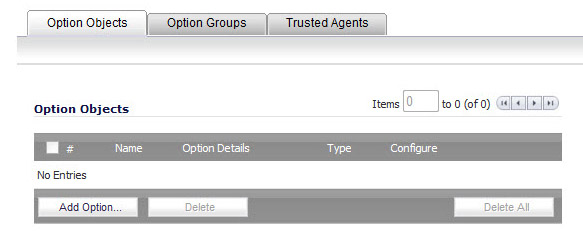
Under DHCP Server Settings, click the Advanced button. The DHCP Advanced Settings page displays. The Option Objects tab is selected by default.
|
|
2
|
|
3
|
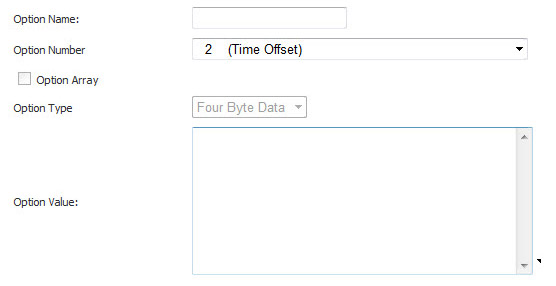
Type a name for the option in the Option Name field.
|
|
4
|
From the Option Number drop-down list, select the option number that corresponds to your DHCP option. For a list of option numbers and names, refer to DHCP Option Numbers.
|
|
5
|
Optionally check the Option Array box to allow entry of multiple option values in the Option Value field.
|
|
6
|
The option type displays in the Option Type drop-down menu. If only one option type is available, for example, for Option Number 2 (Time Offset), the drop-down menu will be greyed out. If there are multiple option types available, for example, for Option Number 77 (User Class Information), the drop-down menu will be functional.
|
|
7
|
Type the option value, for example, an IP address, in the Option Value field. If Option Array is checked, multiple values may be entered, separated by a semi-colon (;).
|
|
8
|
Click OK. The object will display in the Option Objects list.
|