
|
1
|
In the Network > DHCP Server page, at the bottom of the DHCP Server Lease Scopes table, click Add Static. The Static Entry Configuration dialog displays.
|
|
2
|
In the General tab, make sure the Enable this DHCP Scope is checked, if you want to enable this entry.
|
|
3
|
Enter a name for the static DNS entry in the Entry Name field.
|
|
4
|
Type the device IP address in the Static IP Address field.
|
|
5
|
Type the device Ethernet (MAC) address in the Ethernet Address field.
|
|
6
|
Type the number of minutes an IP address is used before it is issued another IP address in the Lease Time (minutes) field. 1440 minutes (24 hours) is the default value.
|
|
7
|
To populate the Default Gateway and Subnet Mask fields with default values for a certain interface, select the Interface Pre-Populate check box near the bottom of the page and choose the interface from the drop-down list. The populated IP addresses are in the same private subnet as the selected interface.
|
|
8
|
Use the populated gateway address or type the IP address of the gateway into the Default Gateway field.
|
|
9
|
Use the populated subnet mask or type the gateway subnet mask into the Subnet Mask field.
|
|
10
|
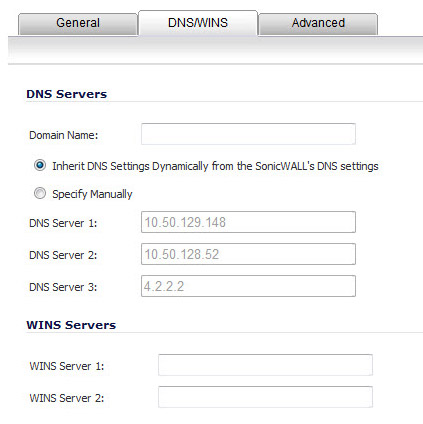
Click the DNS/WINS tab to continue configuring the DHCP Server feature.
|
|
11
|
If you have a domain name for the DNS Server, type it in the Domain Name field.
|
|
12
|
Inherit DNS Settings Dynamically from the SonicWall’s DNS settings is selected by default. When selected, the DNS Server IP fields are unavailable.
|
|
13
|
If you do not want to use the SonicWall security appliance network settings, select Specify Manually, and type the IP address of your DNS Server in the DNS Server 1 field. You can specify two additional DNS servers.
|
|
14
|
If you have WINS running on your network, type the WINS server IP address(es) in the WINS Server 1 field. You can specify an additional WINS server.
|
|
15
|
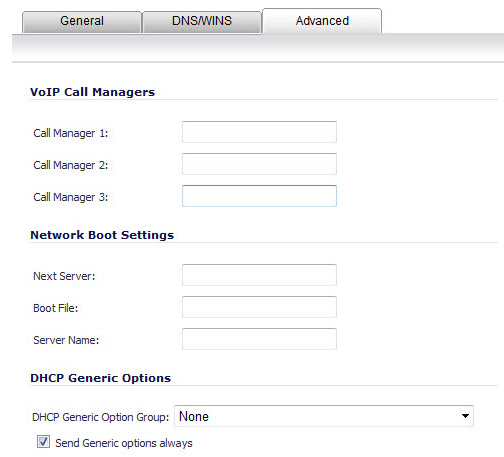
Click on the Advanced tab. The Advanced tab allows you to configure the SonicWall DHCP server to send Cisco Call Manager information to VoIP clients on the network.
|
|
16
|
Enter the IP address or FQDN of your VoIP Call Manager in the Call Manager 1 field. You can add two additional VoIP Call Manager addresses.
|
|
17
|
Under Network Boot Settings, in the Next Server field, enter the IP address of the PXE boot server (TFTP server) that a PXE client uses during the next stage of the boot process.
|
When using these options, select PXE under DHCP Generic Options.
|
18
|
In the Boot File field, type in the name of the boot file that the PXE client can get over TFTP from the PXE boot server.
|
|
19
|
In the Server Name field, type in the DNS host name of the PXE boot server (TFTP server).
|
|
20
|
|
21
|
Click OK to add the settings to the SonicWall.
|
|
22
|
Click Accept for the settings to take effect on the SonicWall.
|
For more information on VoIP support features on the SonicWall security appliance, see VoIP Overview.