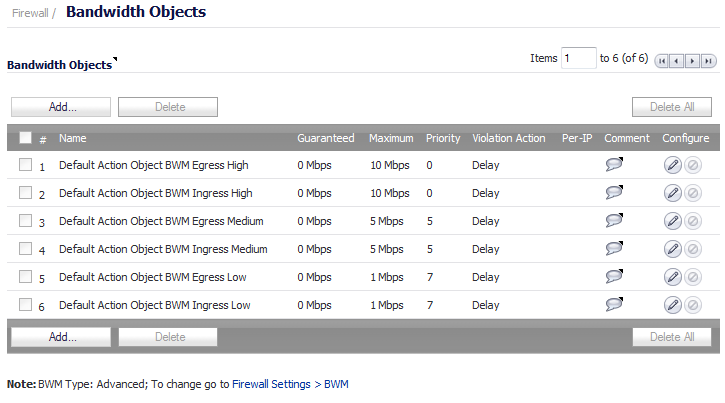
For information on using Bandwidth Objects in Access Rules, App Rules, and Action Objects, see Firewall Settings > BWM .
|
NOTE: You also can configure bandwidth objects in an Access Rule as described in Enabling a Bandwidth Object in an Access Rule and in an Action Object as described in Enabling a Bandwidth Object in an Action Object .
|
|
1
|
|
2
|
Click the Add button to create a new Bandwidth Object.
|
Click the Configure button for the Bandwidth Object you want to change.
The Add/Edit Bandwidth Object window displays.
|
3
|
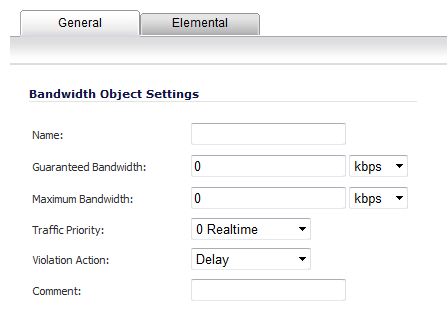
Click the General tab.
|
|
4
|
In the Name field, enter a name for this bandwidth object.
|
|
5
|
In the Guaranteed Bandwidth field, enter the amount of bandwidth that this bandwidth object will guarantee to provide for a traffic class and then select the rate, kbps or Mbps from the drop-down menu.
|
|
6
|
In the Maximum Bandwidth field, enter the maximum amount of bandwidth that this bandwidth object will provide for a traffic class and then select the rate, kbps or Mbps from the drop-down menu.
|
|
8
|
From the Traffic Priority drop-down menu, select the priority that this bandwidth object will provide for a traffic class. The highest priority is 0 Realtime, the default. The lowest priority is 7 Lowest.
|
|
9
|
From the Violation Action drop-down menu, select the action that this bandwidth object will provide when traffic exceeds the maximum bandwidth setting:
|
|
•
|
Delay, the default, specifies that excess traffic packets will be queued and sent when possible.
|
|
•
|
Drop specifies that excess traffic packets will be dropped immediately.
|
|
10
|
In the Comment field, enter a text comment or description for this bandwidth object.
|
|
11
|
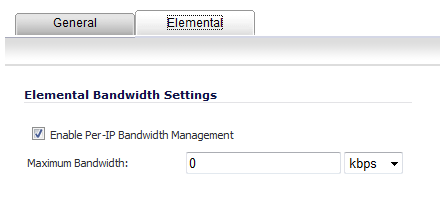
Select the Elemental tab.
|
|
12
|
Under the Elemental Bandwidth Settings heading, select the Enable Per-IP Bandwidth Management option if you want it. The Maximum Bandwidth option becomes active.
|
|
1
|
|
2
|
|
13
|
Click OK.
|


