|
1
|
Navigate to Network > DHCP Server.
|
|
2
|
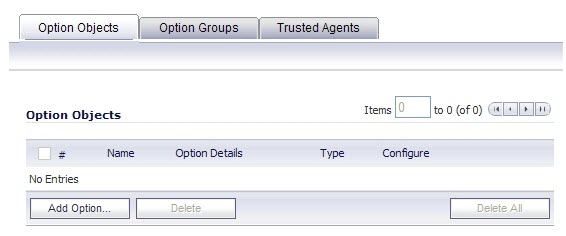
Under DHCP Server Settings, click the Advanced button. The DHCP Advanced Settings window displays. The Option Objects tab is selected by default.
|
|
3
|
|
4
|
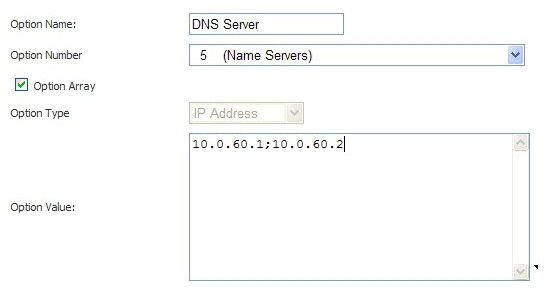
Type a name for the option in the Option Name field.
|
|
5
|
From the Option Number drop-down menu, select the option number that corresponds to your DHCP option. For a list of option numbers and names, refer to DHCP Option Numbers .
|
|
6
|
Optionally check the Option Array box to allow entry of multiple option values in the Option Value field.
|
|
7
|
The option type displays in the Option Type drop-down menu. If only one option type is available, for example, for Option Number 2 (Time Offset), the drop-down menu will be greyed out. If there are multiple option types available, for example, for Option Number 77 (User Class Information), the drop-down menu will be functional.
|
|
8
|
Type the option value, for example, an IP address, in the Option Value field. If Option Array is checked, multiple values may be entered, separated by a semi-colon (;).
|
|
9
|
|
1
|
In the left-hand navigation panel, navigate to Network > DHCP Server.
|
|
2
|
|
3
|
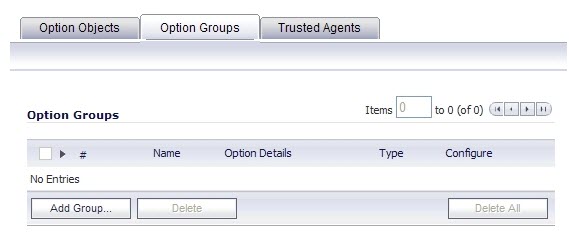
Click the Option Groups tab.
|
|
4
|
|
5
|
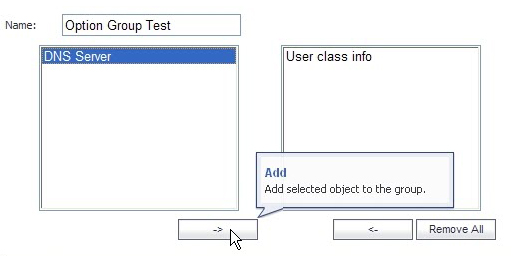
Enter a name for the group in the Name field.
|
|
6
|
Select an option object from the left column and click the -> button to add the option object to the group. To select multiple option objects at the same time, hold the Ctrl key while selecting the option objects.
|
|
7
|
To configure the Default Trusted Relay Agent List Address Group, you must first configure an Address Object for each trusted relay agent, then add these Address Objects to the Default Trusted Relay Agent List Address Group or to a custom Address Group.
To configure Address Objects for the trusted relay agents and to configure the Default Trusted Relay Agent List Address Group or a custom Address Group, perform the following steps:
|
1
|
Navigate to Network > Address Objects.
|
|
2
|
|
3
|
In the Add Address Object window, fill in the fields with the appropriate values for the DHCP relay agent and then click Add. Repeat as necessary to add more relay agents. For more information about configuring address objects, see Creating and Managing Address Objects .
|
|
•
|
Under Address Groups, to add the relay agent Address Objects to the Default Trusted Relay Agent List Address Group, click the Configure icon in the row for it.
|
|
•
|
To add the relay agent Address Objects to a new, custom Address Group, click Add Group under Address Groups.
|
|
5
|
|
7
|
In the DHCP Advanced Settings page, you can enable the Trusted Relay Agent List option using the Default Trusted Relay Agent List Address Group or create another Address Group using existing Address Objects.
|
1
|
In the left-hand navigation panel, navigate to the Network > DHCP Server page.
|
|
2
|
Under DHCP Server Settings, click the Advanced button.
|
|
3
|
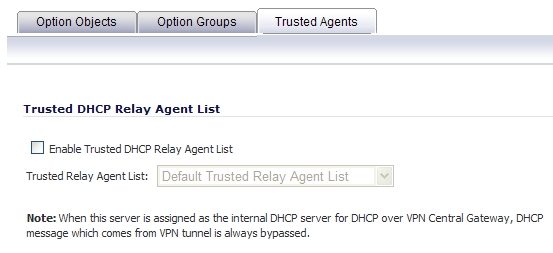
On the DHCP Advanced Settings page, click the Trusted Agents tab.
|
|
4
|
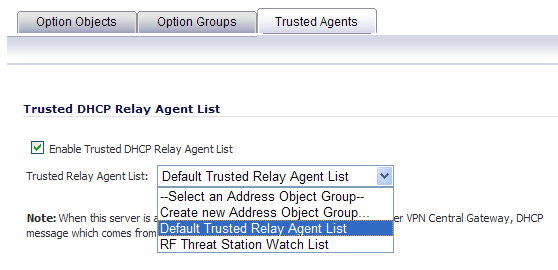
Select the Enable Trusted DHCP Relay Agent List checkbox. The Trusted Relay Agent List drop-down list becomes available. The drop-down list includes all existing address groups as well as the Create new Address Object Group option.
|
|
5
|
To use the Default Trusted Relay Agent List Address Group or another existing Address Group, select it from the drop-down list.
|
|
6
|
To create a custom Address Group for this option, select Create new Address Object Group. The Add Address Object Group window displays. Perform the following steps:
|
|
1
|
Fill in the Name field with a descriptive name for the Address Group.
|
|
3
|
Click OK.
|
In the DHCP Advanced Settings window, the new Address Group is displayed in the Trusted Relay Agent List drop-down menu. The new Address Group is now available on the Network > Address Objects page, and can be edited or deleted there.
|
7
|
On the DHCP Advanced Settings page, click OK to enable the Trusted Relay Agent List option with the selected Address Group.
|