For instance, you can create a custom signature to match HTTP GET request packets. You might use this if you want to prevent Web browsing from your local area network.
To determine a unique identifier for a HTTP GET packet, you can use the Wireshark network protocol analyzer to view the packet header. For more information about using Wireshark, see Wireshark. In Wireshark, capture some packets that include the traffic you are interested in. In this case, you want to capture a HTTP GET request packet. You can use any web browser to generate the HTTP GET request.
|
2
|
In Wireshark, generate the HTTP GET request.
|
|
3
|
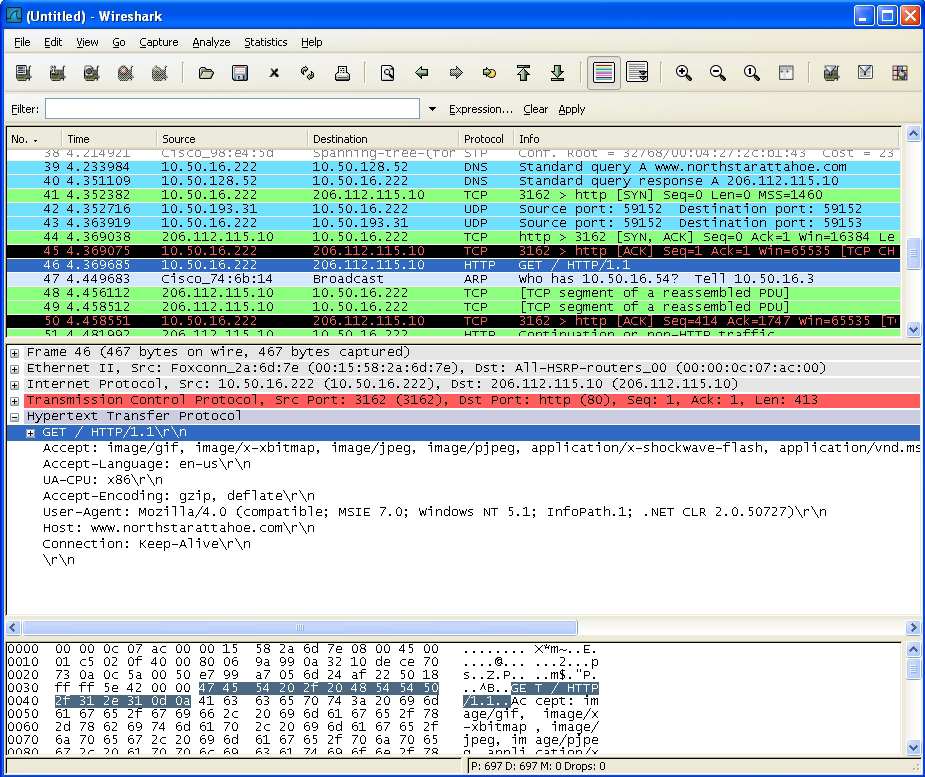
Wireshark displays the HTTP GET request packet:
|
|
4
|
In the top pane of Wireshark, scroll down to find the HTTP GET packet.
|
|
9
|
Navigate to Firewall > Match Object.
|
|
10
|

|
b
|
Select Custom Object from the Match Object Type drop-down menu. Select Exact Match from the Match Type drop-down menu.
|
|
c
|
Select the Enable Settings check box. The settings fields become available.
|
|
d
|
|
e
|
|
TIP: You can leave the Payload Size set to the default value. The Payload Size is used to indicate the amount of data in the packet, but in this case we are only concerned with the packet header.
|
|
f
|
|
g
|
In the Content field, type the bytes as shown by Wireshark: 474554. Do not use spaces in hexadecimal content.
|
|
12
|
Click OK.
|
|
13
|
Navigate to Firewall > App Rules.
|
|
14
|

|
16
|
Enter a descriptive name for the policy in the Policy Name field.
|
|
17
|
|
18
|
|
19
|
|
20
|
For the Connection Side, select Client Side. You can also modify other settings. For more information about creating a policy, see Prerequisites to Configuring App Rules Policies.
|
|
21
|
Click OK.
|