NOTE: The Server Configuration section that expands upon clicking the Edit icon is the same section you configured when adding a new LDAP server, as described in Adding an LDAP Server .
From the list of available LDAP servers, click the Edit icon. The Server Configuration, LDAP Query Panel, and Add LDAP Mappings sections expand for you to edit.
|
NOTE: The Server Configuration section that expands upon clicking the Edit icon is the same section you configured when adding a new LDAP server, as described in Adding an LDAP Server .
|
|
NOTE: If you selected the Auto-fill LDAP Query fields when saving configuration option in the Server Configuration section, the LDAP Query Panel fills automatically with default values.
|

Specify the following values to successfully allow users to login to their Junk Box:
|
•
|
Directory Node to Begin Search—Specify a full LDAP directory path that points towards a node containing the information for all groups in the directory.
|
|
•
|
Filter—Specify an LDAP filter to easily find and identify users and mailing lists on the server. In this example,
|
(&(|(objectClass=group)(objectClass=person)(objectClass=publicFolder))(mail=*))
|
•
|
User Login Name Attribute—Specify the text attribute the user will use as their ‘login name.’ The generally accepted attribute for this field is sAMAccountName.
|
|
•
|
Email Alias Attribute—Specify the email address, EmployeeID, PhoneNumber, or other alias attributes that link a single user to his or her junk box. The single generally accepted attribute for this field is proxyAddresses.
|
|
NOTE: Any other attributes must be separated by a comma. In this example, proxyAddresses,legacyExchangeDN.
|
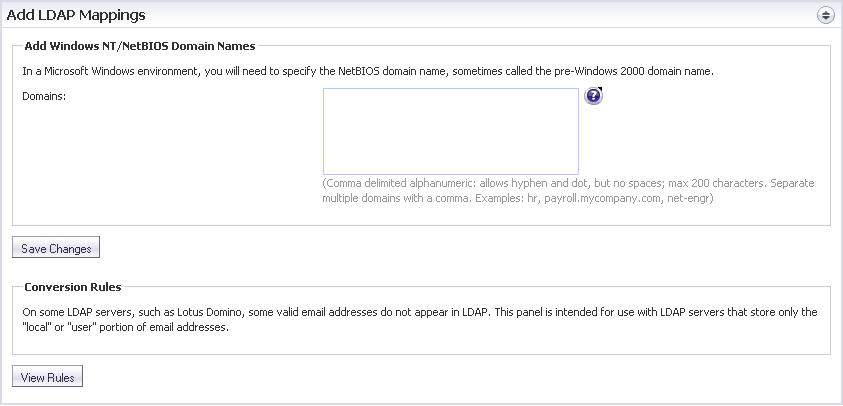
If you are using a Microsoft Windows environment, you will need to specify the NetBIOS domain name.
|
2
|
|
3
|
Highlight your domain from the Active Directory Domains and Trusts dialog box.
|
|
4
|
Click Action.
|
|
5
|
|
6
|
Add the NetBIOS domain name(s) to the Domains section; separate multiple domains with a comma.
|
|
7
|
Click Save Changes to finish.
|