|
1
|
|
2
|
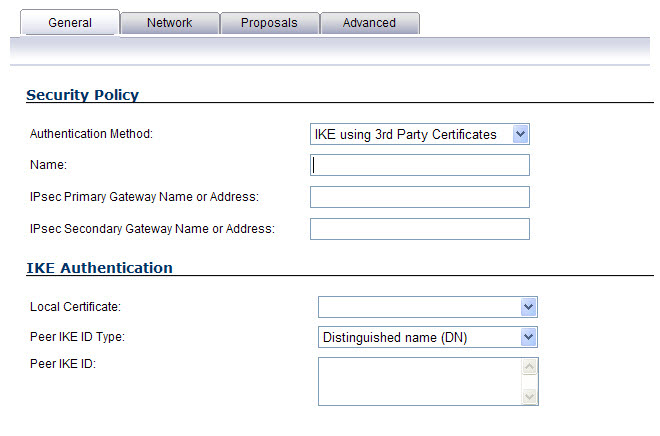
In the Authentication Method list in the General tab, select IKE using 3rd Party Certificates.The VPN Policy dialog displays the 3rd party certificate options.
|
|
3
|
Type a Name for the Security Association in the Name field.
|
|
4
|
Type the IP address or Fully Qualified Domain Name (FQDN) of the primary remote SonicWall in the IPsec Primary Gateway Name or Address field. If you have a secondary remote SonicWall, enter the IP address or Fully Qualified Domain Name (FQDN) in the IPsec Secondary Gateway Name or Address field.
|
|
5
|
Under IKE Authentication, select a third party certificate from the Local Certificate list. You must have imported local certificates before selecting this option.
|
|
6
|
Select one of the following Peer ID types from the Peer IKE ID Type menu:
|
|
•
|
E-Mail ID and Domain Name - The Email ID and Domain Name types are based on the certificate's Subject Alternative Name field, which is not contained in all certificates by default. If the certificate contains a Subject Alternative Name, that value must be used. For site-to-site VPNs, wild card characters (such as * for more than 1 character or ? for a single character) cannot be used. The full value of the E-Mail ID or Domain Name must be entered. This is because site-to-site VPNs are expected to connect to a single peer, as opposed to Group VPNs, which expect multiple peers to connect.
|
|
•
|
Distinguished Name - Based on the certificates Subject Distinguished Name field, which is contained in all certificates by default. As with the E-Mail ID and Domain Name above, the entire Distinguished Name field must be entered for site-to-site VPNs Wild card characters are not supported.
|
|
•
|
To find the certificate details (Subject Alternative Name, Distinguished Name, etc.), navigate to the System > Certificates page and click on the Export button for the certificate.
|
|
7
|
Type an ID string in the Peer IKE ID field.
|
|
8
|
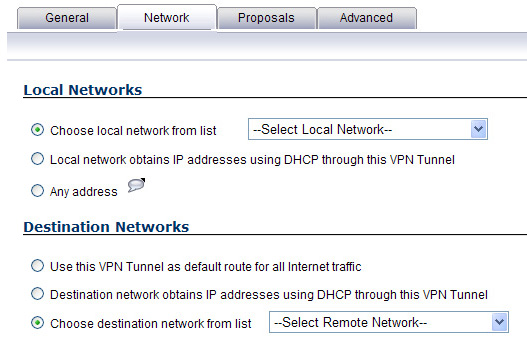
Click on the Network tab.
|
|
9
|
Under Local Networks, select a local network from Choose local network from list if a specific local network can access the VPN tunnel. If hosts on this side of the VPN connection will be obtaining their addressing from a DHCP server on the remote side of the tunnel, select Local network obtains IP addresses using DHCP through this VPN tunnel. If traffic can originate from any local network, select Any Address.
|
|
10
|
Under Destination Networks, select Use this VPN Tunnel as default route for all Internet traffic if traffic from any local user cannot leave the SonicWall security appliance unless it is encrypted. You can only configure one SA to use this setting. If the remote side of this VPN connection is be obtaining its addressing from a DHCP server on this side of the tunnel, select Destination network obtains IP addresses using DHCP server through this tunnel.
|
Alternatively, select Choose Destination network from list, and select the address object or group.
|
11
|
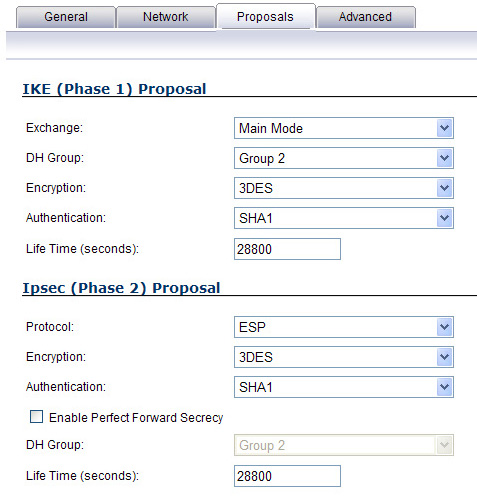
Click the Proposals tab.
|
|
12
|
In the IKE (Phase 1) Proposal section, select the following settings:
|
|
•
|
|
•
|
Select the desired DH Group from the DH Group drop-down menu.
|
|
•
|
|
•
|
Select the desired authentication method from the Authentication drop-down menu.
|
|
•
|
Enter a value in the Life Time (seconds) field. The default setting of 28800 forces the tunnel to renegotiate and exchange keys every 8 hours.
|
|
13
|
In the IPsec (Phase 2) Proposal section, select the following settings:
|
|
•
|
Select the desired protocol from the Protocol drop-down menu.
|
|
•
|
|
•
|
Select the desired authentication method from the Authentication drop-down menu.
|
|
•
|
Select Enable Perfect Forward Secrecy if you want an additional Diffie-Hellman key exchange as an added layer of security. Select Group 2 from the DH Group menu.
|
|
•
|
Enter a value in the Life Time (seconds) field. The default setting of 28800 forces the tunnel to renegotiate and exchange keys every 8 hours.
|
|
14
|
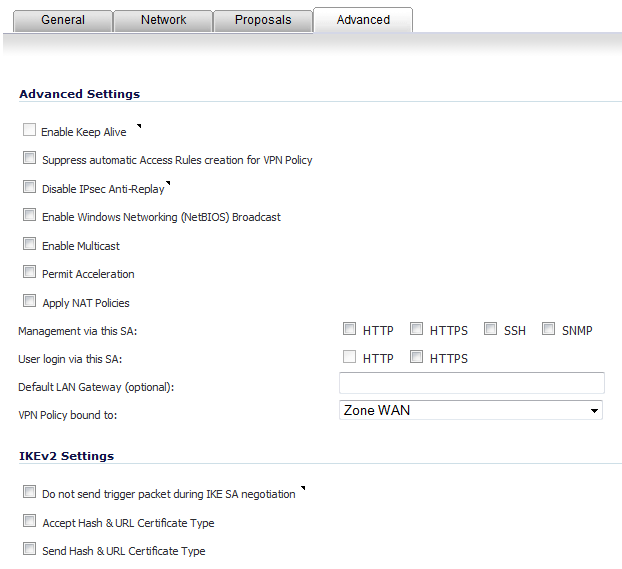
Click the Advanced tab. Select any optional configuration options you want to apply to your VPN policy:
|
|
•
|
Select Enable Keep Alive to use heartbeat messages between peers on this VPN tunnel. If one end of the tunnel fails, using Keepalives will allow for the automatic renegotiation of the tunnel once both sides become available again without having to wait for the proposed Life Time to expire.
|
|
•
|
The Suppress automatic Access Rules creation for VPN Policy setting is not enabled by default to allow the VPN traffic to traverse the appropriate zones.
|
|
•
|
To require XAUTH authentication by users prior to allowing traffic to traverse this tunnel, select Require authentication of VPN client by XAUTH, and select a User group to specify allowed users from the User group for XAUTH.
|
|
•
|
Select Enable Windows Networking (NetBIOS) Broadcast to allow access to remote network resources by browsing the Windows® Network Neighborhood.
|
|
•
|
Select Enable Multicast to allow multicast traffic through the VPN tunnel.
|
|
•
|
Select Permit Acceleration to enable redirection of traffic matching this policy to the WAN Acceleration (WXA) appliance.
|
|
•
|
Select Apply NAT Policies if you want the SonicWall to translate the Local, Remote or both networks communicating via this VPN tunnel. To:
|
|
•
|
Perform Network Address Translation on the Local Network, select or create an Address Object in the Translated Local Network menu.
|
|
•
|
Translate the Remote Network, select or create an Address Object in the Translated Remote Network menu. Generally, if NAT is required on a tunnel, either Local or Remote should be translated, but not both.
|
Apply NAT Policies is particularly useful where both sides of a tunnel use either the same or overlapping subnets.
|
•
|
Select Enable OCSP Checking to check VPN certificate status and specify the URL where to check certificate status. See the Using OCSP with SonicWall Security Appliances.
|
|
•
|
To manage the remote SonicWall through the VPN tunnel, select HTTP, HTTPS, or both from Management via this SA. Select HTTP, HTTPS, or both in the User login via this SA to allow users to login using the SA.
|
|
•
|
If you wish to use a router on the LAN for traffic entering this tunnel destined for an unknown subnet, for example, if you configured the other side to Use this VPN Tunnel as default route for all Internet traffic, you should enter the IP address of your router into the Default LAN Gateway (optional) field.
|
|
•
|
Select an interface or zone from the VPN Policy bound to drop-down menu. A zone is the preferred selection if you are using WAN Load Balancing and you wish to allow the VPN to use either WAN interface.
|
|
15
|
Click OK.
|