Network_netPolicies
This chapter contains the following sections:
• NAT Policy Settings Explained
• For information on setting up NAT Policies, see Creating NAT Policies.
The Network Address Translation (NAT) engine in SonicOS allows users to define granular NAT polices for their incoming and outgoing traffic. By default, the SonicWALL SuperMassive has a preconfigured NAT policy to allow all systems connected to the X0 interface to perform Many-to-One NAT using the IP address of the X1 interface, and a policy to not perform NAT when traffic crosses between the other interfaces. This chapter explains how to set up the most common NAT policies.
Understanding how to use NAT policies starts with an the construction of an IP packet. Every packet contains addressing information that allows the packet to get to its destination, and for the destination to respond to the original requester. The packet contains (among other things) the requester’s IP address, the protocol information of the requestor, and the destination’s IP address. The NAT Policies engine in SonicOS can inspect the relevant portions of the packet and can dynamically rewrite the information in specified fields for incoming, as well as outgoing traffic.
You can add up to 512 NAT Policies on a SonicWALL SuperMassive running SonicOS, and they can be as granular as you need. It is also possible to create multiple NAT policies for the same object – for instance, you can specify that an internal server use one IP address when accessing Telnet servers, and to use a totally different IP address for all other protocols. Because the NAT engine in SonicOS supports inbound port forwarding, it is possible to hide multiple internal servers off the WAN IP address of the SonicWALL SuperMassive. The more granular the NAT Policy, the more precedence it takes.
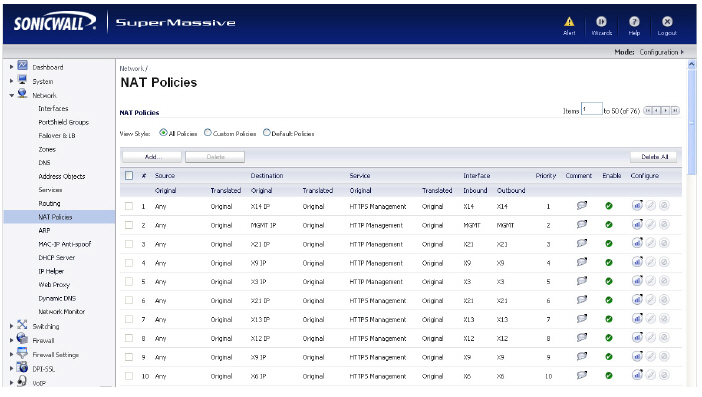
The NAT Policies table allows you to view your NAT Policies by All Policies, Custom Policies, or Default Policies.
Tip Before configuring NAT Policies, be sure to create all Address Objects associated with the policy. For instance, if you are creating a One-to-One NAT policy, be sure you have Address Objects for your public and private IP addresses.
Tip By default, LAN to WAN has a NAT policy predefined on the SonicWALL.
You can change the view your route policies in the NAT Policies table by selecting one of the view settings in the View Style menu. All Policies displays all the routing policies including Custom Policies and Default Policies. Initially, only the Default Policies are displayed in the Route Policies table when you select All Policies from the View Style menu.
The NAT Policies table provides easy pagination for viewing a large number of VPN policies. You can navigate a large number of VPN policies listed in the Route Policies table by using the navigation control bar located at the top right of the Route Policies table. Navigation control bar includes four buttons. The far left button displays the first page of the table. The far right button displays the last page. The inside left and right arrow buttons moved the previous or next page respectively.
You can enter the policy number (the number listed in the # column) in the Items field to move to a specific VPN policy. The default table configuration displays 50 entries per page. You can change this default number of entries for tables on the System > Administration page.
You can sort the entries in the table by clicking on the column header. The entries are sorted by ascending or descending order. The arrow to the right of the column entry indicates the sorting status. A down arrow means ascending order. An up arrow indicates a descending order.
Moving your pointer over the Comment icon in the Configure column of NAT Policies table displays the comments entered in the Comments field of the Add NAT Policy window.
Moving your pointer over the Statistics icon in the Configure column of NAT Policies table displays traffic statistics for the NAT policy.
Clicking the Delete icon ![]() deletes the NAT Policy entry. If the icon is dimmed, the NAT Policy is a default entry and you cannot delete it.
deletes the NAT Policy entry. If the icon is dimmed, the NAT Policy is a default entry and you cannot delete it.
The following explains the settings used to create a NAT policy entry in the Add NAT Policy or Edit NAT Policy windows.
Click the Add button in the Network > NAT Policies page to display the Add NAT Policy window to create a new NAT policy or click the Edit icon in the Configure column for the NAT policy you want to edit to display the Edit NAT Policy window.
• Original Source: This drop-down menu setting is used to identify the Source IP address(es) in the packet crossing the SonicWALL SuperMassive, whether it is across interfaces, or into/out-of VPN tunnels. You can use the default Address Objects in SonicOS, or you can create your own Address Objects. These entries can be single host entries, address ranges, or IP subnets.
• Translated Source: This drop-down menu setting is what the SonicWALL SuperMassive translates the specified Original Source to as it exits the SonicWALL SuperMassive, whether it is to another interface, or into/out-of VPN tunnels. You can use the default Address Objects in SonicOS, or you can create your own Address Objects entries. These entries can be single host entries, address ranges, or IP subnets.
• Original Destination: This drop-down menu setting is used to identify the Destination IP address(es) in the packet crossing the SonicWALL SuperMassive, whether it be across interfaces, or into/out-of VPN tunnels. When creating outbound NAT polices, this entry is usually set to Any since the destination of the packet is not being changed, but the source is being changed. However, these Address Object entries can be single host entries, address ranges, or IP subnets.
• Translated Destination: This drop-down menu setting is what the SonicWALL translates the specified Original Destination to as it exits the SonicWALL SuperMassive, whether it is to another interface, or into/out-of VPN tunnels. When creating outbound NAT polices, this entry is usually set to Original, since the destination of the packet is not being changed, but the source is being changed. However, these Address Objects entries can be single host entries, address ranges, or IP subnets.
• Original Service: This drop-down menu setting is used to identify the IP service in the packet crossing the SonicWALL SuperMassive, whether it is across interfaces, or into/out-of VPN tunnels. You can use the default services on the SonicWALL, or you can create your own entries. For many NAT policies, this field is set to Any, as the policy is only altering source or destination IP addresses.
• Translated Service: This drop-down menu setting is what the SonicWALL SuperMassive translates the Original Service to as it exits the SonicWALL SuperMassive, whether it be to another interface, or into/out-of VPN tunnels. You can use the default services in the SonicWALL SuperMassive, or you can create your own entries. For many NAT Policies, this field is set to Original, as the policy is only altering source or destination IP addresses.
• Inbound Interface: This drop-down menu setting is used to specify the entry interface of the packet. When dealing with VPNs, this is usually set to Any, since VPN tunnels aren’t really interfaces.
• Outbound Interface: This drop-down is used to specify the exit interface of the packet once the NAT policy has been applied. This field is mainly used for specifying which WAN interface to apply the translation to. Of all fields in NAT policy, this one has the most potential for confusion. When dealing with VPNs, this is usually set to Any, since VPN tunnels aren’t really interfaces. Also, as noted in the Quick Q&A’ section of this chapter, when creating inbound 1-2-1 NAT Policies where the destination is being remapped from a public IP address to a private IP address, this field must be set to Any.
• Comment: This field can be used to describe your NAT policy entry. The field has a 32-character limit, and once saved, can be viewed in the main Network > NAT Policies page by running the mouse over the text balloon next to the NAT policy entry. Your comment appears in a pop-up window as long as the mouse is over the text balloon.
• Enable NAT Policy: By default, this box is checked, meaning the new NAT policy is activated the moment it is saved. To create a NAT policy entry but not activate it immediately, uncheck this box.
• Create a reflective policy: When you check this box, a mirror outbound or inbound NAT policy for the NAT policy you defined in the Add NAT Policy window is automatically created.
For information on setting up NAT Policies, see Creating NAT Policies.
This section provides an introduction to the NAT Load Balancing feature. It contains the following subsections:
• Which NAT LB Method Should I Use?
• Caveats
• Details of Load Balancing Algorithms
Network Address Translation (NAT) & Load Balancing (LB) provides the ability to balance incoming traffic across multiple, similar network resources. Do not confuse this with the WAN ISP & LB feature on the SonicWALL appliance. While both features can be used in conjunction, WAN ISP & LB is used to balance outgoing traffic across two ISP connections, and NAT LB is primarily used to balance incoming traffic.
Load Balancing distributes traffic among similar network resources so that no single server becomes overwhelmed, allowing for reliability and redundancy. If one server becomes unavailable, traffic is routed to available resources, providing maximum uptime.
This document details how to configure the necessary NAT, load balancing, health check, logging, and firewall rules to allow systems from the public Internet to access a Virtual IP (VIP) that maps to one or more internal systems, such as Web servers, FTP servers, or SonicWALL SRA appliances. This Virtual IP may be independent of the SonicWALL appliance or it may be shared, assuming the SonicWALL appliance itself is not using the port(s) in question.
Please note that the load balancing capability in SonicOS, while fairly basic, will satisfy the requirements for many customer network deployments. Customers with environments needing more granular load balancing, persistence, and health-check mechanisms are advised to use a dedicated third-party load balancing appliance (prices run from US$4,000 to US$25,000 per device).
NAT load balancing is configured on the Advanced tab of a NAT policy.
Note This tab can only be activated when a group is specified in one of the drop-down fields on the General tab of a NAT Policy. Otherwise, the NAT policy defaults to Sticky IP as the NAT method.
SonicOS offers the following advanced configuration options:
NAT Methods
• Sticky IP – Source IP always connects to the same Destination IP (assuming it is alive). This method is best for publicly hosted sites requiring connection persistence, such as Web applications, Web forms, or shopping cart applications. This is the default mechanism, and is recommended for most deployments.
• Round Robin – Source IP cycles through each live load-balanced resource for each connection. This method is best for equal load distribution when persistence is not required.
• Block Remap/Symmetrical Remap – These two methods are useful when you know the source IP addresses/networks (e.g. when you want to precisely control how traffic from one subnet is translated to another).
• Random Distribution – Source IP connects to Destination IP randomly. This method is useful when you wish to randomly spread traffic across internal resources.
High Availability
• Enable Probing – When checked, the SonicWALL will use one of two methods to probe the addresses in the load-balancing group, using either a simple ICMP ping query to determine if the resource is alive, or a TCP socket open query to determine if the resource is alive. Per the configurable intervals, the SonicWALL can direct traffic away from a non-responding resource, and return traffic to the resource once it has begun to respond again.
|
• Only two health-check mechanisms at present (ICMP ping and TCP socket open).
• No higher-layer persistence mechanisms at present (Sticky IP only).
• No “sorry-server” mechanism at present if all servers in group are not responding.
• No “round robin with persistence” mechanism at present.
• No “weighted round robin” mechanism at present.
• No method for detecting if resource is strained, at present.
• While there is no limit to the number of internal resources the SonicWALL appliance can load-balance to, and there no limit to the number of hosts it can monitor, abnormally large load-balancing groups (25+resources) may impact performance.
This appendix describes how the SonicWALL SuperMassive applies the load balancing algorithms:
• Round Robin - Source IP connects to Destination IP alternately
• Random Distribution - Source IP connects to Destination IP randomly
• Sticky IP - Source IP connects to same Destination IP
• Block Remap - Source network is divided by size of the Destination pool to create logical segments
• Symmetrical Remap - Source IP maps to Destination IP (for example, 10.1.1.10 -> 192.168.60.10.)
Sticky IP Algorithm
Source IP is modulo with the size of the server cluster to determine the server to remap it to. The following two examples show how the Sticky IP algorithm works.
Example one - Mapping to a network:
192.168.0.2 to 192.168.0.4
Translated Destination = 10.50.165.0/30 (Network)
Packet Source IP = 192.168.0.2
192.168.0.2 = C0A80002 = 3232235522 = 11000000101010000000000000000010
(IP -> Hex -> Dec -> Binary)
Sticky IP Formula = Packet Src IP = 3232235522 [modulo] TransDest Size = 2
= 3232235522 [modulo] 2
= 0
(2 divides into numerator evenly. There is no remainder, thus 0)
Stickyt IP Formula yields offset of 0.
Destination remapping to 10.50.165.1.
Example two - Mapping to a IP address range:
192.168.0.2 to 192.168.0.4
Translated Destination = 10.50.165.1 -10.50.165.3 (Range)
Packet Src IP = 192.168.0.2
192.168.0.2 = C0A80002 = 3232235522 = 11000000101010000000000000000010
(IP -> Hex -> Dec -> Binary)
Sticky IP Formula = Packet Src IP = 3232235522 [modulo] TransDest Size = 3
= 3232235522 [modulo] 4
= 1077411840.6666667 - 1077411840
= 0.6666667 * 3
= 2
Stickyt IP Formula yields offset of 2.
Destionation remapping to 10.50.165.3.