PANEL_addWlanSonicPoint
PANEL_addWlanSonicPoint
Configuring a SonicPoint Profile
The SonicPoint profile configuration process varies slightly, depending on whether you are configuring a single-radio SonicPoint or a SonicPoint-N Dual Radio. The following sections describe how to configure the two types of SonicPoint profiles:
Configuring a SonicPointN Profile
For a SonicPoint overview, see SonicPoint > SonicPoints.
You can add any number of SonicPoint profiles. The specifics of the configuration will vary slightly depending on which 802.11 protocols you select. To configure a SonicPoint-N provisioning profile, perform the following tasks:
-
To add a new profile click Add SonicPointN below the list of SonicPoint 802.11n provisioning profiles. To edit an existing profile, select the profile and click the Configure icon in the same line as the profile you are editing.
-
In the Settings tab of the Add Profile window, specify:
-
Enable SonicPoint: Check this to automatically enable each SonicPoint when it is provisioned with this profile.
-
Retain Settings: Check this to have the SonicPointNs provisioned by this profile retain these settings after they are deleted and re-synchronized. Click the Edit button to specify the categories of settings that will be retained.
-
Name Prefix: Enter a prefix for the names of all SonicPointNs connected to this zone. When each SonicPointN is provisioned it is given a name that consists of the name prefix and a unique number, for example: “SonicPoint 126008.”
-
Country Code: Select the country where you are operating the SonicPointNs. The country code determines which regulatory domain the radio operation falls under.
-
802.11n Virtual AP Group: (optional; on SonicWALL NSA only) Select a Virtual Access Point (VAP) group to assign these SonicPointNs to a VAP. This pulldown menu allows you to create a new VAP group. For more information on VAPs, see SonicPoint > Virtual Access Point.
-
In the 802.11n tab, configure the radio settings for the 802.11n radio:
-
Enable Radio: Check this to automatically enable the 802.11n radio bands on all SonicPoints provisioned with this profile.
-
Radio Mode: Select your preferred radio mode from the Radio Mode menu. The wireless security appliance supports the following modes:
-
2.4GHz 802.11n Only - Allows only 802.11n clients access to your wireless network. 802.11a/b/g clients are unable to connect under this restricted radio mode.
-
2.4GHz 802.11n/g/b Mixed - Supports 802.11b, 802.11g, and 802.11n clients simultaneously. If your wireless network comprises multiple types of clients, select this mode.
Tip: For optimal throughput speed solely for 802.11n clients, SonicWALL recommends the 802.11n Only radio mode. Use the 802.11n/b/g Mixed radio mode for multiple wireless client authentication compatibility.
-
2.4GHz 802.11g Only - If your wireless network consists only of 802.11g clients, you may select this mode for increased 802.11g performance. You may also select this mode if you wish to prevent 802.11b clients from associating.
-
5 GHz 802.11n Only - Allows only 802.11n clients access to your wireless network. 802.11a/b/g clients are unable to connect under this restricted radio mode.
-
5 GHz 802.11n/a Mixed - Supports 802.11n and 802.11a clients simultaneously. If your wireless network comprises both types of clients, select this mode.
-
5 GHz 802.11a Only - Select this mode if only 802.11a clients access your wireless network.
-
SSID: Enter a recognizable string for the SSID of each SonicPoint using this profile. This is the name that will appear in clients’ lists of available wireless connections.
Note: If all SonicPoints in your organization share the same SSID, it is easier for users to maintain their wireless connection when roaming from one SonicPoint to another.
When the wireless radio is configured for a mode that supports 802.11n, the following options are displayed:
Radio Band (802.11n only): Sets the band for the 802.11n radio:
-
Auto - Allows the appliance to automatically detect and set the optimal channel for wireless operation based on signal strength and integrity. This is the default setting.
-
Standard - 20 MHz Channel - Specifies that the 802.11n radio will use only the standard 20 MHz channel. When this option is selected, the Standard Channel pulldown menu is displayed.
-
Standard Channel - This pulldown menu only displays when the 20 MHz channel is selected. By default, this is set to Auto, which allows the appliance to set the optimal channel based on signal strength and integrity. Optionally, you can select a single channel within the range of your regulatory domain. Selecting a specific a channel can also help with avoiding interference with other wireless networks in the area.
-
Wide - 40 MHz Channel - Specifies that the 802.11n radio will use only the wide 40 MHz channel. When this option is selected, the Primary Channel and Secondary Channel pulldown menus are displayed:
-
Primary Channel - By default this is set to Auto. Optionally, you can specify a specific primary channel.
-
Secondary Channel - The configuration of this pulldown menu is controlled by your selection for the primary channel:
-
If the primary channel is set to Auto, the secondary channel is also set to Auto.
-
If the primary channel is set to a specific channel, the secondary channel is set to to the optimum channel to avoid interference with the primary channel.
Enable Short Guard Interval: Specifies the short guard interval of 400ns (as opposed to the standard guard interval of 800ns). The guard interval is a pause in transmission intended to avoid data loss from interference or multipath delays.
Enable Aggregation: Enables 802.11n frame aggregation, which combines multiple frames to reduce overhead and increase throughput.
Tip: The Enable Short Guard Interval and Enable aggregation options can slightly improve throughput. They both function best in optimum network conditions where users have strong signals with little interference. In networks that experience less than optimum conditions (interference, weak signals, etc.), these options may introduce transmission errors that eliminate any efficiency gains in throughput.
ACL Enforcement: Select this to enforce Access Control by allowing or denying traffic from specific devices. Select a MAC address group from the Allow List to automatically allow traffic from all devices with MAC address in the group. Select a MAC address group from the Deny List to automatically deny traffic from all devices with MAC address in the group. The deny list is enforced before the Allow list.
-
In the Wireless Security section of the 802.11n Radio tab, configure the following settings:
-
Authentication Type: Select the method of authentication for your wireless network. You can select WEP - Both (Open System & Shared Key), WEP - Open System, WEP - Shared Key, WPA - PSK, WPA - EAP, WPA2-PSK, WPA2-EAP, WPA2-AUTO-PSK, and WPA2-AUTO-EAP.
WEP Configuration
-
WEP Key Mode: Select the size of the encryption key.
-
Default Key: Select which key in the list below is the default key, which will be tried first when trying to authenticate a user.
-
Key Entry: Select whether the key is alphanumeric or hexadecimal.
-
Key 1 - Key 4: Enter the encryptions keys for WEP encryption. Enter the most likely to be used in the field you selected as the default key.
WPA or WPA2 Configuration:
-
Cipher Type: The cipher that encrypts your wireless data. Choose either TKIP (older, more compatable), AES (newer, more secure), or Both (backward compatable).
-
Group Key Interval: The time period for which a Group Key is valid. The default value is 86400 seconds. Setting to low of a value can cause connection issues.
-
Passphrase (PSK only): This is the passphrase your network users must enter to gain network access.
-
RADIUS Server Settings (EAP Only): Configure settings for your RADIUS authentication server.
-
In the Advanced tab, configure the performance settings for the 802.11n radio. For most 802.11n advanced options, the default settings give optimum performance.
-
Hide SSID in Beacon: Check this option to have the SSID broadcast as part of the wireless beacon, rather than as a separate broadcast.
-
Schedule IDS Scan: Select a time when there are fewer demands on the wireless network to schedule an Intrusion Detection Service (IDS) scan to minimize the inconvenience of dropped wireless connections.
-
Data Rate: Select the speed at which the data is transmitted and received. Best automatically selects the best rate available in your area given interference and other factors. Or you can manually select a data rate.
-
Transmit Power: Select the transmission power. Transmission power effects the range of the SonicPoint. You can select: Full Power, Half (-3 dB), Quarter (-6 dB), Eighth (-9 dB), or Minimum.
-
Antenna Diversity: The Antenna Diversity setting determines which antenna the SonicPoint uses to send and receive data. When Best is selected, the SonicPoint automatically selects the antenna with the strongest, clearest signal.
-
Beacon Interval (milliseconds): Enter the number of milliseconds between sending out a wireless beacon.
-
DTIM Interval: Enter the interval in milliseconds.
-
Fragmentation Threshold (bytes): Enter the number of bytes of fragmented data you want the network to allow.
-
RTS Threshold (bytes): Enter the number of bytes.
-
Maximum Client Associations: Enter the maximum number of clients you want the SonicPoint to support on this radio at one time.
-
Preamble Length: Select the length of the preamble--the initial wireless communication send when associating with a wireless host. You can select Long or Short.
-
Protection Mode: Select the CTS or RTS protection. Select None, Always, or Auto. None is the default.
-
Protection Rate: Select the speed for the CTS or RTS protection, 1 Mbps, 2 Mbps, 5 Mbps, or 11 Mbps.
-
Protection Type: Select the type of protection, CTS-only or RTS-CTS.
-
Enable Short Slot Time: Allow clients to disassociate and reassociate more quickly.
-
Allow Only 802.11g Clients to Connect: Use this if you are using Turbo G mode and therefore are not allowing 802.11b clients to connect.
When a SonicPoint unit is first connected and powered up, it will have a factory default configuration (IP address 192.168.1.20, username: admin, password: password). Upon initializing, it will attempt to find a SonicOS device with which to peer. If it is unable to find a peer SonicOS device, it will enter into a stand-alone mode of operation with a separate stand-alone configuration allowing it to operate as a standard Access Point.
If the SonicPoint does locate, or is located by a peer SonicOS device, via the SonicWALL Discovery Protocol, an encrypted exchange between the two units will ensue wherein the profile assigned to the relevant Wireless zone will be used to automatically configure (provision) the newly added SonicPoint unit.
As part of the provisioning process, SonicOS will assign the discovered SonicPoint device a unique name, and it will record its MAC address and the interface and zone on which it was discovered. It can also automatically assign the SonicPoint an IP address, if so configured, so that the SonicPoint can communicate with an authentication server for WPA-EAP support. SonicOS will then use the profile associated with the relevant zone to configure the 2.4GHz and 5GHz radio settings.
Modifications to profiles will not affect units that have already been provisioned and are in an operational state. Configuration changes to operational SonicPoint devices can occur in two ways:
-
Via manual configuration changes – Appropriate when a single, or a small set of changes are to be affected, particularly when that individual SonicPoint requires settings that are different from the profile assigned to its zone.
Via un-provisioning – Deleting a SonicPoint unit effectively un-provisions the unit, or clears its configuration and places it into a state where it will automatically engage the provisioning process anew with its peer SonicOS device. This technique is useful when the profile for a zone is updated or changed, and the change is set for propagation. It can be used to update firmware on SonicPoints, or to simply and automatically update multiple SonicPoint units in a controlled fashion, rather than changing all peered SonicPoints at once, which can cause service disruptions.
Configuring a SonicPoint NDR Profile
For a SonicPoint overview, see SonicPoint > SonicPoints.
You can add any number of SonicPoint profiles. To configure a dual radio SonicPointNDR provisioning profile:
-
To add a new profile click Add SonicPoint NDR below the list of SonicPoint provisioning profiles. To edit an existing profile, select the profile and click the edit icon
 in the same line as the profile you are editing.
-
In the General tab of the Add Profile window, specify:
-
Enable SonicPoint: Check this to automatically enable each SonicPoint when it is provisioned with this profile.
-
Retain Settings: Check this to have the SonicPointNs provisioned by this profile retain these settings after they are deleted and re-synchronized. Click the Edit button to specify the categories of settings that will be retained. Seperate retain settings can be configured for each SonicPointNDR radio.
-
Enable RF Monitoring: Check this to enable RF monitoring on the SonicPoints.
-
Name Prefix: Enter a prefix for the names of all SonicPoints connected to this zone. When each SonicPoint is provisioned it is given a name that consists of the name prefix and a unique number, for example: “SonicPoint 126008.”
-
Country Code: Select the country where you are operating the SonicPoints. The country code determines which regulatory domain the radio operation falls under.
-
802.11g Virtual AP Group and 802.11a Virtual AP Group: (optional; on SonicWALL NSA only) Select a Virtual Access Point (VAP) group to assign these SonicPoints to a VAP. This pulldown menu allows you to create a new VAP group. For more information on VAPs, see SonicPoint > Virtual Access Point.
-
In the 802.11g tab, Configure the radio settings for the 802.11g (2.4GHz band) radio:
-
Enable 802.11g Radio: Check this to automatically enable the 802.11g radio bands on all SonicPoints provisioned with this profile.
-
SSID: Enter a recognizable string for the SSID of each SonicPoint using this profile. This is the name that will appear in clients’ lists of available wireless connections.
Note: If all SonicPoints in your organization share the same SSID, it is easier for users to maintain their wireless connection when roaming from one SonicPoint to another.
-
Radio Mode: Select the speed of the wireless connection. You can choose 11Mbps - 802.11b, 54 Mbps - 802.11g, or 108 Mbps - Turbo G mode. If you choose Turbo mode, all users in your company must use wireless access cards that support turbo mode.
-
Channel: Select the channel the radio will operate on. The default is AutoChannel, which automatically selects the channel with the least interference. Use AutoChannel unless you have a specific reason to use or avoid specific channels.
-
ACL Enforcement: Select this to enforce Access Control by allowing or denying traffic from specific devices. Select a MAC address group from the Allow List to automatically allow traffic from all devices with MAC address in the group. Select a MAC address group from the Deny List to automatically deny traffic from all devices with MAC address in the group. The deny list is enforced before the Allow list.
-
Authentication Type: Select the method of authentication for your wireless network. You can select WEP - Both (Open System & Shared Key), WEP - Open System, WEP - Shared Key, WPA - PSK, WPA - EAP, WPA2-PSK, WPA2-EAP, WPA2-AUTO-PSK, and WPA2-AUTO-EAP.
-
WEP Key Mode: Select the size of the encryption key.
-
Default Key: Select which key in the list below is the default key, which will be tried first when trying to authenticate a user.
-
Key Entry: Select whether the key is alphanumeric or hexadecimal.
-
Key 1 - Key 4: Enter the encryptions keys for WEP encryption. Enter the most likely to be used in the field you selected as the default key.
-
In the 802.11g Advanced tab, configure the performance settings for the 802.11g radio. For most 802.11g advanced options, the default settings give optimum performance.
-
Hide SSID in Beacon: Check this option to have the SSID broadcast as part of the wireless beacon, rather than as a separate broadcast.
-
Schedule IDS Scan: Select a time when there are fewer demands on the wireless network to schedule an Intrusion Detection Service (IDS) scan to minimize the inconvenience of dropped wireless connections.
-
Data Rate: Select the speed at which the data is transmitted and received. Best automatically selects the best rate available in your area given interference and other factors. Or you can manually select a data rate.
-
Transmit Power: Select the transmission power. Transmission power effects the range of the SonicPoint. You can select: Full Power, Half (-3 dB), Quarter (-6 dB), Eighth (-9 dB), or Minimum.
-
Antenna Diversity: The Antenna Diversity setting determines which antenna the SonicPoint uses to send and receive data. You can select:
-
Best: This is the default setting. When Best is selected, the SonicPoint automatically selects the antenna with the strongest, clearest signal. In most cases, Best is the optimal setting.
-
1: Select 1 to restrict the SonicPoint to use antenna 1 only. Facing the rear of the SonicPoint, antenna 1 is on the left, closest to the power supply.
-
2: Select 2 to restrict the SonicPoint to use antenna 2 only. Facing the rear of the SonicPoint, antenna 2 is on the right, closest to the console port.
-
Beacon Interval (milliseconds): Enter the number of milliseconds between sending out a wireless beacon.
-
DTIM Interval: Enter the interval in milliseconds.
-
Fragmentation Threshold (bytes): Enter the number of bytes of fragmented data you want the network to allow.
-
RTS Threshold (bytes): Enter the number of bytes.
-
Maximum Client Associations: Enter the maximum number of clients you want the SonicPoint to support on this radio at one time.
-
Preamble Length: Select the length of the preamble--the initial wireless communication send when associating with a wireless host. You can select Long or Short.
-
Protection Mode: Select the CTS or RTS protection. Select None, Always, or Auto. None is the default.
-
Protection Rate: Select the speed for the CTS or RTS protection, 1 Mbps, 2 Mbps, 5 Mbps, or 11 Mbps.
-
Protection Type: Select the type of protection, CTS-only or RTS-CTS.
-
CCK OFDM Power Delta: Select the difference in radio transmit power you will allow between the 802.11b and 802.11g modes: 0 dBm, 1 dBm, or 2 dBm.
-
Enable Short Slot Time: Allow clients to disassociate and reassociate more quickly.
-
Allow Only 802.11g Clients to Connect: Use this if you are using Turbo G mode and therefore are not allowing 802.11b clients to connect.
-
Configure the settings in the 802.11a Radio and 802.11a Advanced tabs. These settings affect the operation of the 802.11a radio bands. The SonicPoint has two separate radios built in. Therefore, it can send and receive on both the 802.11a and 802.11g bands at the same time.
The settings in the 802.11a Radio and 802.11a Advanced tabs are similar to the settings in the 802.11g Radio and 802.11g Advanced tabs. Follow the instructions in step 3 and step 4 in this procedure to configure the 802.11a radio.
When a SonicPoint unit is first connected and powered up, it will have a factory default configuration (IP address 192.168.1.20, username: admin, password: password). Upon initializing, it will attempt to find a SonicOS device with which to peer. If it is unable to find a peer SonicOS device, it will enter into a stand-alone mode of operation with a separate stand-alone configuration allowing it to operate as a standard Access Point.
If the SonicPoint does locate, or is located by a peer SonicOS device, via the SonicWALL Discovery Protocol, an encrypted exchange between the two units will ensue wherein the profile assigned to the relevant Wireless zone will be used to automatically configure (provision) the newly added SonicPoint unit.
As part of the provisioning process, SonicOS will assign the discovered SonicPoint device a unique name, and it will record its MAC address and the interface and zone on which it was discovered. It can also automatically assign the SonicPoint an IP address, if so configured, so that the SonicPoint can communicate with an authentication server for WPA-EAP support. SonicOS will then use the profile associated with the relevant zone to configure the 2.4GHz and 5GHz radio settings.
Modifications to profiles will not affect units that have already been provisioned and are in an operational state. Configuration changes to operational SonicPoint devices can occur in two ways:
-
Via manual configuration changes – Appropriate when a single, or a small set of changes are to be affected, particularly when that individual SonicPoint requires settings that are different from the profile assigned to its zone.
-
Via un-provisioning – Deleting a SonicPoint unit effectively un-provisions the unit, or clears its configuration and places it into a state where it will automatically engage the provisioning process anew with its peer SonicOS device. This technique is useful when the profile for a zone is updated or changed, and the change is set for propagation. It can be used to update firmware on SonicPoints, or to simply and automatically update multiple SonicPoint units in a controlled fashion, rather than changing all peered SonicPoints at once, which can cause service disruptions.
Updating SonicPoint Settings
You can change the settings of any individual SonicPoint list on the Sonicpoint > SonicPoints page.
Edit SonicPoint Settings
To edit the settings of an individual SonicPoint:
-
Under SonicPoint Settings, click the Edit icon
 in the same line as the SonicPoint you want to edit.
-
In Edit SonicPoint screen, make the changes you want. See Configuring a SonicPoint Profile for instructions on configuring these settings.
-
Click OK to apply these settings.
Synchronize SonicPoints
Click Synchronize SonicPoints at the top of the SonicPoint > SonicPoints page to update the settings for each SonicPoint reported on the page. When you click Synchronize SonicPoints, SonicOS polls all connected SonicPoints and displays updated settings on the page.
Enable and Disable Individual SonicPoints
You can enable or disable individual SonicPoints on the SonicPoint > SonicPoints page:
-
Check the box under Enable to enable the SonicPoint, uncheck the box to disable it.
-
Click Accept at the top of the SonicPoint > SonicPoints page to apply this setting to the SonicPoint.
SonicPoint-N Diagnostics Enhancement
A SonicPoint can collect critical runtime data and save it into persistent storage in the global SonicPoint Peer List. If the SonicPoint experiences a failure, the diagnostic enhancement feature allows the SonicWALL managing appliance to retrieve the log data when the SonicPoint reboots. Then, this log data is incorporated into the Tech Support Report (TSR). For more information regarding the TSR, refer to the Tech Support Report.
To enable the SonicPoint-N diagnostic enhancement feature, follow the steps listed below:
-
Navigate to the System >Diagnostics page.
-
Select the SonicPointN Diagnostics checkbox in the Tech Support Report section.
-
Click Accept. You can then generate a TSR with information available for the SonicPoint-N Diagnostics by clicking the Download Report button.
Note: You may need to re-synchronize your SonicPoint-N and SonicWALL managing appliance to the latest SonicPoint Firmware in order to retrieve the latest SonicPoint-N Diagnostics.
Updating SonicPoint Firmware
Not all SonicOS Enhanced firmware contains an image of the SonicPoint firmware. To check, scroll to the bottom of the SonicPoint > SonicPoints page and look for the Download link.
If your SonicWALL appliance has Internet connectivity, it will automatically download the correct version of the SonicPoint image from the SonicWALL server when you connect a SonicPoint device.
If your SonicWALL appliance does not have Internet access, or has access only through a proxy server, you must perform the following steps:
-
Download the SonicPoint image from http://www.mysonicwall.com to a local system with Internet access.
You can download the SonicPoint image from one of the following locations:
-
On the same page where you can download the SonicOS Enhanced firmware
-
On the Download Center page, by selecting SonicPoint in the Type drop-down menu
-
Load the SonicPoint image onto a local Web server that is reachable by your SonicWALL appliance.
You can change the file name of the SonicPoint image, but you should keep the extension in tact (ex: .bin.sig).
-
In the SonicOS user interface on your SonicWALL appliance, in the navigation pane, click System and then click Administration.
-
In the System > Administration screen, under Download URL, click the Manually specify SonicPoint image URL checkbox to enable it.
-
In the text box, type the URL for the SonicPoint image file on your local Web server.
Note: When typing the URL for the SonicPoint image file, do NOT include “http://” in the text box.
-
Click Accept.
Automatic Provisioning (SDP & SSPP)
The SonicWALL Discovery Protocol (SDP) is a layer 2 protocol employed by SonicPoints and devices running SonicOS Enhanced. SDP is the foundation for the automatic provisioning of SonicPoint units via the following messages:
-
Advertisement – SonicPoint devices without a peer will periodically and on startup announce or advertise themselves via a broadcast. The advertisement will include information that will be used by the receiving SonicOS device to ascertain the state of the SonicPoint. The SonicOS device will then report the state of all peered SonicPoints, and will take configuration actions as needed.
-
Discovery – SonicOS devices will periodically send discovery request broadcasts to elicit responses from L2 connected SonicPoint units.
-
Configure Directive – A unicast message from a SonicOS device to a specific SonicPoint unit to establish encryption keys for provisioning, and to set the parameters for and to engage configuration mode.
-
Configure Acknowledgement – A unicast message from a SonicPoint to its peered SonicOS device acknowledging a Configure Directive.
-
Keepalive – A unicast message from a SonicPoint to its peered SonicOS device used to validate the state of the SonicPoint.
If via the SDP exchange the SonicOS device ascertains that the SonicPoint requires provisioning or a configuration update (e.g. on calculating a checksum mismatch, or when a firmware update is available), the Configure directive will engage a 3DES encrypted, reliable TCP based SonicWALL Simple Provisioning Protocol (SSPP) channel. The SonicOS device will then send the update to the SonicPoint via this channel, and the SonicPoint will restart with the updated configuration. State information will be provided by the SonicPoint, and will be viewable on the SonicOS device throughout the entire discovery and provisioning process.
SonicPoint and SonicPointN States
SonicPoint and SonicPointN devices can function in and report the following states (in all states listed below, SonicPoint refers to both SonicPoint and SonicPointN devices):
-
Initializing – The state when a SonicPoint starts up and advertises itself via SDP prior to it entering into an operational or stand-alone mode.
-
Operational – Once the SonicPoint has peered with a SonicOS device and has its configuration validated, it will enter into a operational state, and will be ready for clients.
-
Provisioning – If the SonicPoint configuration requires an update, the SonicOS device will engage an SSPP channel to update the SonicPoint. During this brief process it will enter the provisioning state.
-
Safemode – Safemode can be engaged by depressing the reset button, or from the SonicOS peer device. Placing a SonicPoint into Safemode returns its configuration to defaults, disables the radios, and disables SDP. The SonicPoint must then be rebooted to enter either a stand-alone, or some other functional state.
-
Non-Responsive – If a SonicOS device loses communications with a previously peered SonicPoint, it will report its state as non-responsive. It will remain in this state until either communications are restored, or the SonicPoint is deleted from the SonicOS device’s table.
-
Updating Firmware – If the SonicOS device detects that it has a firmware update available for a SonicPoint, it will use SSPP to update the SonicPoint’s firmware.
-
Downloading Firmware – The SonicWALL appliance is downloading new SonicPoint firmware from the configured URL, which can be customized by the administrator. The default URL is http://software.sonicwall.com.
-
Downloading Failed – The SonicWALL appliance cannot download the SonicPoint firmware from the configured URL.
-
Writing Firmware – While the SonicPoint is writing new firmware to its flash, the progress is displayed as a percentage in the SonicOS management interface in the SonicPoint status field.
-
Over-Limit – By default, up to 2 SonicPoint devices can be attached to the Wireless zone interface. If more than 2 units are detected, the over-limit devices will report an over-limit state, and will not enter an operational mode. The number can be reduced from 2 as needed.
-
Rebooting – After a firmware or configuration update, the SonicPoint will announce that it is about to reboot, and will then do so.
-
Firmware failed – If a firmware update fails, the SonicPoint will report the failure, and will then reboot.
-
Provision failed – In the unlikely event that a provision attempt from a SonicOS device fails, the SonicPoint will report the failure. So as not to enter into an endless loop, it can then be manually rebooted, manually reconfigured, or deleted and re-provisioned.
-
Stand-alone Mode (not reported) – If a SonicPoint device cannot find or be found by a SonicOS device to peer with, it will enter a stand-alone mode of operation. This will engage the SonicPoint’s internal GUI (which is otherwise disabled) and will allow it to be configured as a conventional Access Point. If at any time it is placed on the same layer 2 segment as a SonicOS device that is sending Discovery packets, it will leave stand-alone mode, and will enter into a managed mode. The stand-alone configuration will be retained.
SonicPoint Deployment Best Practices
This section provides SonicWALL recommendations and best practices regarding the design, installation, deployment, and configuration issues for SonicWALL’s SonicPoint wireless access points. The information covered allows site administrators to properly deploy SonicPoints in environments of any size. This section also covers related external issues that are required for successful operation and deployment.
SonicWALL cannot provide any direct technical support for any of the third-party Ethernet switches referenced in this section. The material is also subject to change without SonicWALL’s knowledge when the switch manufacturer releases new models or firmware that may invalidate the information contained here. The only exception to this rule is Hewlett-Packard, as SonicWALL is currently a member of HP’s ProCurve Alliance program, and works closely with HP to ensure compatibility with the ProCurve switch product line.
Further information on this can be found at:
http://h20195.www2.hp.com/v2/GetPDF.aspx/4AA1-9147ENUC.pdf
Best practices information is provided in the following sections:
Prerequisites
The following are required for a successful SonicPoint deployment:
-
SonicOS Enhanced requires public Internet access in order for the UTM appliance to download and update the SonicPoint firmware images. If the device does not have public Internet access, you will need to obtain and download the SonicPoint firmware manually.
-
One or more SonicWALL SonicPoint or SonicPoint-G wireless access points.
-
If you are using a PoE switch to power the SonicPoint, it must be an 802.3af-compliant Ethernet switches. Vendor-specific switch programming notes can be found towards the end of this section for HP, Cisco, Dell, and D-Link. If not, you will need to use the power adapter that ships with the SonicPoint, or SonicWALL’s PoE Injector. See:
http://www.sonicwall.com/downloads/SonicWALL_PoE_Injector_Users_Guide.pdf
-
It is strongly recommended you obtain a support contract for SonicWALL as well as the PoE switch; this will allow you to update to new versions if issues are found on the switch side or on the SonicWALL side, or when new features are released.
-
Be sure do conduct a full site survey before installation (see section below).
-
Check wiring and cable infrastructure to verify that end-to-end runs between SonicPoints and the Ethernet switches are CAT5, CAT5e, or CAT6.
-
Check building codes for install points and work with building’s facilities staff, as some desired install points may violate regulations.
Layer 2 and Layer 3 Considerations for SonicPoints
SonicWALL uses two proprietary protocols (SDP and SSPP) and both *cannot* be routed across any layer 3 device. Any SonicPoint that will be deployed must have an Ethernet connection back to the provisioning SonicWALL UTM appliance, in the same broadcast domain/network.
The SonicWALL UTM appliance must have an interface or sub-interface in same VLAN/broadcast domain as SonicPoint.
SonicPoints must be able to reach the DHCP scope on the SonicWALL; make sure other DHCP servers are not present on the VLAN/broadcast domain.
Sharing SSIDs across SonicPoints attached to multiple interfaces may cause connectivity issues as a wireless client roams to a different SonicPoint subnet.
Tested Switches
-
Most Cisco switches work well; however SonicWALL does not recommend deploying SonicPoints using the “Cisco Express” switch line.
-
SonicWALL does not recommend deploying SonicPoints using Netgear PoE switches.
-
If you are using D-Link PoE switches, you will need to shut off all their proprietary broadcast control and storm control mechanisms, as they will interfere with the provisioning and acquisition mechanisms in the SonicPoint (see section regarding this).
-
Dell – make sure to configure STP for fast start on SonicPoint ports.
-
Extreme – make sure to configure STP for fast start on SonicPoint ports.
-
Foundry – make sure to configure STP for fast start on SonicPoint ports.
-
HP ProCurve – make sure to configure STP for fast start on SonicPoint ports.
Wiring Considerations
-
Make sure wiring is CAT5, CAT5e, or CAT6 end to end.
-
Due to signaling limitations in 802.3af, Ethernet cable runs cannot go over 100 meters between PoE switch and SonicPoint.
-
You will need to account for PoE power loss as the cable run becomes longer; this can be up to 16%. For longer cable runs, the port will require more power to be supplied.
Site Survey and Planning
-
Conduct a full site-walk of all areas SonicPoints will be deployed in with a wireless spectrum scanner; note any existing APs and the channels they are broadcasting on. SonicWALL currently recommends using Fluke or AirMagnet products to conduct full site surveys. You may also wish to try out NetStumbler/MiniStumbler, which while free does a decent job of surveying, providing it works with your wireless card.
-
Blueprints of floor plans are helpful; here you can mark the position of Access Points and the range of the wireless cell. Make multiple copies of these as during the site-survey results may cause the original design not to be the best and a new start will be needed. As well you see where walls, halls and elevators are located, that can influence the signal. Also, areas in which users are located – and where not - can be seen. During the site-survey keep an eye open for electrical equipment that may cause interference (microwaves, CAT Scan equipment, etc…) In area’s were a lot of electrical equipment is placed, also take a look at the cabling being used. In areas with a lot of electrical equipment UTP should not be used, FTP or STP is required.
-
Survey three dimensionally, wireless signals cross over to different floors.
-
Determine where you can locate APs based on power and cabling. Remember that you shouldn't place APs close to metal or concrete walls and you should put them as close to the ceiling as possible.
-
Use the wireless scanning tool to check signal strengths and noise. Signal to noise ratio should at least be 10dB (minimum requirements for 11 Mbps), however 20dB is preferred. Both factors influence the quality of the service.
-
Relocate the APs and re-test, depending of the results of your survey.
-
Save settings, logs and note the location of the AP for future reference.
-
If you find that certain areas, or all areas are saturated with existing overlapping 802.11b/g channels, you may wish to deploy SonicPoints using the 802.11a radio. This provides a much larger array of channels to broadcast on, although the range of 802.11a is limited, and the SonicPoint does not allow for the addition of external antennas (only the SonicPoint-G model allows this).
-
When planning, make sure you note the distance of cable runs from where the SonicPoint will be mounted; this must be 100 meters or less. If you are not using PoE switches, you will also need to account for the power adapter or PoE injector for the SonicPoint or SonicPoint- G. Make sure you are not creating an electrical or fire hazard.
-
Be wary of broadcasting your wireless signal into areas that you do not control; check for areas where people might be able to leach signal and tune the SonicPoints accordingly.
-
For light use, you can plan for 15-20 users for each SonicPoint. For business use, you should plan for 5-10 users for each SonicPoint.
-
Plan accordingly for roaming users – this will require tuning the power on each SonicPoint so that the signal overlap is minimal. Multiple SonicPoints broadcasting the same SSID in areas with significant overlap can cause ongoing client connectivity issues.
-
Use the scheduling feature in SonicOS Enhanced to shut SonicPoints when not in use – it’s recommended that you do not operate your SonicPoints during non-business-hours (off nights and weekends).
Channels
The default setting of SonicPoints is auto-channel. When this is set, at boot-up the SP will do a scan and check if there are other wireless devices are transmitting. Then it will try to find an unused channel and use this for transmission. Especially in larger deployments, this can cause trouble. Here it is recommended to assign fixed channels to each SonicPoint. A diagram of the SPs and their MAC-Addresses helps to avoid overlaps, best is to mark the location of the SPs and MAC Addresses on a floor-plan.
Wireless Card Tuning
If you are experiencing connectivity issues with laptops, check to see if the laptop has an Intel embedded wireless adapter. The following Intel chipsets are publicly known and acknowledged by Intel to have disconnect issues with third-party wireless access points such as the SonicWALL SonicPoint and SonicPoint-G:
-
Intel PRO/Wireless 2100 Network Connection
-
Intel PRO/Wireless 2100A Network Connection
-
Intel PRO/Wireless 2200BG Network Connection
-
Intel PRO/Wireless 2915ABG Network Connection
-
Intel PRO/Wireless 3945ABG Network Connection
These wireless cards are provided to OEM laptop manufacturers and are often rebranded under the manufacturers name – for example, both Dell and IBM use the above wireless cards but the drivers are branded under their own name.
To identify the adapter, go to Intel’s support site and do a search for Intel Network Connection ID Tool. Install and run this tool on any laptop experiencing frequent wireless disconnect issues. The tool will identify which Intel adapter is installed inside the laptop.
Once you have identified the Intel wireless adapter, go to Intel’s support site and download the newest software package for that adapter – it is recommended that you download and install the full Intel PRO/Set package and allow it to manage the wireless card, instead of Windows or any OEM provided wireless network card management program previously used. SonicWALL recommends that you use version 10.5.2.0 or newer of the full Intel PRO/Set Wireless software driver/manager.
Be sure to use the Intel wireless management utility and to disable Microsoft’s Wireless Zero Config management service – the Intel utility should control the card, not the OS.
In the ‘Advanced’ section, disable the power management by unchecking the box next to ‘Use default value’, then move the slidebar under it to ‘Highest’. This instructs the wireless card to operate at full strength and not go into sleep mode. When you are done, click on the ‘OK’ button to save and activate the change. Reboot the laptop.
In the ‘Advanced’ section, adjust the roaming aggressiveness by unchecking the box next to ‘Use default value’, then move the slidebar under it to ‘Lowest’. This instructs the wireless card to stay stuck to the AP it’s associated as long as possible, and only roam if the signal is significantly degraded. This is extremely helpful in environments with large numbers of access points broadcasting the same SSID. When you are done, click on the ‘OK’ button to save and activate the change. Reboot the laptop.
If you continue to have issues, you may also try adjusting the Preamble Mode on the wireless card. By default the Intel wireless cards above are set to ‘auto’. All SonicWALL wireless products by default are set to use a ‘Long’ preamble, although this can be adjusted in the Management GUI. To adjust the Intel wireless card’s preamble setting, go to the ‘Advanced’ section and uncheck the box next to ‘Use default value’, then select ‘Long Tx Preamble’ from the drop-down below it. When you are done, click on the ‘OK’ button to save and activate the change. Reboot the laptop.
PoE
-
A SonicPoint at full power draws 6-10 Watts.
-
SonicPoints are set to Class 0 PD (meaning that it can be 0.44W minimum up to 12.95W maximum). A mismatch in Class will cause confusion in the handshake and reboot the SonicPoint.
-
Full 802.3af compliance is required on any switch that will be supplying PoE to a SonicPoint or SonicPoint-G. Do not operate SonicPoints on non-compliant switches as SonicWALL does not support it.
-
Turn off pre-802.3af-spec detection as it may cause connectivity issues.
-
Long cable runs cause loss of power; 100 meter runs between SonicPoint and PoE switch may incur up to 16% power/signal degradation; because of this the PoE switch will need to supply more power to the port to keep the SonicPoint operational.
-
Because of this, make sure each port can get 10 Watts guaranteed if possible, and set the PoE priority to critical or high.
-
One thing to be particularly careful to plan for is that not all PoE switches can provide the full 15.4 watts of power to each of its PoE ports – it might have 24 but it can’t actually have all ports with PoE devices attached without the addition of an external redundant power supply. You will need to work closely with the manufacturer of the PoE switch to ensure that enough power is supplied to the switch to power all of your PoE devices.
Spanning-Tree
-
When an Ethernet port becomes electrically active, most switches by default will activate the spanning-tree protocol on the port to determine if there are loops in the network topology. During this detection period of 50-60 seconds the port does not pass any traffic – this feature is well-known to cause problems with SonicPoints. If you do not need spanning-tree, disable it globally on the switch, or disable it on each port connected to a SonicPoint device.
-
If this is not possible, check with the switch manufacturer to determine if they allow for “fast spanning-tree detection”, which is a method that runs spanning-tree in a shortened time so as to not cause connectivity issues. Please refer to the switch-specific sections at the end of this technote for programming samples on how to do this.
VTP and GVRP
Turn these trunking protocols off on ports connected directly to SonicPoints, as they have been known to cause issues with SonicPoints – especially the high-end Cisco Catalyst series switches.
Port-Aggregation
-
Many switches have port aggregation turned on by default – this causes a lot of issues and
-
should be deactivated on ports connected directly to SonicPoints.
-
PAGP/Fast EtherChannel/EtherChannel – turn this off on the ports going to SonicPoints.
-
LACP – turn this off on the ports going to SonicPoints.
Broadcast Throttling/Broadcast Storm
This feature is an issue on some switches, especially D-Link. Please disable on per port basis if possible, if not disable globally.
Speed and Duplex
-
At present, auto-negotiation of speed and duplex is the only option for SonicPoints.
-
Lock speed and duplex on switch and reboot SonicPoint -- this may help with connectivity issues.
-
Check port for errors, as this is the best way to determine if there is a duplex issue (port will also experience degraded throughput).
Troubleshooting Older SonicPoints
If you have an older SonicPoint and it’s consistently port flapping, or doesn’t power up at all, or is stuck reboot cycling, or reports in the GUI as stuck in provisioning, check to see if you are running a current version of firmware, and that the SonicWALL UTM appliance has public internet access. You may need to RMA for a newer SonicPoint.
Troubleshooting
-
When creating a Wireless zone and interface, make sure to configure the interface for the number of SonicPoints you wish to support -- new interfaces are set to ‘No SonicPoints’ by default. If you do not do this, the UTM appliance will not create the necessary DHCP scope and will not acquire any SonicPoints added to the interface.
-
If you added SonicPoints and only a certain number were detected and acquired, check interface settings as noted above, as it might be set for too few SonicPoints.
-
If throughput seems sluggish, check to see how many SonicPoints you have on an interface – in large deployments it’s advisable to spread them across more than one. Try to limit the interfaces to a 4-to-1 oversubscription ratio. For example, if you have a 100Mbps, you can safely attach up to 20 SonicPoints to it and expect reasonable performance.
-
Given throughput on SonicPoints only 20-22 Mbps at best – this is a limitation of the 802.11a and 802.11g and not the SonicPoint.
-
If you are still experiencing throughput issues, please upgrade to SonicOS 4.0.1.0 or newer, as it contains several fixes that will help.
-
Make sure your security zone (the default WLAN, or your own custom wireless zone) has the right settings – they might be blocking traffic for various reasons.
-
If the SonicPoints are not acquiring, check DHCP scopes; they might be off, or missing entirely.
-
It is NOT advisable to use the same SSID for the 802.11bg and the 802.11a radios, as clients with tri-band cards may experience disconnect issues – name them separately.
-
Stuck in provisioning mode? Unplug, clear from config, reboot and plug back in.
-
All versions of SonicOS Enhanced after version 3.5 no longer contain the SonicPoint firmware image, and in order for a SonicPoint to be discovered and provisioned, the UTM appliance must be connected to the Internet.
-
Note that SonicPoints have a ‘Standalone Mode’ which they will transition to if they can’t find a SonicWALL UTM appliance. If you have more than one SonicPoint, you may have issues as all of the SonicPoints will revert to the same default IP address of 192.168.1.20/24.
-
When troubleshooting wireless issues, logging, Syslog, and SNMP are your friends – SonicWALL’s Global Management System (GMS) package can centralize all of these for all of your SonicWALL devices, regardless of location. A free alternative is Kiwi’s Syslog Daemon, which can accept Syslog streams and SNMP traps from all SonicWALL UTM appliances. The most current version can be found here:
http://www.kiwisyslog.com/
-
Check the network cabling. Is shielded or unshielded TP cable being used?
Resetting the SonicPoint
The SonicPoint has a reset switch inside a small hole in the back of the unit, next to the console port. You can reset the SonicPoint at any time by pressing the reset switch with a straightened paperclip, a tooth pick, or other small, straight object.
The reset button resets the configuration of the mode the SonicPoint is operating in to the factory defaults. It does not reset the configuration for the other mode. Depending on the mode the SonicPoint is operating in, and the amount of time you press the reset button, the SonicPoint behaves in one of the following ways:
-
Press the reset button for at least three seconds, and less than eight seconds with the SonicPoint operating in Managed Mode to reset the Managed Mode configuration to factory defaults and reboot the SonicPoint.
-
Press the reset button for more than eight seconds with the SonicPoint operating in Managed Mode to reset the Managed Mode configuration to factory defaults and reboot the SonicPoint in SafeMode.
-
Press the reset button for at least three seconds, and less than eight seconds with the SonicPoint operating in Stand-Alone Mode to reset the Stand-Alone Mode configuration to factory defaults and reboot the SonicPoint.
-
Press the reset button for more than eight seconds with the SonicPoint operating in Stand-Alone Mode to reset the Stand-Alone Mode configuration to factory defaults and reboot the SonicPoint in SafeMode.
Switch Programming Tips
Sample HP ProCurve switch commands (per-interface)
-
name ‘link to SonicPoint X’
-
no lacp
-
no cdp
-
power critical
-
no power-pre-std-detect (note: global command)
-
speed-duplex 100-half (note: only if you are seeing FCS errors)
-
spanning-tree xx admin-edge-port (note: replace xx with port number)
-
mdix-mode mdix
Sample Cisco Catalyst switch configuration
Any Cisco POE Switch: On the connecting interface/port, issue the command ‘Power inline static 10000’.
2900/3500-series:
-
On the connecting interface/port, issue the command ‘spanning-tree portfast’, which will greatly reduce the time STP is performed on the interface/port.
-
If you are using a 2950 or 3550 switch, issue the command ‘switchport mode access’ to disable trunking on the interface/port.
-
On the connecting interface, issue the commands ‘speed 100’ (or ‘speed 10’) and ‘duplex full’ (or ‘duplex half’) to lock the speed and duplex of the port.
2948/2980/4000/4500/5000/5500/6500-series running CatOS:
-
On the connecting interface/port, issue the command ‘set spantree portfast __/__ enable’ (fill in first blank with module number, and second blank with port), which will greatly reduce the time STP is performed on the interface/port.
-
On the connecting interface/port, issue the command ‘set port channel __/__ off’ (fill in first blank with module number, and second blank with port range), which will disable EtherChannel (PAgP) on the interface/port.
-
On the connecting interface/port, issue the command ‘set port trunk __/__’ (fill in first blank with module number, and second blank with port), which will disable trunking on the interface/port.
-
On the connecting interface/port, issue the command ‘set port speed __/__ 100’ (fill in first blank with module number, and second blank with port), which will lock the speed to 100Mbps on the interface/port (you can also lock it to 10Mbps if you wish).
-
On the connecting interface/port, issue the command ‘set port duplex __/__ full’ (fill in first blank with module number, and second blank with port), which will lock the duplex to full on the interface/port (you can also lock it to half duplex if you wish).
Note: Cisco switches running CatOS 5.2 and newer have a special macro command called ‘set port host __/__‘ that sets the interface/port for portfast, disables trunking, and disables EtherChannel. You will still have to manually set the speed/duplex for the port(s), however.
1900-Series
1900-series switch have portfast enabled by default on the 10mbps ports and disabled on the 100 Mbps ports. If you are using the 100mbps ports to connect to a SonicWALL device, issue the command ‘spantree start-forwarding’, which will greatly reduce the time STP is performed on the interface/port.
Sample Dell switch configuration (per interface)
-
spanning-tree portfast
-
no back-pressure
-
no channel-group
-
duplex half (note: only if you are seeing FCS errors)
-
speed 100
-
no flowcontrol
-
no gvrp enable
-
no lldp enable
-
mdix on
-
mdix auto
-
no port storm-control broadcast enable
Sample D-Link switch configuration
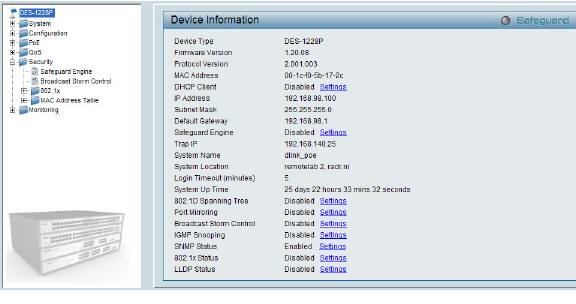
The D-Link PoE switches do not have a CLI, so you will need to use their web GUI. Note that D-Link recommends upgrading to Firmware Version 1.20.09 if you are using multicast in your environment.
Disable spanning-tree, broadcast storm control, LLDP and the Safeguard Engine on the switch before adding SonicPoints to the switch, as all may impact their successful provisioning, configuration, and functionality.